Manage contacts effectively in Outlook
Do you have a pile of business cards on your desk that you would like to add to Outlook at some point when you have time? Is your contact folder in Outlook filled with contact details that might or might not be up to date? Managing contacts effectively is very time-consuming. However, having a large network and having people’s contact details readily available is a large asset so I highly recommend that you invest some time in managing your contacts. In this week’s blog article I’ll share some recommendations for how to effectively manage your contacts using Outlook.
1. Keep contact information up to date using social networks
Last week I wrote a blog post called, “How to use Outlook 2013 with social networks”. Connecting Outlook to social networks is a great way to stay connected with people and to have access to their latest contact details. If they add a new telephone number or email address to LinkedIn, the contact details in Outlook 2013 will be updated automatically. To learn how to connect Outlook to social networks, see the above-mentioned article if you are using Outlook 2013 if you are using Outlook 2010 see the blog post, “The Outlook Social Connector – a hidden jewel”.
2. Add contact information from business cards
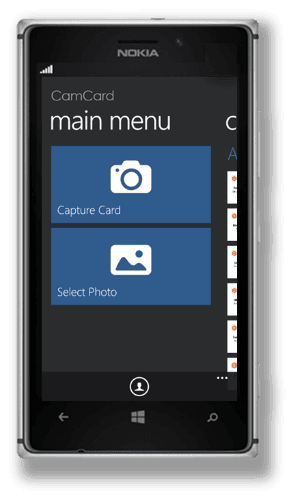
As a business professional, you probably get numerous business cards every day. Today, when most of us are equipped with really sophisticated smartphones there is no need to manually enter data from business cards into Outlook. There are a number of apps you can use to scan/photograph business cards and then synchronize the contact details to Outlook. Personally, I use an app for my Windows Phone called CamCard. Using this app I can capture the information from a business card and then export the details to Outlook/Exchange. There are a large number of apps available for capturing business cards, just do a search on the app marketplace for your phone.
3. Add contact information from email signatures
Today most people have their contact details in their email signatures (at least they should). If you get an email from someone you want to include in your network, I recommend you add their contact details to your contact directory right away. To do that in Outlook 2013, copy the email signature, right-click the email address and select “Add to Outlook contacts”. The People contact card will open up pre-populated with the name of the person and the email address. To paste in the rest of the fields I find it easiest to go to the “Notes” section and copy in the email signature there.
You can then copy and paste in the contact information into the appropriate fields from the Notes field.
4. Link contacts
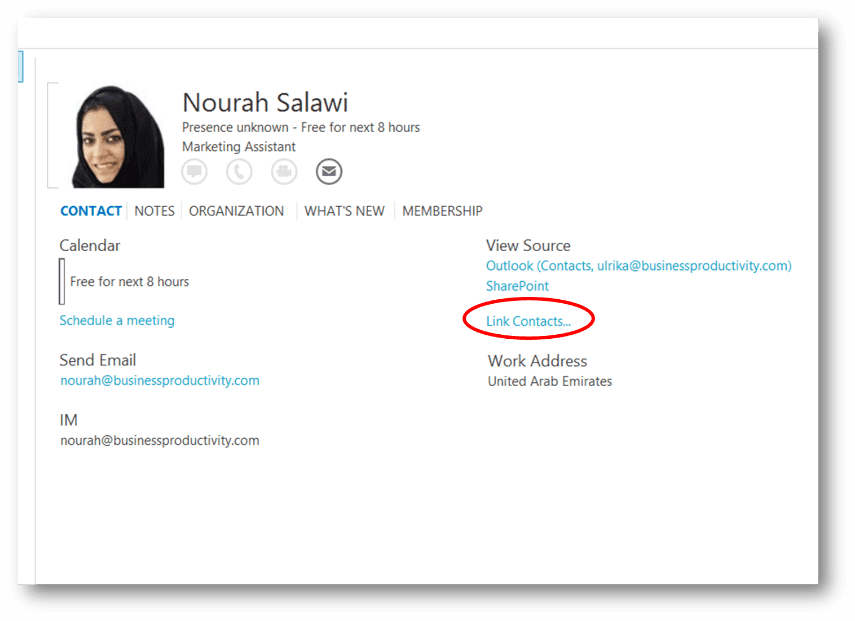
The new People View in Outlook 2013 automatically combines contact information for the same person from various sources into a single view. So for instance, you will see information from your various contact folders, as well as other contact sources like SharePoint, Lync, LinkedIn and Facebook all in one view. Outlook uses email addresses as a unique identifier to decide if the information belongs to the same person or not. You can also link contacts yourself. In the People Contact Card view click “Link Contacts”. Search for the contact information you want to link and select it. This way if you have a person’s email address in one contact card, and their address and phone number in another card, Outlook shows you the information in a single view, without you having to manually combine the information.
5. Group contacts
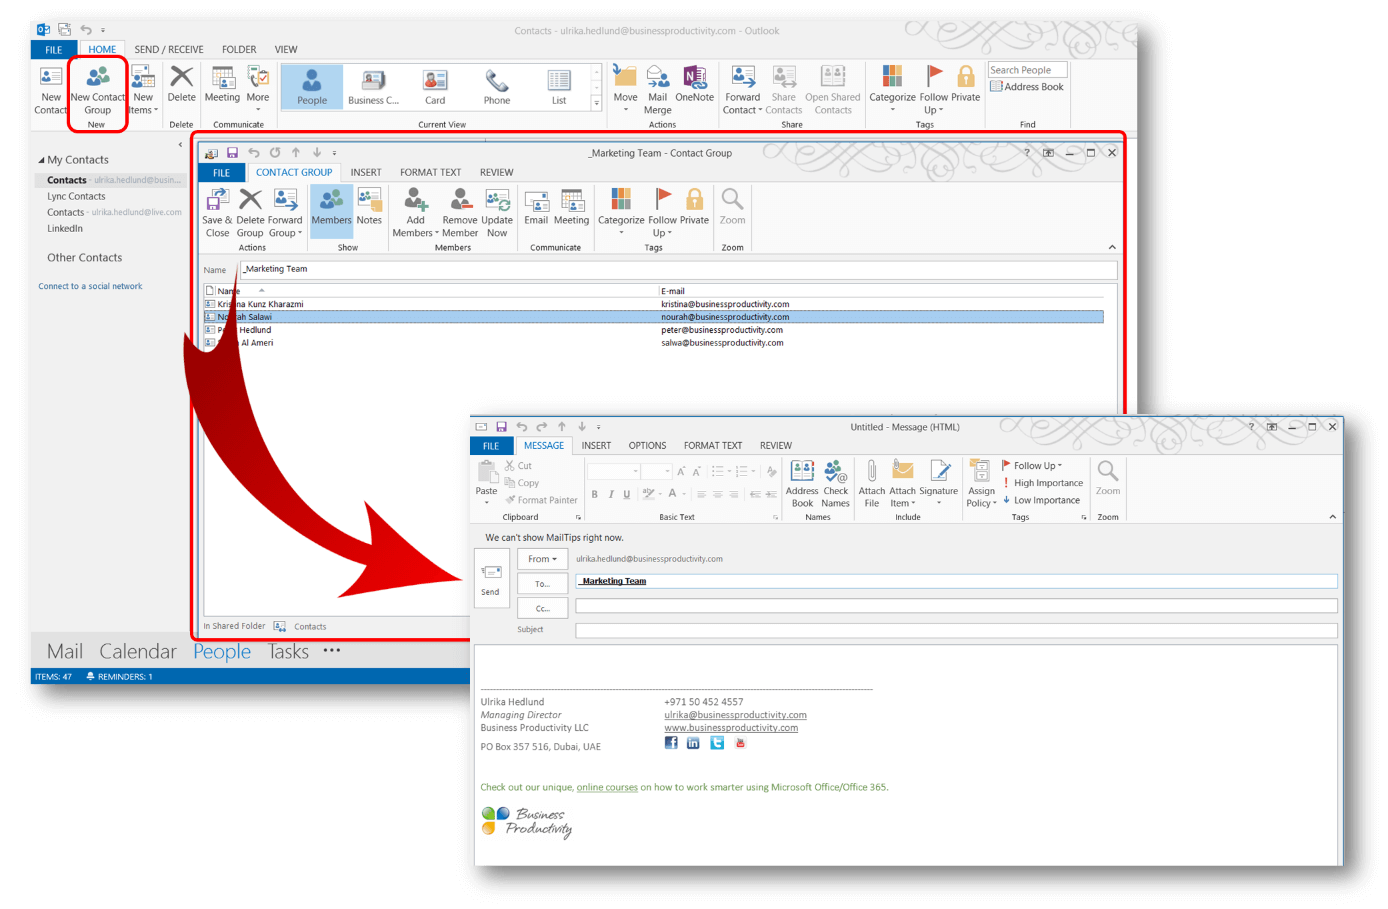
If you often communicate with a group of people it can be beneficial to group contacts together. There are numerous ways to do this in Outlook. If you have a group of people (whose email addresses are unlikely to change) you can create a Contact Group in Outlook. Click “New Contact Group” and then add the people you want to include in the group from your Outlook contacts or by typing in their email addresses. I recommend you name your contact group starting with an underscore (_Marketing Team) or some other symbol so that your groups always appear first in your contact list, that way they are quicker to find.
It’s a bit time consuming to create contact groups, but once you’ve created one you can use it to communicate with the people in the group without having to add everyone manually, which can save you a lot of time. Once you’ve created a contact group there is no live link to the original contact card. So if you change the email address in the contact card, the email address in the contact group remains unchanged.
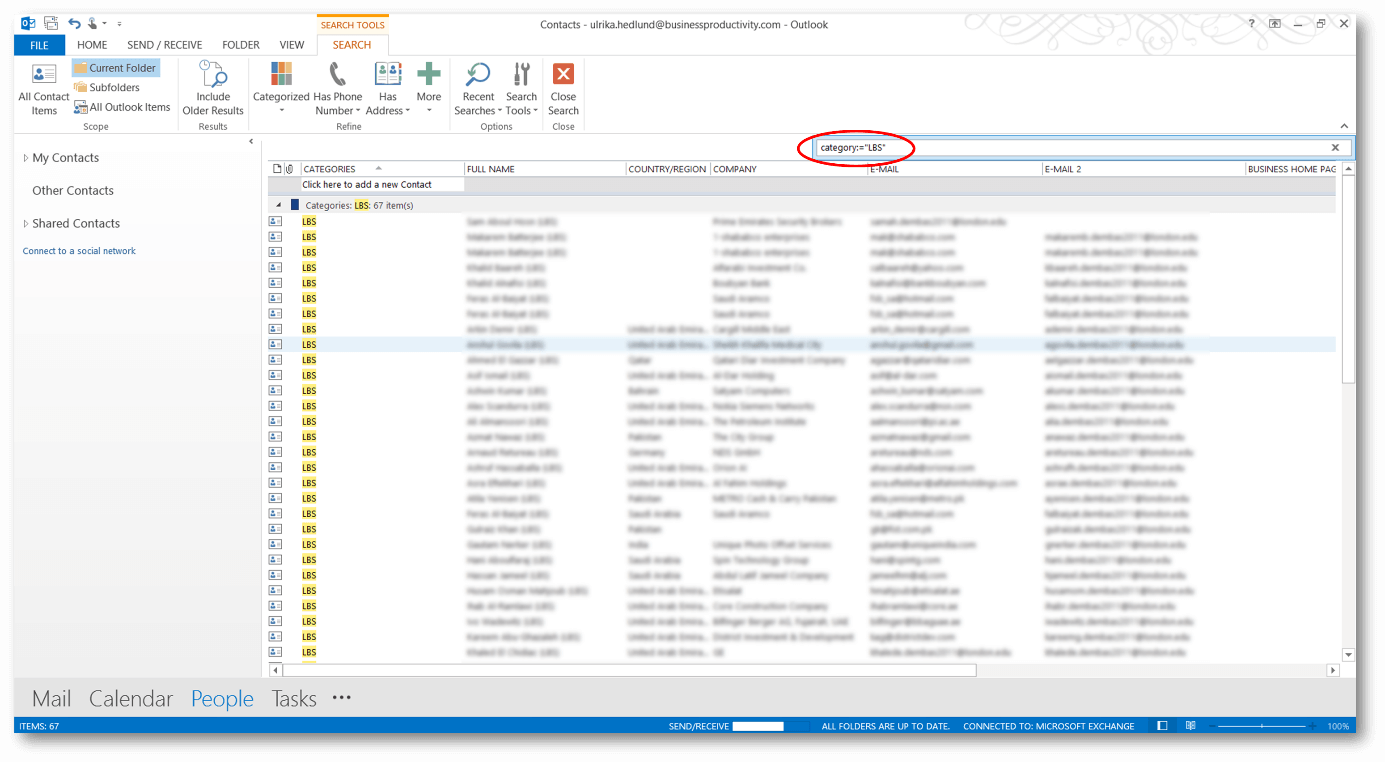
If you have a group of people that frequently update their contact details it’s better to use categories to group contacts together. Create a new category, in this example, I’ll use LBS for my classmates at London Business School. Mark the contacts you want to add to your group with your new category. To communicate with your group, just search for contacts tagged with the LBS category.
Mark all the contacts in the group and then click “Email”.
An email is generated with all the people in the category in the “To” field.
6. Access contact information from your smartphone
Having your contacts synchronized to your smartphone is key if you want to be connected on the go. In general, only contacts that are in your primary contact folder in Outlook are synchronized to your mobile phone. You can use this to your advantage. You can create additional contact folders for people whose contact information you want to save for future reference, but you might not need access through your smartphone.
Good luck with managing your contacts!
(If you have difficulties reading this article, you can access the full article in pdf here).
You can also check out a recent article on our sister site – Storyals for tips on how to manage your contacts and calendar here.


