How to present using touch in PowerPoint 2013?
Microsoft has designed PowerPoint 2013 to support both touch-screen devices as well as traditional computers where you use a mouse and keyboard. Even though it’s quite straight-forward to use PowerPoint 2013 on a touchscreen device, it helps to have the basics covered before you deliver a presentation. In this week’s blog post I’ll share some of the basics you need to know to deliver a presentation using touch in PowerPoint 2013.
1. Enable Touch mode in PowerPoint 2013
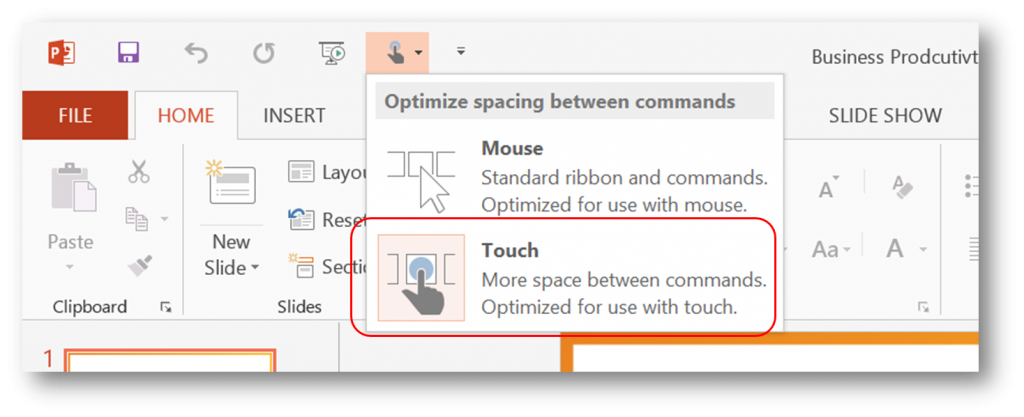
If you haven’t already done so, you should enable Touch mode in PowerPoint 2013. To do this click the Touch/Mouse mode icon in the Quick Access Toolbar. With touch mode enabled, there is more space between menu items which makes it easier to use PowerPoint 2013 with your fingers (rather than a mouse).
2. Move back and forth in your presentation
To start the presentation click the tab named “Slide Show”, and then “From Beginning” or mark the slide you want to start your presentation from and click the little “Slide Show” icon in the bottom right corner.
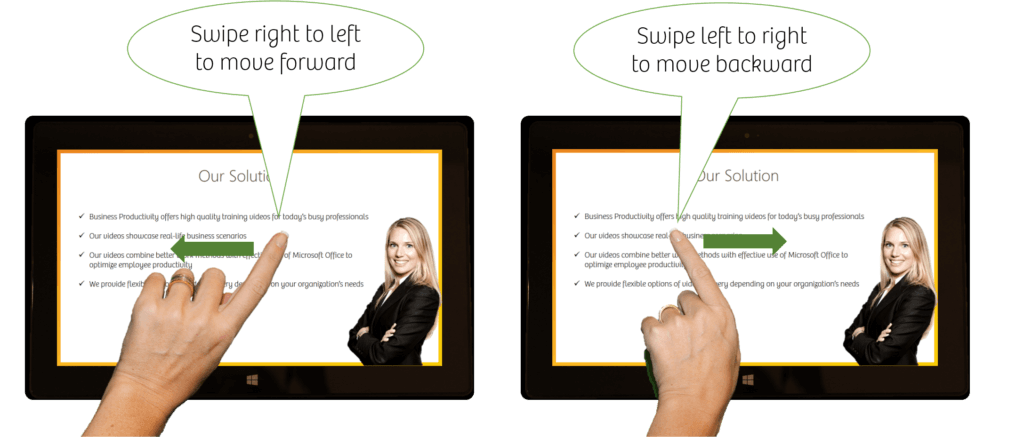
To move back and forth in your presentation you can use your finger and swipe on the screen. To move forward in your presentation swipe from right to left, to move back swipe from left to right.
You can also move forward and backward in your presentation using the arrow buttons on the presentation menu in the bottom left corner. To open up the presentation menu just tap the screen.
3. Zoom in and out
Sometimes you want to zoom in to show something more clearly in a slide. To zoom in, double-tap the slide, or pinch your fingers together and move out. To zoom back out, double-tap again, or spread your fingers and pinch them together.

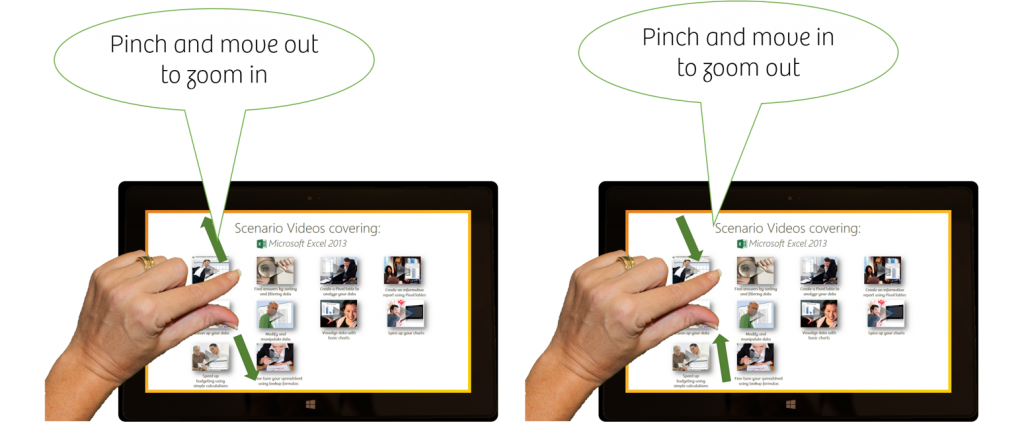
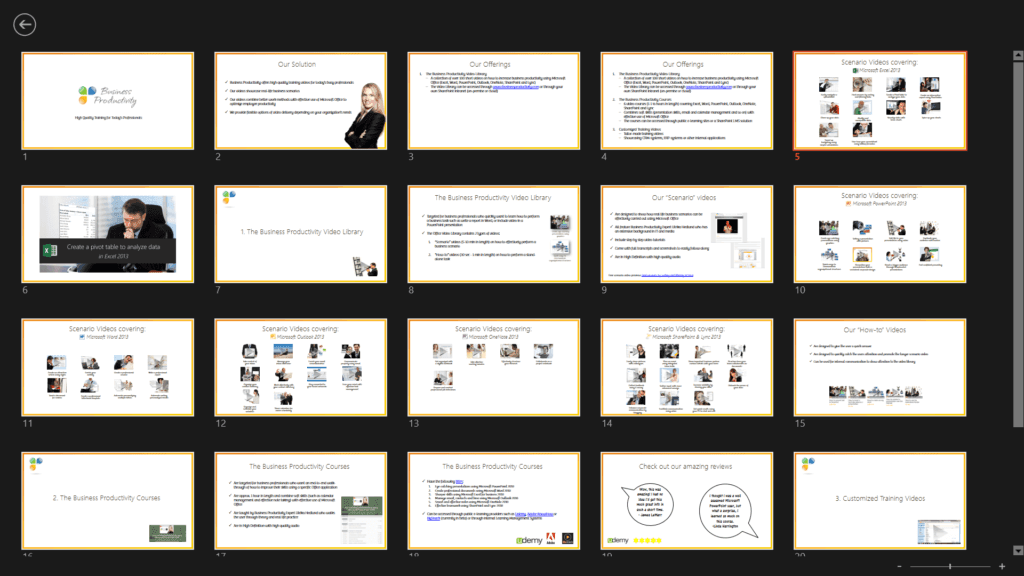
If you zoom out while in normal presentation mode you will see all your slides as thumbnails and you can easily pick the one you want to show next.
4. Play videos
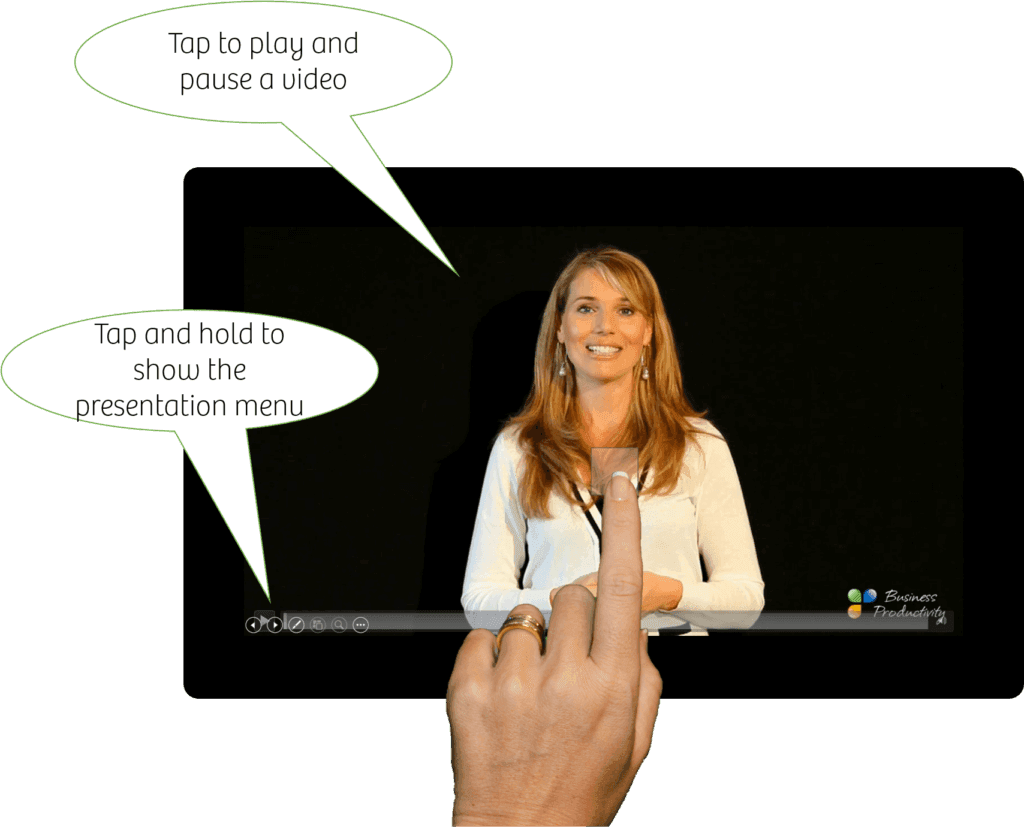
To play a video just tap with your finger anywhere in the video. To pause, tap again. To fast forward touch anywhere on the progress bar to move to that point in time in the video. If you want to switch slides before the video has finished, tap and hold on the video until the presentation menu bar appears and then click the forward or back arrow.
5. Illustrate your message using digital ink
If you have a touchscreen with a digital stylus you can use your stylus to draw directly on the screen during your presentation. This is a great way to illustrate something you are talking about, or to take a note of something the audience points out during the presentation. You can select between different kinds of pens and colors by clicking the pen/laser pointer button on the presentation menu bar.

At the end of the presentation, you will be asked whether or not you want to keep or discard your drawings.
6. Use Presenter View
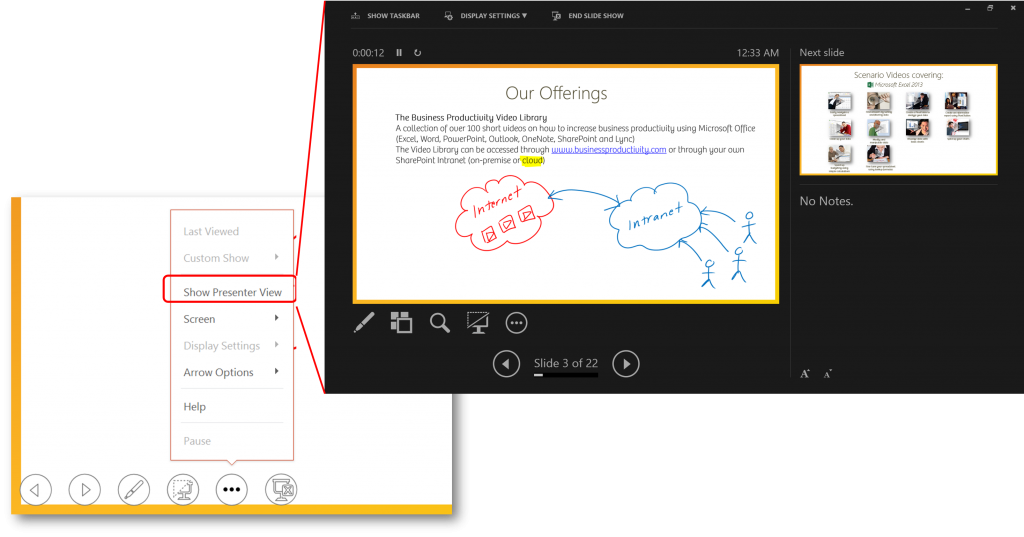
One of the benefits of using a touchscreen tablet device is that you can present in more casual settings while having coffee in the cafeteria, or in a hotel lobby. You can also use a touchscreen tablet device to present in a more traditional setting by connecting your device to a projector. In that case, it might be useful to show the Presenter View. The Presenter View, which has been greatly improved in PowerPoint 2013, enables you to see more information about the slide you are currently displaying to the audience. You can see your speaker notes, how much time has elapsed since you started the presentation, the next slide, and so on. To open up the Presentation View, tap the screen to show the presentation menu bar, click the ellipsis circle and select “Show Presenter View”.
Make sure you practice before your presentation
As with all presentations, you should go through your presentation and practice before you present to an audience. Presenting using touch is quite different since you don’t have the keyboard and mouse easily accessible as you are used to. But once you get the hang of it I’m sure you’ll enjoy this impactful way of presenting.
(If you have difficulties reading this article, you can access the full article in pdf here).


