How to effectively use shared meeting notes in OneNote 2013?
One of the many valuable benefits of OneNote 2013 is that you can more easily share meeting notes with each other. Microsoft has integrated the OneNote “Meeting Notes” functionality into Outlook and Lync so that you can easily share notes with meeting attendees just with a click of a button. However, in order to use the shared meeting notes effectively, there are a number of things you should keep in mind. In this article, I’ll share some of my own recommendations for how to effectively use OneNote 2013 shared meeting notes for effective meeting minutes.
1. Understand when and when not to use shared meeting notes
In order to share notes using Microsoft OneNote, all meeting participants need to have a Microsoft Account and permissions to access the OneNote notebook in which the notes are being shared. There is no requirement for other meeting attendees to have Microsoft OneNote 2013 installed or licensed, if they don’t, they can use the free OneNote Web app to access the shared notes. Even though anyone can sign up for a free Microsoft Account, shared meeting notes might not be practical for every single meeting. You can’t expect people from outside your organization to have a Microsoft Account (or want to go through the process of setting one up just for a single meeting). Therefore, shared meeting notes are mainly for internal meetings where you know that everyone in your organization has a Microsoft account, or in recurring meetings where it makes sense for external business partners to set up a Microsoft Account to access the shared notes during your meetings.
2. Prepare your shared notebooks ahead of time
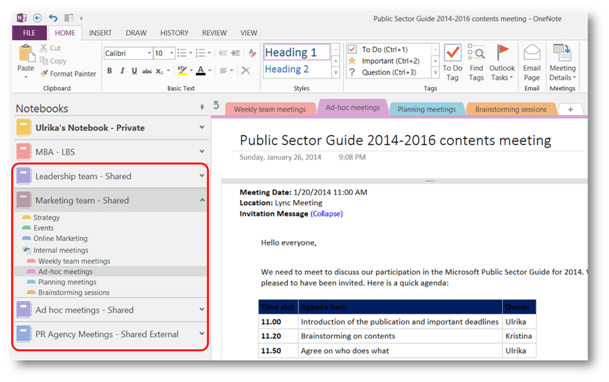
Since all meeting participants have to have permissions to read and edit the entire notebook to share meeting notes, you don’t want to give access to a notebook where you have sensitive or private information. A good recommendation is to create separate notebooks for the different type of meetings you run or participate in:
Regular team/project meetings – Ideally, if you and your team/project members are already sharing a SharePoint team site, you can create a shared notebook there. That way the notebook “inherits” the same permissions as the site, and you don’t have to worry about giving meeting participants permissions to the notebook. You can create a section in the notebook for meetings and keep all your shared meeting notes there. Every time a team member invites to a meeting they use that shared meeting notebook. By doing this you minimize the issue of having multiple notebooks in OneNote, each created for a separate meeting. You have all your meeting notes gathered in one single team/project notebook and you can easily go back in time to see the notes from previous meetings.
Ad-hoc internal meetings – Create a notebook where you share notes with ad-hoc meeting participants. If you want to make life easy for yourself and if you are not worried about confidential information in your meeting notes, create a notebook on your SharePoint SkyDrive Pro site that you share with the entire organization. That way you don’t have to worry about sharing permissions for each meeting. If you are not comfortable sharing it with everyone, you can select to share it with meeting participants one meeting at a time.
Recurring meetings with external participants – If you are working on a project or if you regularly work with vendors outside your organization that you have meetings with you can encourage them to create a Microsoft Account for your shared meetings. In order to facilitate sharing, you can create this notebook on SkyDrive so that they can easily access it. (Refer to your organization’s policies and guidelines for how to share information with external business partners).
3. Nominate a primary note taker
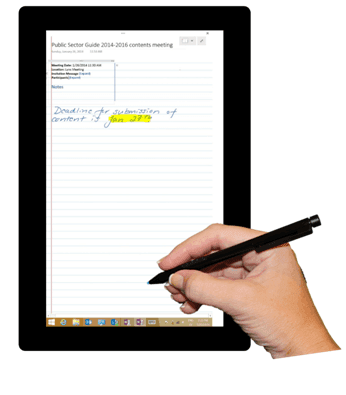
 When you share meeting notes meeting participants can access and edit the notes simultaneously. You will see the page get updated with contributor’s notes as soon as the changes have been synchronized (to refresh just press Shift F9 on your keyboard). This is great, but you shouldn’t assume that everyone will pitch in to write the ultimate meeting minutes. If you want to end up with good meeting minutes (which you do) you need to assign someone to be the primary note taker. If your meeting is online it’s fine for that person to type the notes. But as you can read in my previous blog article, “How to take good meeting minutes”, typing notes on your laptop is not recommended when you are meeting face to face as this is extremely disturbing. If you have a tablet device you can take notes in OneNote using a digital stylus, otherwise, take notes on a piece of paper and type them into the shared meeting note after the meeting. If the person assigned to take meeting notes is presenting something, it’s ideal that someone else can easily step in and continue the note taking in the shared notes.
4. Review the meeting notes before you wrap up the meeting
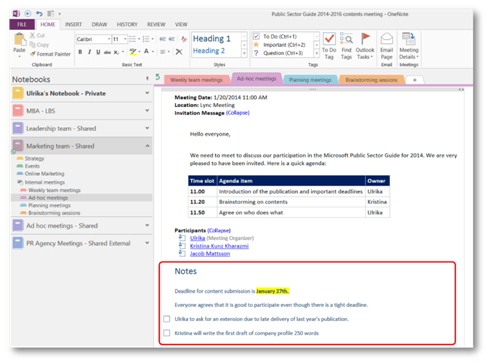
Before you wrap up the meeting, review your meeting notes with the attendees. Make sure that you have captured important deadlines, action items and decisions. Agree on how to track and share action item progress. If you are using the “To do” checkboxes in OneNote you can use your shared notes as a live tracking document of action items. Let everyone know that this is the place they should mark items as completed when they are done.
5. Easily keep track of your meeting notes
The beauty of the new integrated meeting notes capability in Outlook is that you can easily go back to any meeting in your calendar and look up the meeting notes by just clicking the link in the meeting details. The shared notes will open up and you can review the notes. A best practice for recurring meetings that you have weekly or monthly is to go back to the previous meeting to see if there are any outstanding action items.
Don’t let technology take over the meeting
Being able to collaborate on notes in real-time is really cool and it can be quite fun to see what you write appear on everyone else’s screen. Other times you might experience difficulties with the shared notes – someone doesn’t have access to the notebook, or someone gets an error message. You have to make sure that the technology doesn’t take over your meeting. The objective of the meeting notes is to support your memory so that everyone remembers the key points such as what was decided during the meeting, who is doing what, etc. It’s up to you as the meeting organizer to make sure the note-taking piece doesn’t take too much space. If so, revert to pen and paper and update the meeting participants after the meeting on where they can access the meeting notes.
(If you have difficulties reading this article, you can access the full article in pdf here).


