
Give your pictures new life with Photo Gallery
Update: Windows Essentials 2012 suite reached the end of support, and is unavailable for download.
Most people today have thousands of pictures saved in numerous folders on computers and hard drives. If you don’t have the right tools, working with pictures can be a time-consuming nightmare. In many cases, our pictures are left in their folder and slowly forgotten. In this week’s blog post I will share with you how you can use a tool called Photo Gallery to sort, filter, rate and edit your pictures to give them new life!
1. Install Photo Gallery
Photo Gallery is included in the application suite Windows Essentials. This applications suite is available as a free download for everyone who has a valid license for Microsoft Windows 7 or later. Windows Essentials is available in a number of different languages, so you can select the one you prefer. Windows Essentials also includes other applications like Writer and Microsoft SkyDrive. During the installation, you can choose which programs to install. You can select only to install Photo Gallery and Movie Maker (more on Movie Maker in another blog post).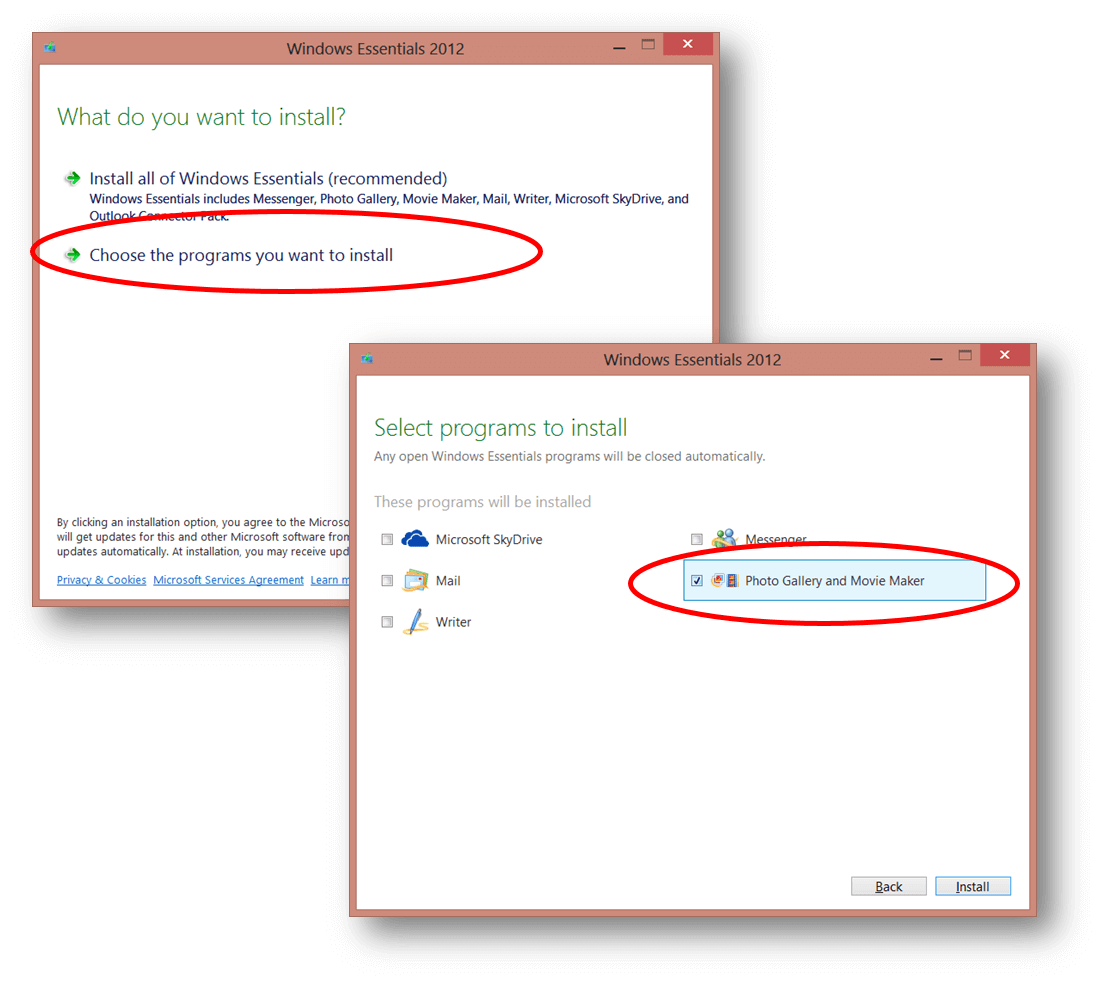
2. Locate your pictures
Using Photo Gallery you can see pictures and videos that you have saved in various folders on your computer. You can also add pictures that you have on external hard drives or USB drives. By default, Photo Gallery locates the pictures you have in your “My Pictures” folder and the videos located in the “My Videos” folder, but you can add more folders to Photo Gallery if you have pictures saves in other locations. To add pictures that you have in another location go to the “File” tab and click “Include Folder” and then click “Add”.

3. Select your pictures by filtering on a date range
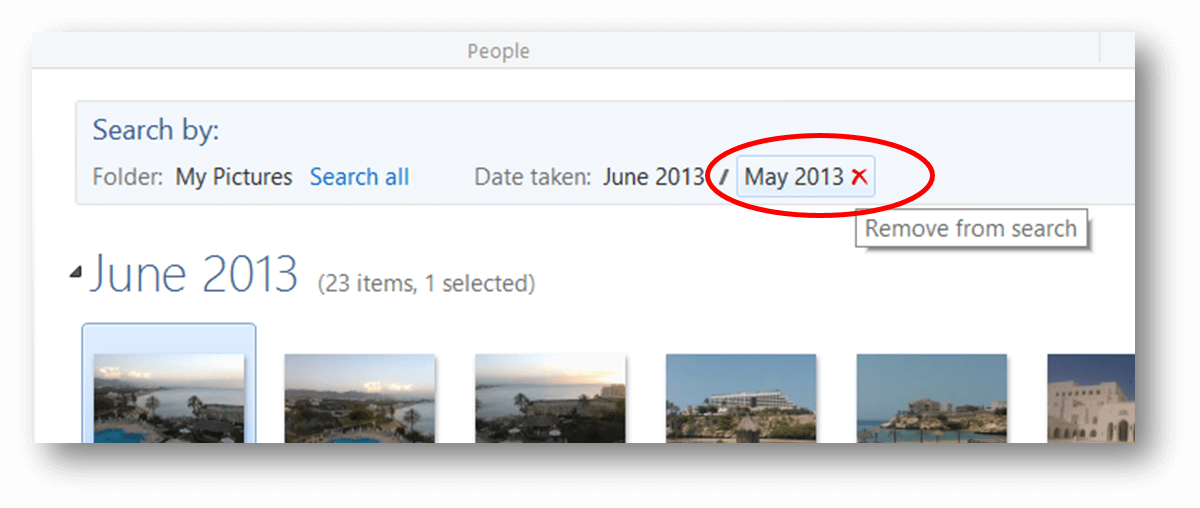
Now that you have all your pictures visible in Photo Gallery you can start filtering your pictures. Photo Gallery looks at the timestamp of a picture so you can easily sort your pictures by year, month and day. To only view pictures taken a certain time period go to the “Find” tab and select the day, month or year you want to see pictures from.  You can easily add multiple years, months or days to your selection. To remove a selected time period just click the delete icon next to the date.
4. Rate your pictures and select your favorites
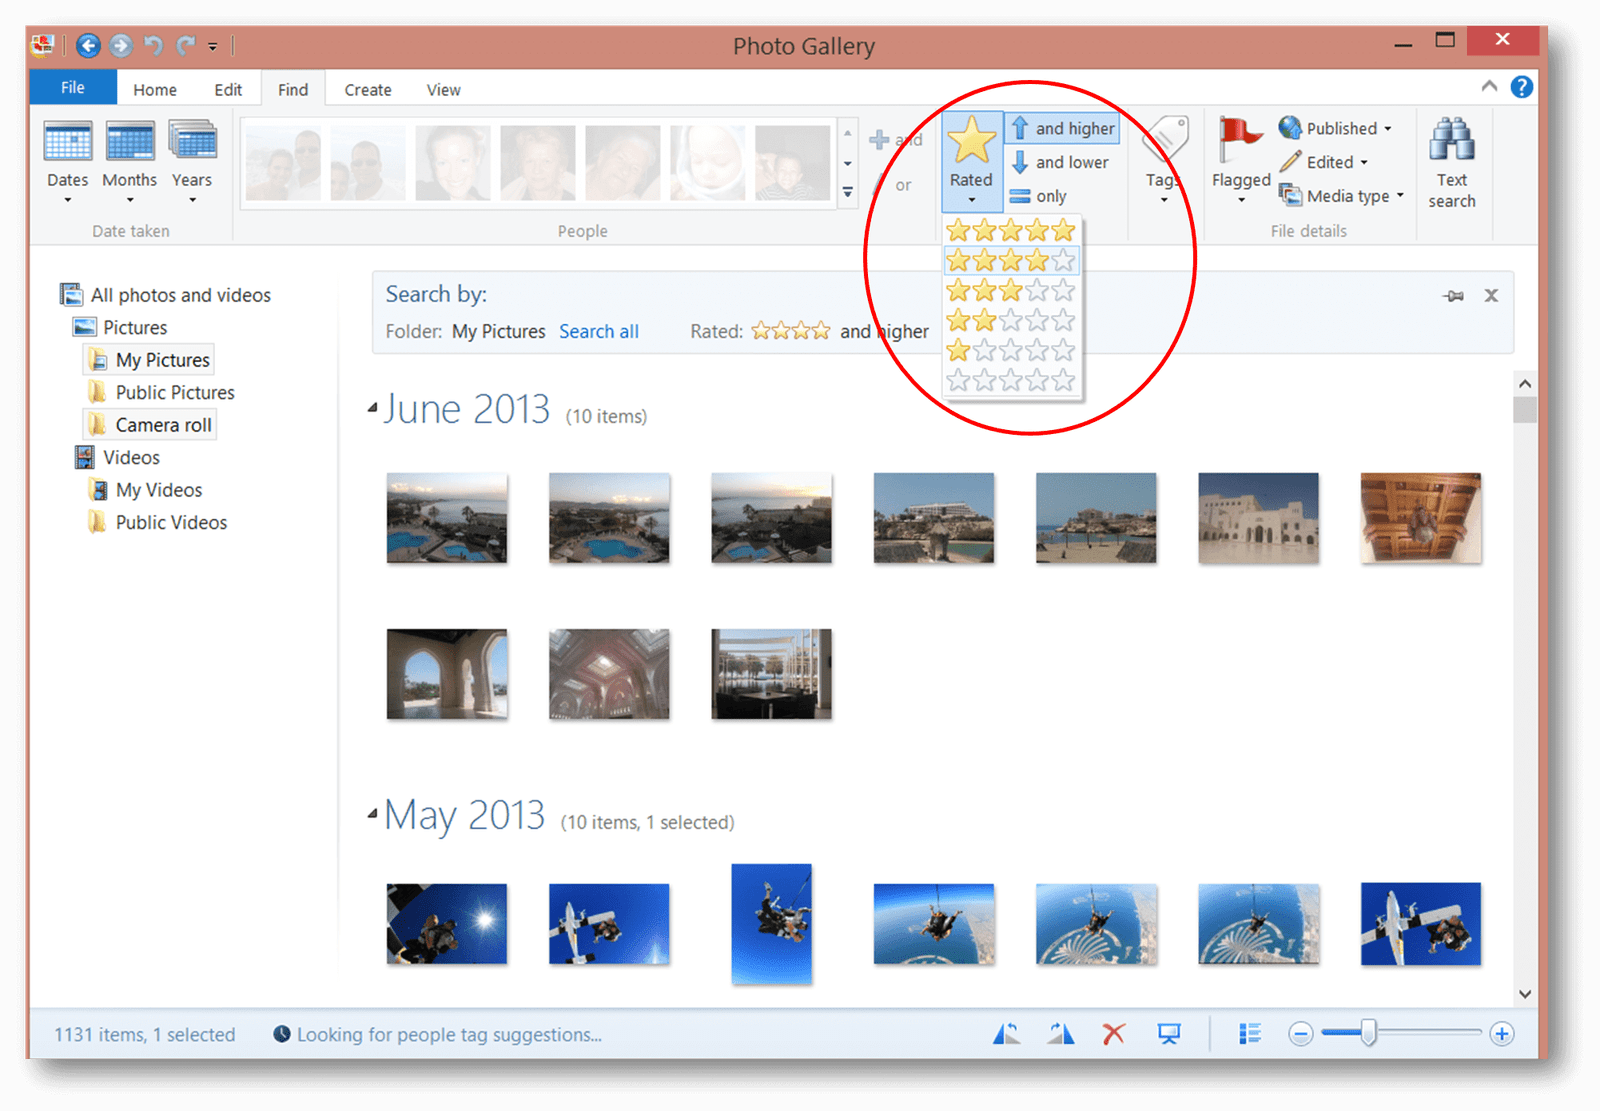
Now that you have filtered your pictures so that you are only seeing the ones taken during the time range you are interested in, it is time to select the best pictures. We tend to take a lot more pictures today with our digital cameras – that, of course, means that we end up with a lot of pictures that are less than great. Rating pictures is a manual process that can be a bit time-consuming, but once you have rated a picture, Photo Gallery keeps track of your rating so that you can use it over and over again. Open up a picture by double-clicking it. Under the “View” tab, click “Tag and caption pane” to display a properties panel next to the picture. In the bottom right corner in the “Information” section, you can give your picture a star rating from 1-5. Just click on the number of stars you think the photograph deserves. You can select multiple pictures at once and give them the same rating. You can easily change your rating by just clicking on another star or by clicking on the same star again to remove your rating altogether.

When you have rated your pictures you can add a filter so that you only show the ones that you have given a high rating. Under the “Find” tab, click “Rated” and select which pictures you want to see, for instance, 4 stars and above.
5. Edit your favorite pictures
Photo Gallery is great for sorting, filtering and rating pictures, but in addition to that, it also includes a number of tools to edit your pictures. For instance, you can change the color and exposure of your photographs, you can straighten photographs if you accidentally got a leaning horizon, you can also enhance the look of the people in your pictures by removing red eyes and unwanted blemishes. You will find all the editing tools by going to the “Edit” tab.

To remove red eyes, go to the “Edit” tab, click “Red Eye” and mark the eyes in the picture you want to fix.
6. Create innovative collages of your pictures
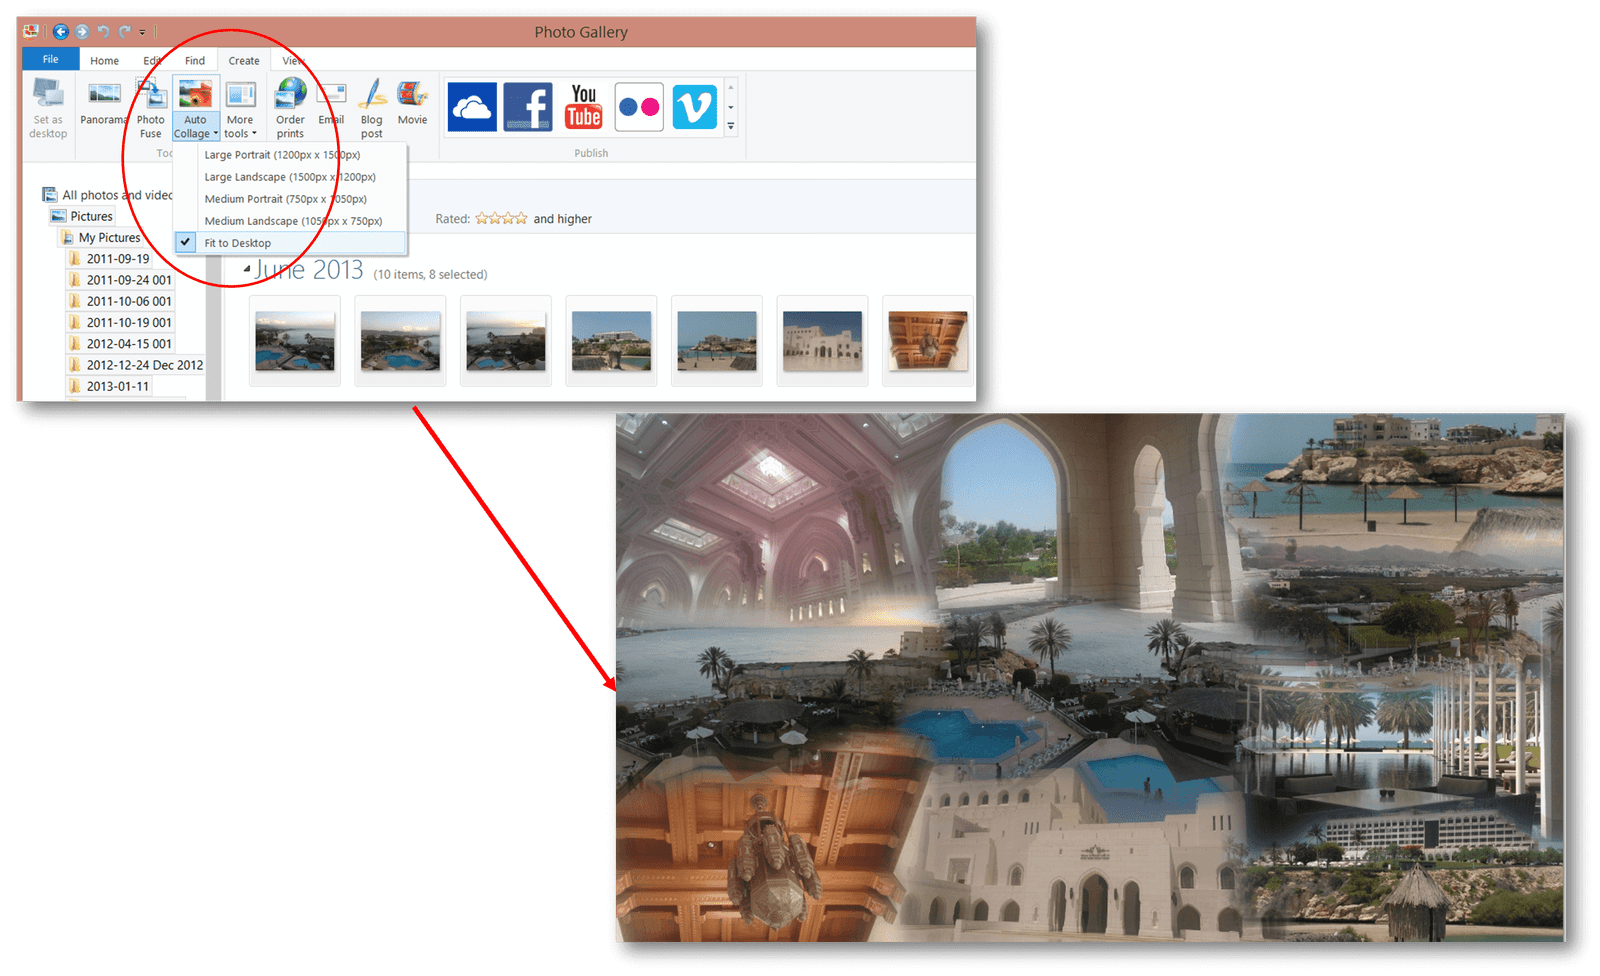
Photo Gallery includes a number of creative tools that you can use to make your photos even more interesting. For instance, you can use the “Panorama” tool to stitch two or more photographs together (perhaps you have taken pictures of a group of people but you couldn’t fit them all in one picture). Using the “Auto-Collage” tool you can create a collage with a number of pictures blended together.
More to explore if you have the time
What I have described above are a few of the basic tools you can use in Photo Gallery to give your pictures new life. There are numerous other tools you can explore if you have time and interest. In addition to the tools already included in Photo Gallery, you can download additional plug-ins free of charge from the Photo Gallery Plug-Ins web site. Here you can find tools to add geographical tags to your photographs or to create 360-degree, panoramic views. Have fun with your pictures!
(If you have difficulties reading this article, you can access the full article in pdf here)