Work effectively with your contact directory
Learn how to work effectively with your contacts in Outlook 2010
Introduction (00:04)
Welcome to Business Productivity – I’m Ulrika Hedlund. In the video “Organize your contact directory” I showed you how you can effectively organize your contacts in Outlook 2010. It really makes so much easier to communicate and stay in touch with business partners and colleagues if you have their contact details updated in Outlook.
In this video I’ll show you how you can effectively work with the contacts you have in Outlook. I’ll show you how you can quickly find contact details you’re looking for, how you can share contact information with each other and also how you can communicate with a contact with just a click of a button. Let me show you!
Using the instant search to find contacts (00:45)
The most effective way to find a contact is simply to do a search. Click in the “Search Contacts” field and just type in who you are looking for.
Here I’ll type “Nancy” and immediately I get the result Nancy Roberts. I can also search for last name to get the same result. I can search for any field that I have in my contact card. So for instance if I search for “170” I get the result of our Emirates Golf card, if I open this up you can see that I have our membership number in the Notes section starting with “170”. To clear the search result just click the cross next to the search field.
Advanced search (01:27)
Whenever you click in the search field the “Search Tools” appear. Here you can do more advanced searches. Say for instance that I want to look for all of the contacts that have a specific category from a specific company. To do that I can first select the Category and I’ll select the “Customer” category, now I want to add the company name so I’ll click “More” and select “Company” and here I’ll type in the company name “BPG Group”.
Here are all the contacts in the “Customer” category from the company “BPG Group”. I’ll remove the company field and then I’ll clear my search.
Extend your search to include all contact folders (02:07)
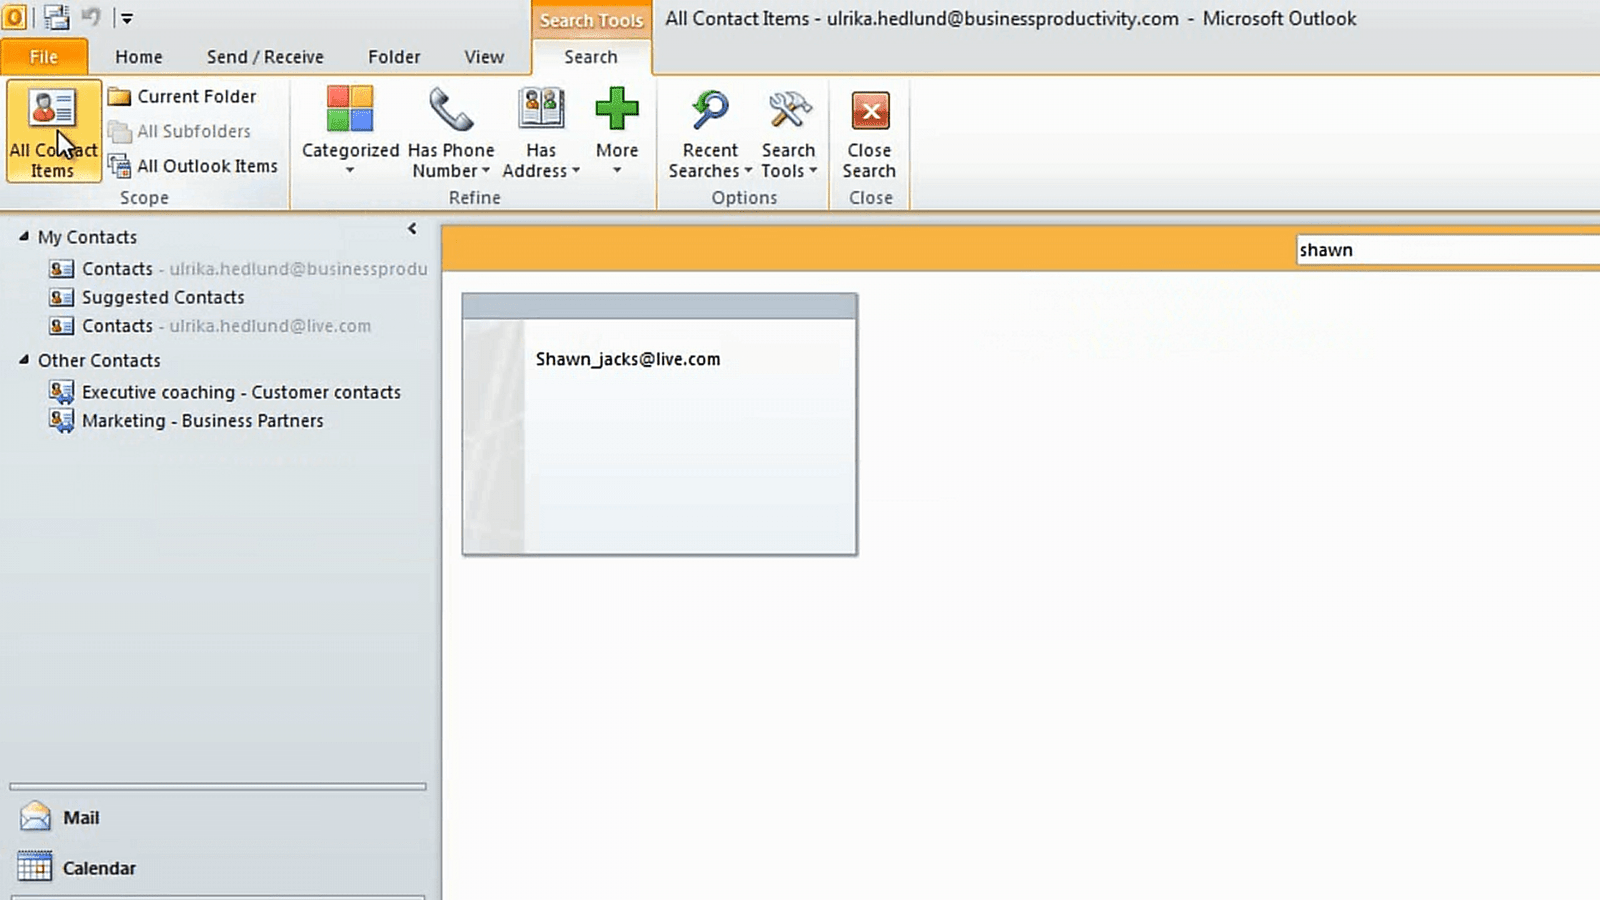
Now I want to do a new search for “Shawn”. Outlook doesn’t find anything, but I’m sure I’ve sent an email to Shawn before so his email address should be in my contacts. By default Outlook only searches your current folder, that is your primary contact folder. If you want to search all contact folders you can extend the search by clicking “All Contact Items”.
Now we can see that Outlook found the email address to Shawn which was located in my “Suggested Contacts” folder. If you want you can change the setting so that Outlook always starts by looking at tall the contact items. To do that click “Search Tools”, “Search Options” and then in the “Results” section change from “Current folder” to “All folders” and then just click “OK”.
Limitations of instant search (02:57)
The instant search is very powerful but it has some limitations in the way that it indexes contacts. Say for instance that I want to search for a contact with the name “Katherine”. I don’t remember her last name and I don’t know if she spells her first name with a “K” or a “C”. I’ll just skip the first letter and type “atherine”. Unfortunately Outlook can’t find anything because Outlook cannot do searches on parts of names. In this case I can find “Katherine” anyway because I know that she works in the HR department. So I’ll just do a search for “HR” and I can find Katherine’s contacts. But this is a limitation that you need to be aware of.
Communicating with your contacts (03:06)
To communicate with a contact just mark the contact and then go to the “Communicate” section on the “Home” tab. Here I can choose to send an email to the contact, send a meeting request, or engage with the person in a number of different ways.
For instance, if the person is part of your instant messaging contacts you can send an instant message. Or if you have Microsoft Lync enabled for outgoing phone calls you can call the person with the just the click of a button.
Flag a contact for follow up (04:04)
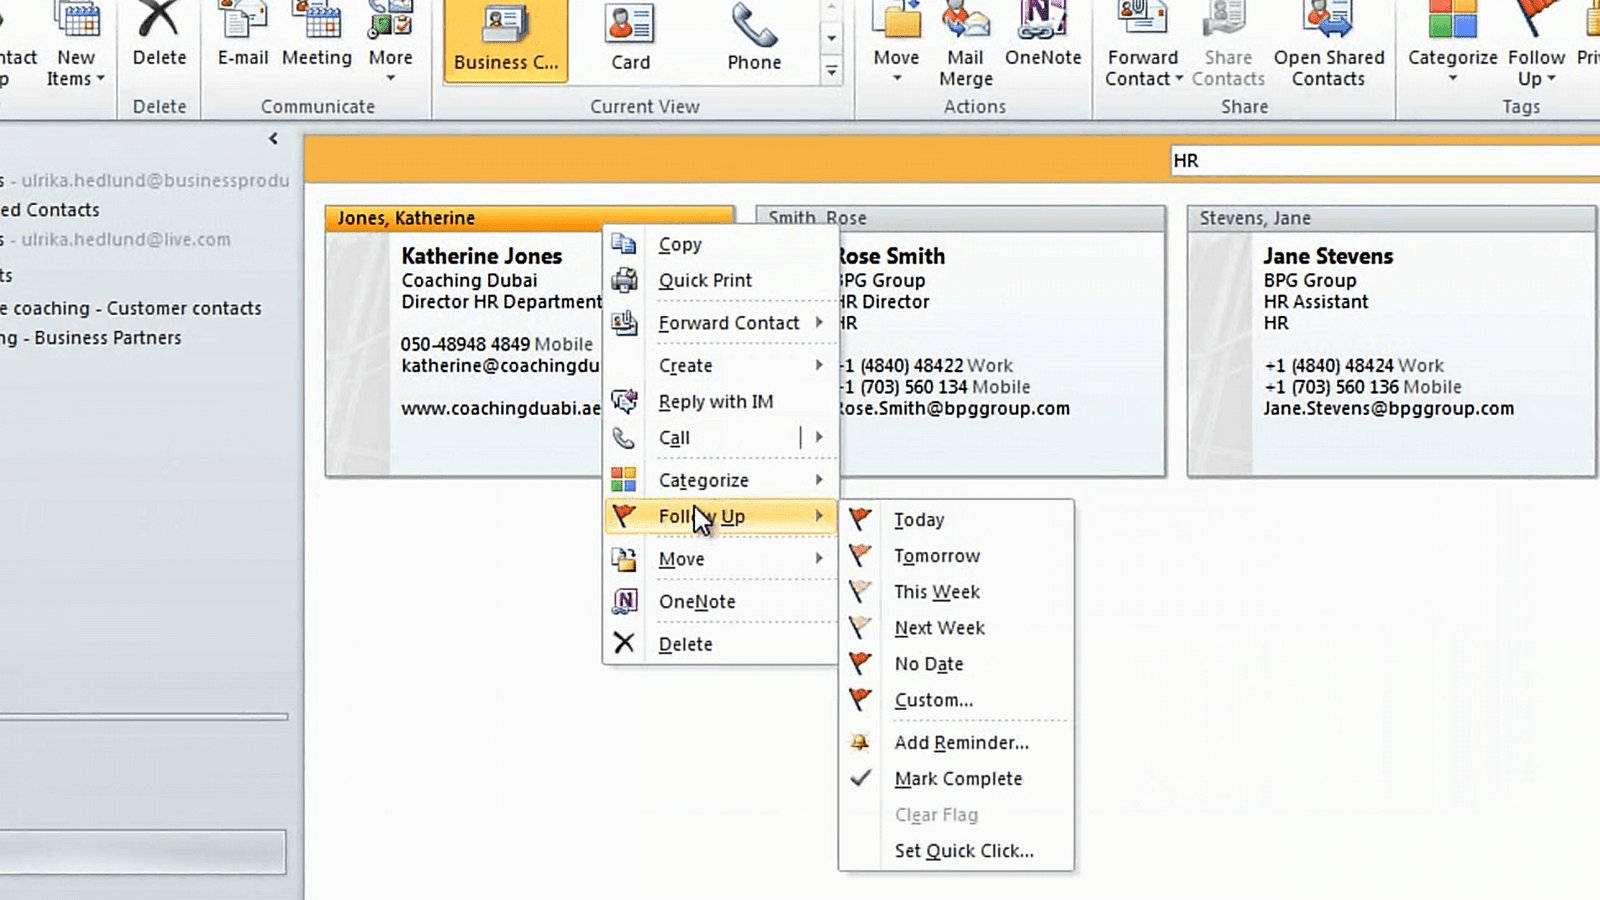
Sometimes you need to call or email a person at a later stage. In order for you not to forget you can flag a contact for follow up. You can either right-click and select “Follow Up” or you can go to the “Tags” section and select “Follow Up”.
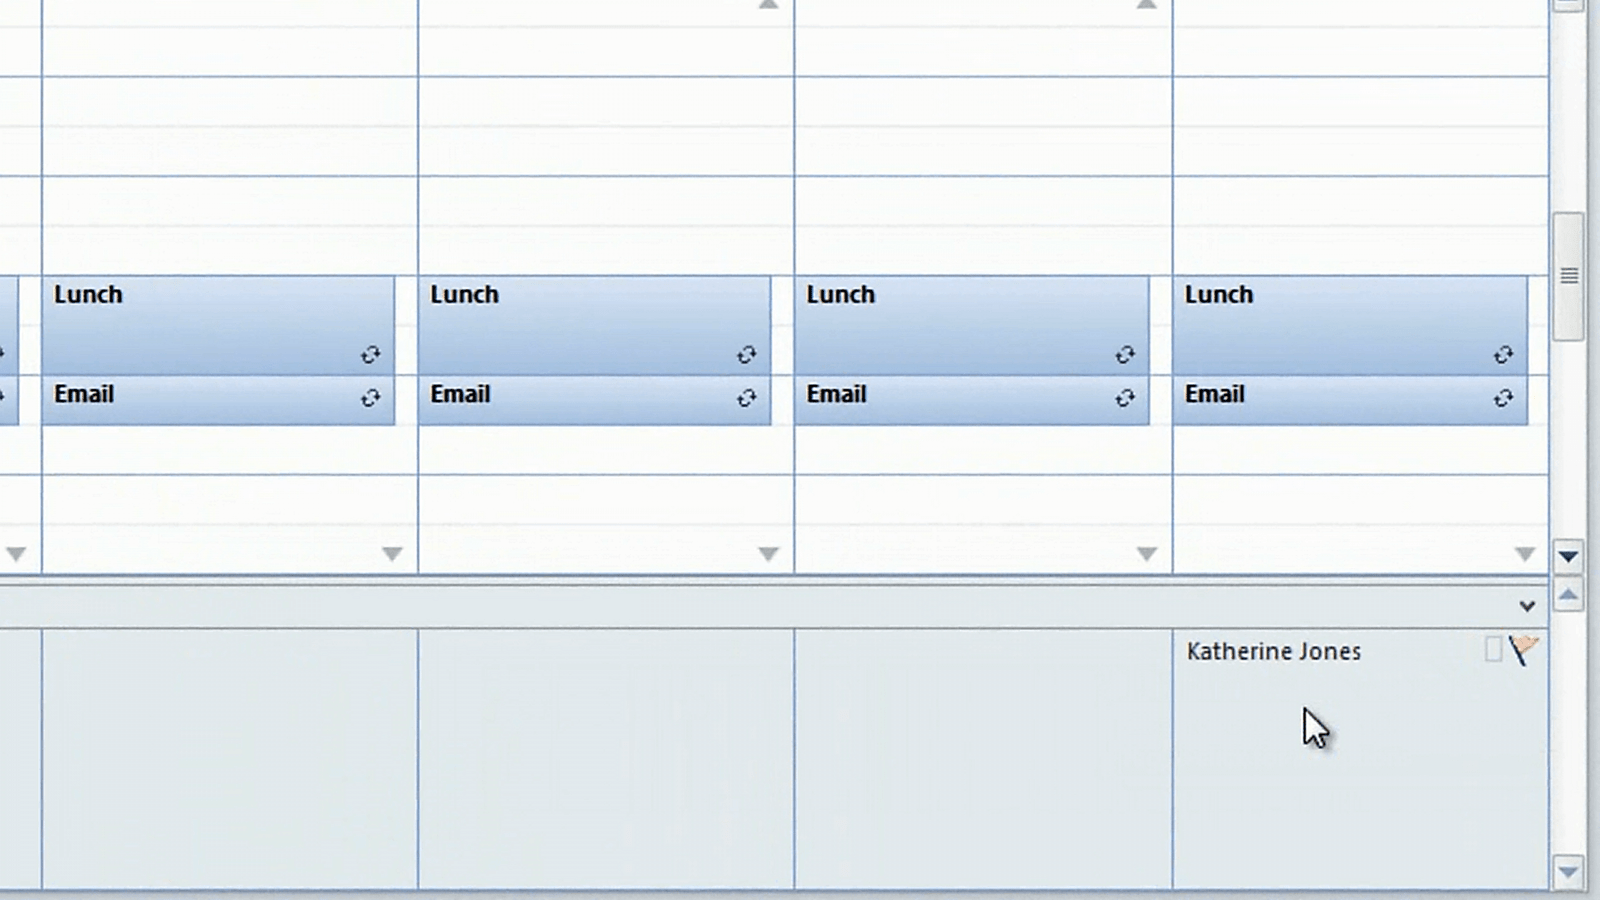
Here I can choose when I want to contact this person and I’ll just say “Next Week”. Now if I go to my “Tasks” I can see that a task has been added for next week with Katherine Jones’ contact details. I can also see this in the “To Do” bar in my calendar. If I go to next week I can see the follow up flag for Katherine Jones.
Let’s go back to the “Contacts” folder.
Email multiple people at once (04:42)
Now I want to send an email to some of the sales representatives at the BPG Group. Again, I’ll just do a search for “BPG Group” and I’ll just select the people that I want to send an email to. To select multiple email recipients just hold down the CTRL key and then mark the people you want to send the email to. Go to the “Communicate” section of the “Home” tab and click “Email”. A new email will open up with your selected contacts in the “To” field.
Creating a Contact Group (05:13)
If you frequently send email to a group of recipients it might be useful to create a Contact Group. A Contact Group is simply a gathering of email addresses. To create a new Contact Group just click “New Contact Group” and then give your Contact Group a name.
I usually start the name with an underscore [_] so that I can easily find all my Contact Groups. I’ll name this “_Sales Reps” and then I’ll add members. I can add members from my Outlook Contacts or from my Address Book or I can just type the email by hand. In this case I’ll select the sales representatives from my Outlook Contacts. Unfortunately I don’t have very advanced search capabilities here so here I just have to add the members by hand and then click “OK”. Another way to add members to your contact group is to first select the contacts from your contacts folder. So let me show you how to do that. Here in my contacts folder I’ll do a search for “Sales Representatives” [sales rep]. Here I have all of the contacts that I want to add to my Contact Group. I’ll select all the contacts by marking the first one, holding done the “Shift” key and then marking the last. I’ll open up an email and I’ll copy the email addresses.
I’ll close down the email and then I’ll create my Contact Group. I’ll click “Add Members” “From Outlook Contacts” and here I’ll just paste in all of the email addresses and click “OK”. I’ll save the group and close the search and here you can see that I have my Sales Reps Contact Group with all of the email addresses.
Now if I want to send an email to this group I can just mark the contact and click “Email”. If I click the plus-sign I will see all of the email addresses and I don’t have to select them one by one saving me a lot of time.
Limitations of using Contact Groups (07:03)
There are some limitations in using Contact Groups. One is that if I change the email address in one of the contact cards this Contact Group email will not be updated. So a better way is actually to use Categories since in that case you are not creating duplicate email addresses.
Forwarding contact cards (07:21)
Quite often other people are going to ask you to share contact information with them. This is very easy to do. Just mark the contact of the person whose contact details you want to share and click “Forward Contact”. Here you can select to share it as a business card. This way the image of the contact card will be included in the body of the email as well as the actual contact card that can be added to the Outlook Contacts.
Sharing contacts with colleagues (07:47)
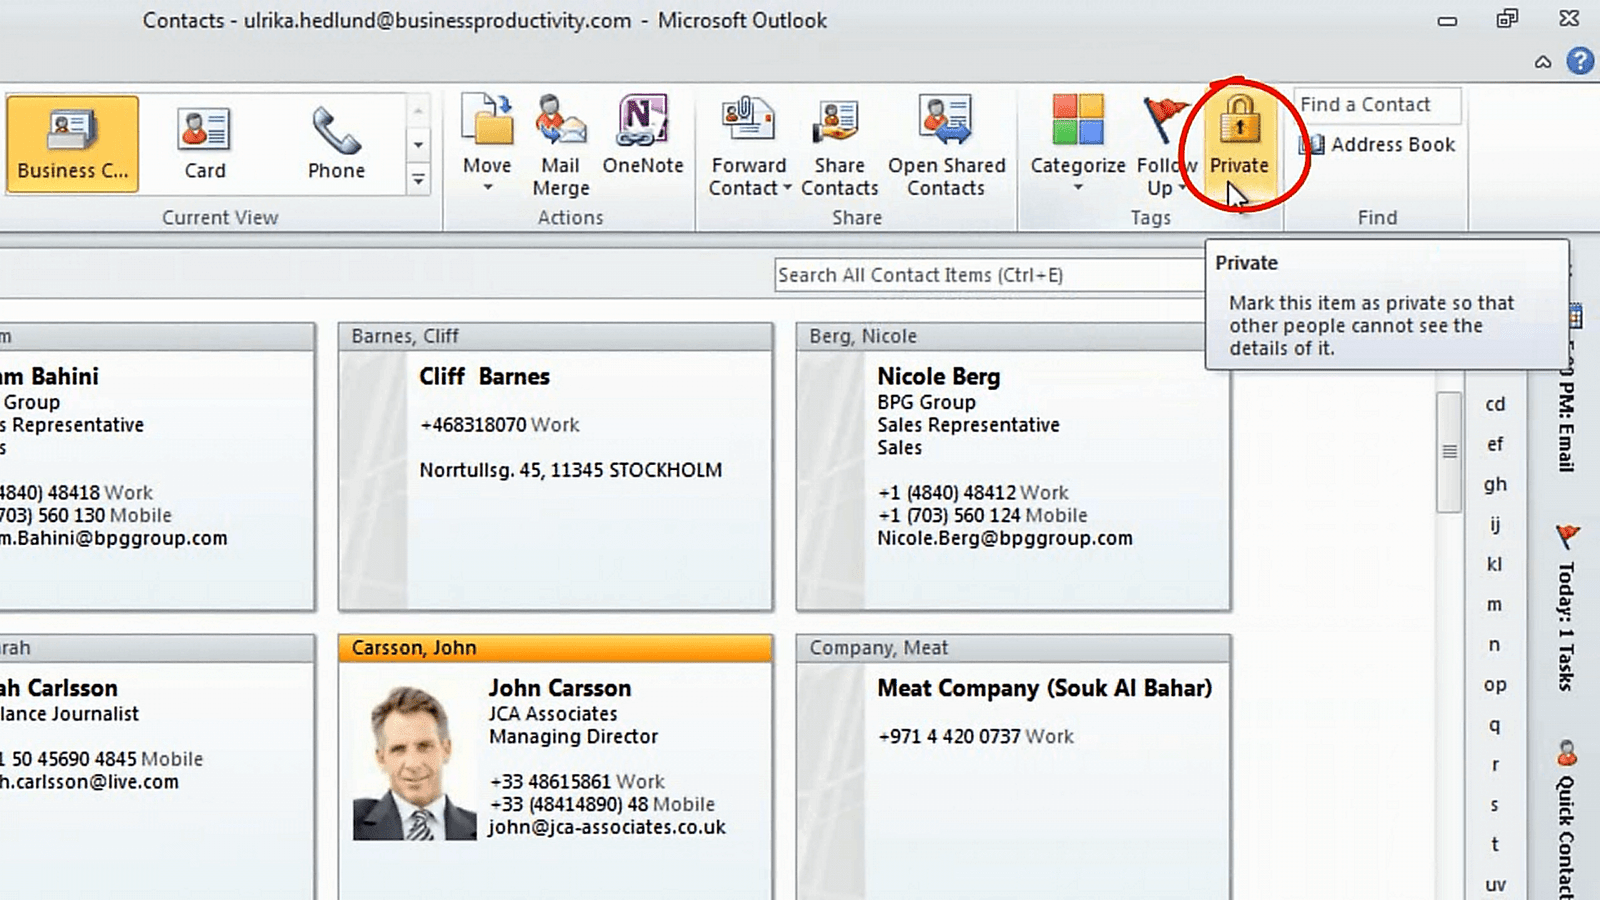
If you work in an organization and you often share contact information with your colleagues, it’s more efficient to share your contact folder with them. To do that go to the “Share” section and click “Share Contacts”.
All the contacts that have not been marked as “Private” will be shared.
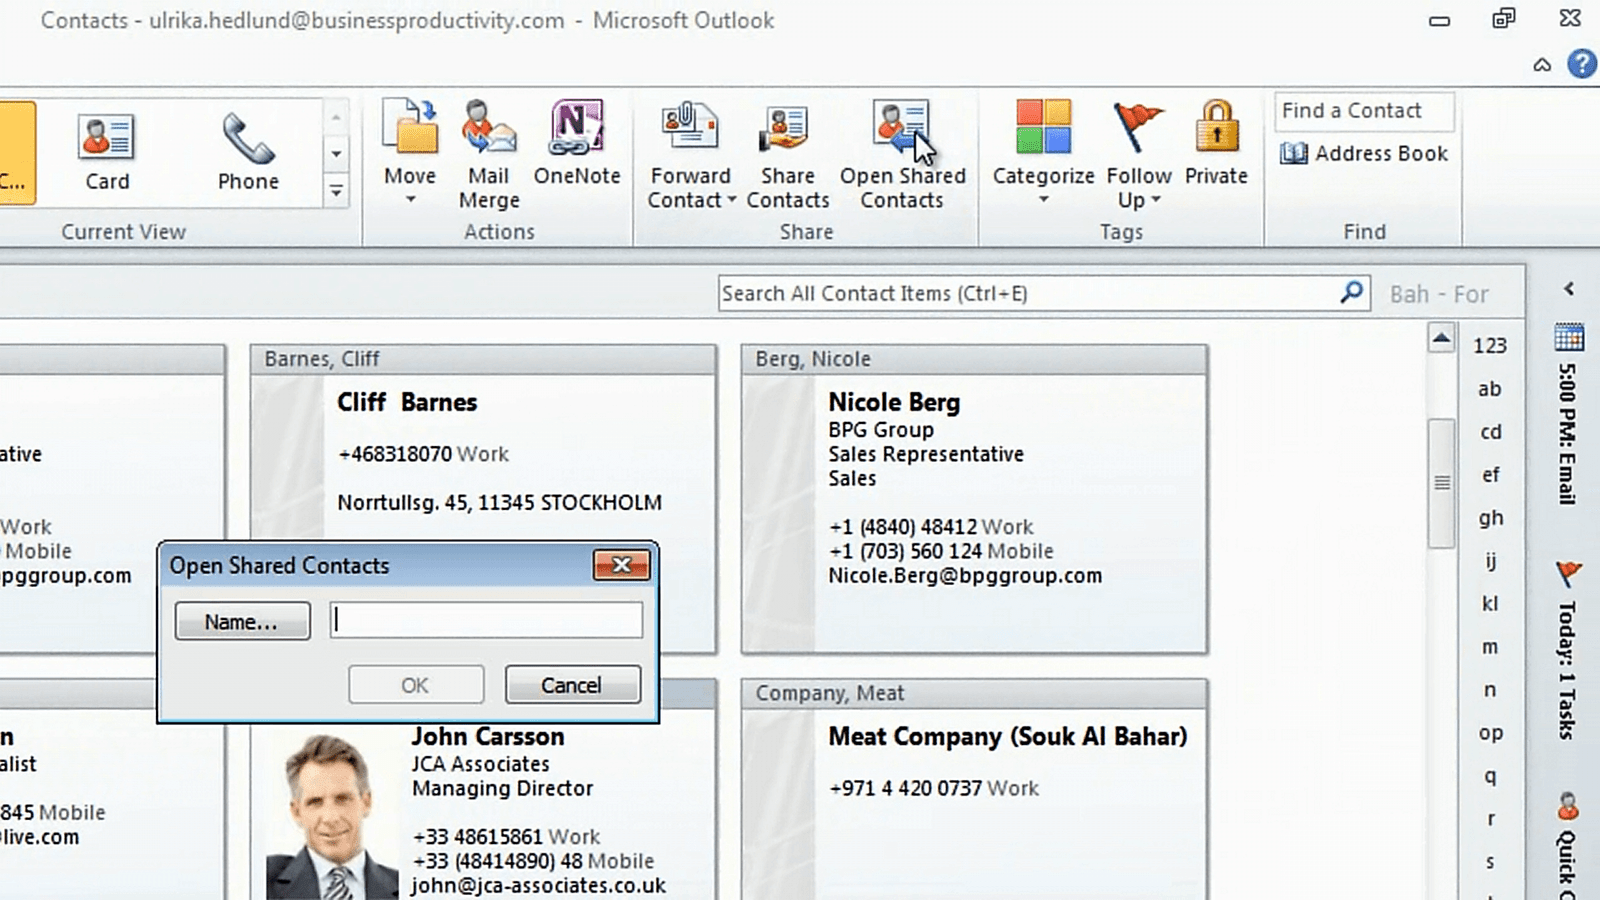
I’ll click “Share Contacts” and I’ll address this sharing invitation with Jacob. Here I can select to request permission to view Jacob’s contact folder, but since he’s already shared this with me I’ll just send this sharing invitation to him. To open up a shared contact folder click “Open Shared Contacts” and just put in the name of the colleague that has shared their contact folder with you.
I’ll select Jacob here and click “OK”. Here I can see the contacts that Jacob has shared with me, now I can easily start communicating with these contacts just as if they were my own.
Closing (08:45)
If you learn to work with effectively with your contacts in Outlook 2010 you’ll save a lot of time. Also, the Social Connector which is new to Outlook 2010 saves you time by updating information automatically for you. So make sure to watch that video.
I’m Ulrika Hedlund for Business Productivity – thanks for watching!


