Unleash the power of your data
Learn how to use lists in Office 365 to get new insights
Introduction (00:04)
Welcome to Business Productivity, I’m Ulrika Hedlund. One of the benefits of using a computer when you are working with large sets of data is that you can easily filter and sort the information to quickly find what you are looking for. Using a spreadsheet application like Excel is very powerful when you want to analyze data, but sometimes you want to find a quicker and more convenient way to share data with your team.
In the video “Increase visibility by sharing your data” I show you how you can import your spreadsheet into a SharePoint list to share the information with your team. In this video I’ll take it one step further and show you how you can unleash the power of your SharePoint list by creating new views of your data to provide additional insights. I’ll also show you how you can take the list offline and how you can edit it using other office applications. Let me show you!
Filter your data (01:03)
Here I have data on the Business Productivity videos that we’ve published that I have imported into a SharePoint list from an excel file. When you have the data in a SharePoint list you can sort and filter the information, just like you’re used to in Excel. To filter the information you just click on the column name. So say for instance that I want to filter to only show the videos on the topic “Effective Teams”, to do that I’ll just click “Effective Teams” and the list is filtered for me.
To remove the filter, just click on the drop down arrow next to the name of the column and select “Clear Filter [from Topic]”.
Sort your data (01:43)
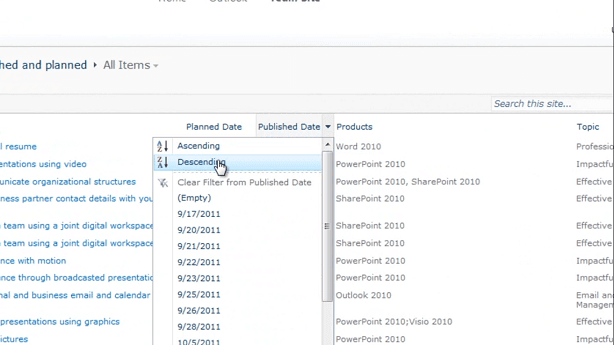
When you have large sets of data like this in lists it’s often useful to sort the data. Here I would like to see all the videos but I want them sorted by published date. To do that, I’ll click the “Published Date” column and I’ll choose “Descending” to have the latest video that we’ve published first.
You will also see a little arrow that indicates that this list is now sorted on this column.
Create a view of your data grouped by a specific topic (02:09)
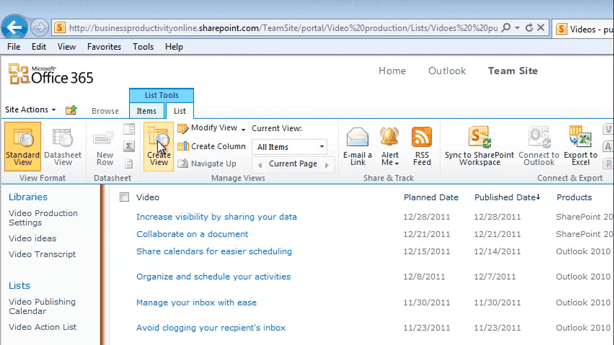
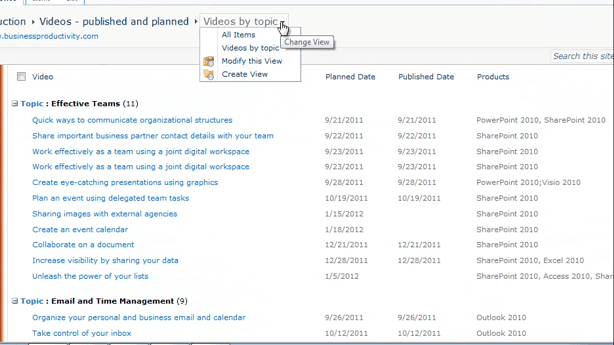
To get a better overview of this data and to easier analyze it I can create new views. So say for instance that I want to create a view that shows me how many videos we have per topic. To do that I’ll go to the “List Tools” and then select “Create View”.
I can choose a format for this view and here I’ll just choose a “Standard View”. I’ll give this view a name; “Videos by topic”. I want his view to be visible to everyone in the team, so I’ll choose to leave the default, which is to “Create a Public View”. Here I can select the columns that I want to show and instead of showing the topic as a normal column I’ll uncheck this and later I’ll choose to group all of the videos by topic. I’ll show you.
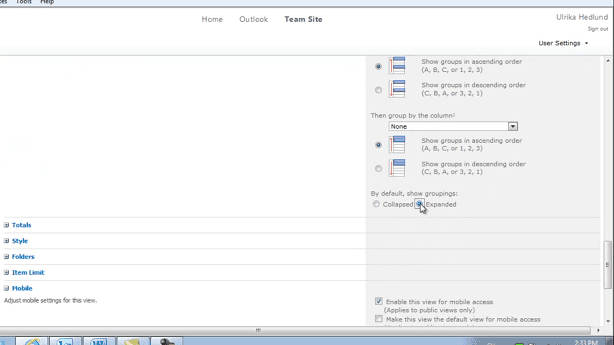
So to do that scroll down to the section called “Group By” and then click the plus sign to expand the section. Here I’ll select “Topic” and then I want the data to be expanded, so it’s easier to view. And then click “OK”.
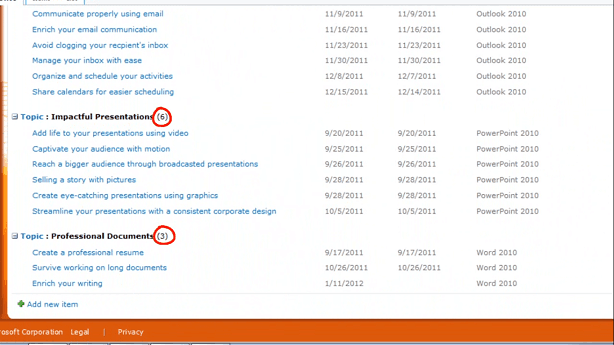
Now you can see that the items in my list have been grouped by topic and I get a very good overview of how many videos I have for each topic.
I can easily switch between my different views by just clicking the drop down arrow next to the title and go back to the “All Items” list which was the original view.
Create a filtered view to show only specific data (03:39)
Now I want to create an additional view that only show me the videos that have been published, not the ones that we have planned for the future. All the videos that have been published have a date in the “Published Date” field. So I want to remove all the items that have a published field which is empty.
To do that I’ll go back to my “List Tools” and click “List” and “Create View”. Again I’ll select the “Standard View” and I’ll name this; “Published videos”. I’ll remove the “Planned Date”, since this is not interesting anymore and I’ll scroll down to the filter section. Here I will select “Show items only when the following is true”, I’ll select my “Published Date” and say that I want to show where the published date “is not equal to” empty.
And then I’ll select “OK”. And here we go! Now we have a new view called “Published videos” where we can see all of the videos that have a date and a published date column.
Create a calendar view to show your data in a calendar (04:44)
As you can imagine there are multiple ways you can filter and sort your data and create views so that other people can easily access this analysis as well. The third and final view I want to create is a calendar view. I would like to have a better overview of the videos that we have planned to publish in the future.
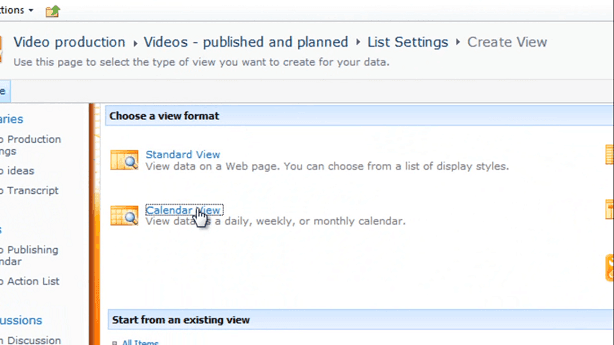
So again we’ll go to our “List Tools” and we’ll create a new view. But instead of selecting the “Standard View” we’ll create a “Calendar View”.
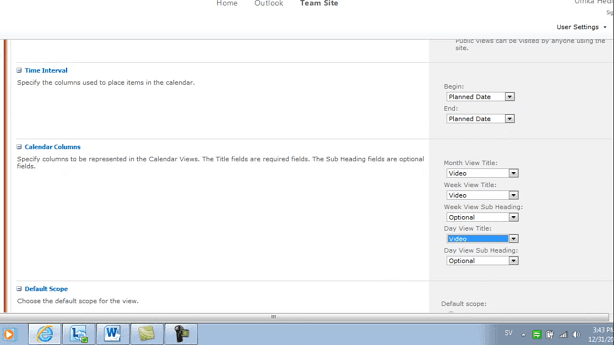
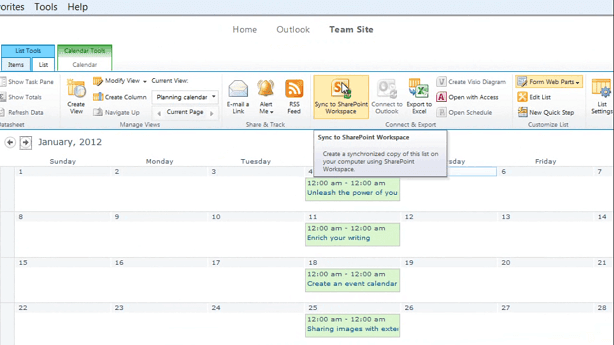
I’ll give it a name; “Planning calendar”. In the “Time Interval” I’ll select the “Planned Date” field for both “Begin” and “End” date. For the monthly, weekly and daily view titles I’ll select the video name. And I’ll select the same for the week view and the day view as well.
I want the default view to be a month calendar so I’ll leave this default. And then I’ll click “OK”. As you can see I now have my items in a calendar view. Now it’s much easier for me to get a visual overview of the videos we have planned for certain dates. I can walk through my calendar, and here I can see that we have a video that’s out of date.
So I’ll click on this, edit it, and just change the date to the Wednesday and click “Save”.
Export your data to Excel (06:03)
One of the great benefits of having your data in a SharePoint list in Office 365 is that the entire team can access this data from wherever they are. Sometimes you want to take the data offline. To do that you can click the “List Tools” and click “List”. If you want you can click “Export to Excel” to export a snapshot of this data back into Excel.
But remember, if you make any changes these will not reflect back to the SharePoint list. If you want to take the data offline and keep the update synchronized you can do this in two different ways.
Take you data offline and up to date with Microsoft Access (06:37)
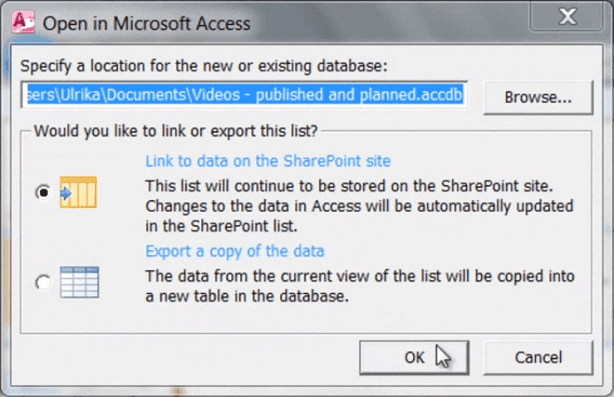
The first way is to connect this data to an Access database. To do that click “Open with Access”.
And choose to link the data to the SharePoint site.
And click “OK”. Access opens up and copies the data from the SharePoint site. Now I have the data in an Access database that I can access when I’m offline. And any changes I make to this data I can save back to the SharePoint site, so it’s synchronized back and everyone can see it.
Take your data offline and up to date with Microsoft SharePoint workspace (07:07)
The second way I can take this data offline is by synchronizing it with a SharePoint workspace. To do that you need to have SharePoint workspace installed on your PC. Then you click “Sync to SharePoint Workspace”.
Select “OK”. Our entire team site is downloaded to the SharePoint workspace so that I can access the information when I’m offline. Here I have access to the entire list offline, I can also add new items. When I click “New” – “Item” a form opens up with the same fields I defined in the SharePoint list. Here I’ll fill in information about a new video and then I click “Save & Close”.
I’ll go to the “Sync” button and click “Synchronize”.
And then let’s go back to our list and scroll down. Here you can see the new video that I just added synchronized back to the SharePoint list.
Ending (08:04)
As you can see, having your data in a SharePoint list enables you to see the information in an entirely new way. I’m sure that you have a lot of data locked up into spreadsheets in your computer that your team would benefit from accessing this way. I’m Ulrika Hedlund for Business Productivity – Thanks for watching!


