Take effective meeting minutes
Learn how to use Microsoft OneNote 2010 to take meeting minutes
Introduction (00:04)
Welcome to Business Productivity – I’m Ulrika Hedlund. Whenever you have a meeting you need to make sure that someone is taking proper meeting minutes. This is crucial in order to keep track of the topics that were covered, the decisions that were made and the action items that were agreed upon. Taking effective meeting notes is quite difficult; you need to capture the key points, at the same time as you are actively engaging in the meeting.
Personally I prefer taking meeting notes by hand, ideally using a Tablet PC so that I have everything captured on my PC. This way I don’t disturb others in the meeting by typing on a keyboard.
In this video I’ll show you how you can take effective meeting notes using Microsoft OneNote 2010. I’ll show you how you can import meeting information from Outlook, how you can keep track of action items that were agreed upon, and finally how you can share your meeting notes with the meeting participants. Let me show you!
A notebook section for meeting minutes (01:14)
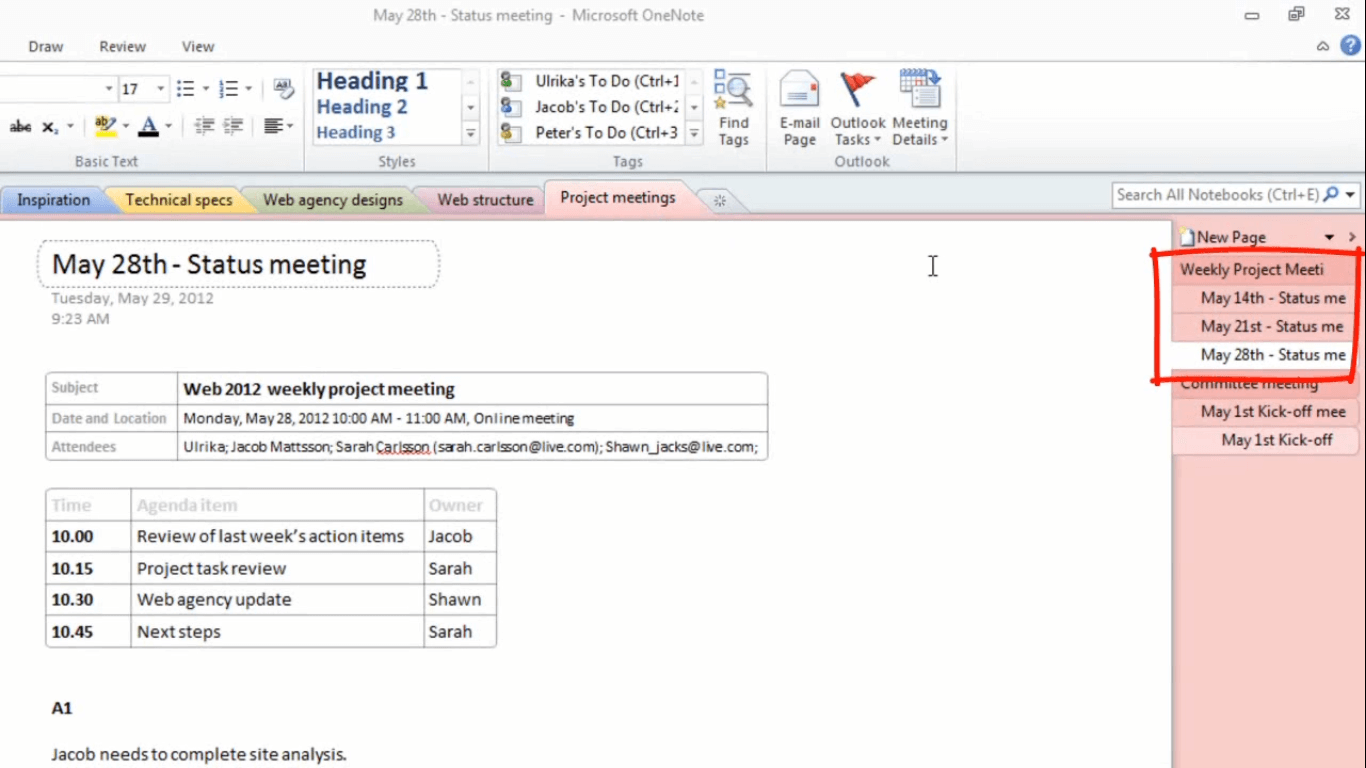
Here I have a shared project notebook called Web Site 2012 where we share information related to our new web site project. I’ve created a section group for our project meetings so here I have meeting minutes from our weekly status meetings and our Steering Committee meetings.
Since this notebook is shared on our SharePoint project site everyone in the team has access to these notes.
Today we have a new Steering Committee meeting where I will be taking the meeting minutes. I’ll create a new page by clicking ”New Page” and then I’ll give it a name: ”May 29th Committee meeting”
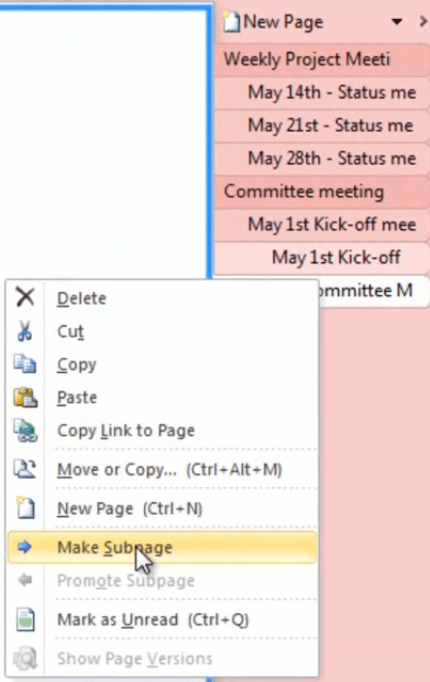
I’ll make it into a sub page by right-clicking and selecting ”Make Subpage”.
Copy meeting details from Outlook (02:02)
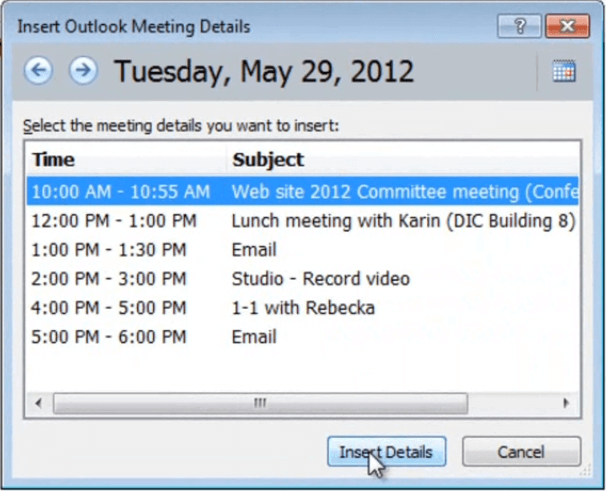
Now I want to include information about who is attending, since I have this information in the Outlook meeting invitation I’ll just choose to insert that into OneNote. Under the ”Home” tab in the Outlook section click ”Meeting Details”.
Here you will see all meetings scheduled for today, if you want to insert meeting information from another date just click ”Choose a meeting from Another day”. Here you can step between different dates to select the meeting you want to insert details from. I’ll go back to today’s date and select the 10 am committee meeting.
The subject and the attendees are inserted, as well as the contents of the meeting invitation. Unfortunately, as you can see, the Agenda table loses its formatting when it’s inserted so I’ll just choose to remove this and instead copy the actual agenda table from the Outlook meeting and paste it into my notes.
Easily review previous meeting minutes (02:59)
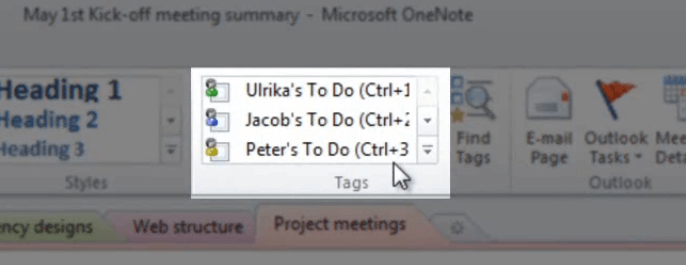
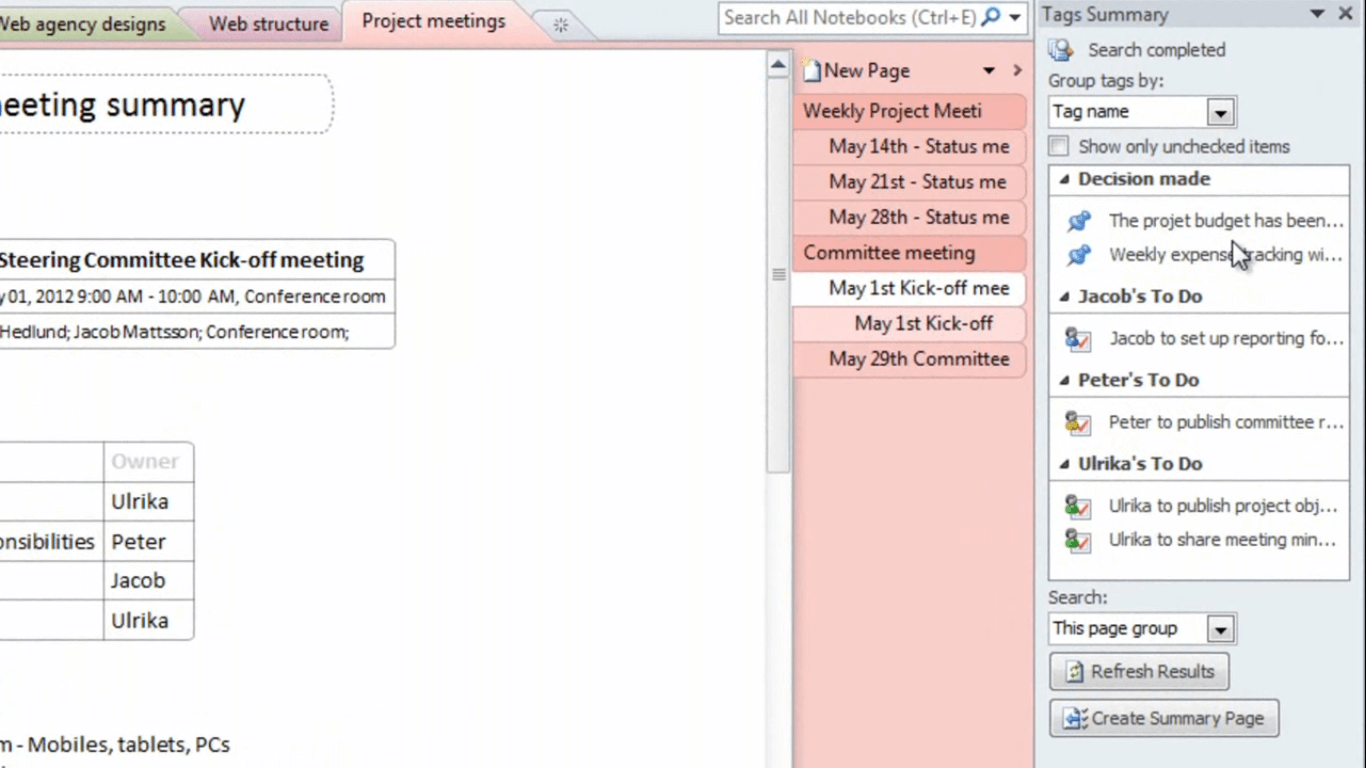
Now the first action item we have in our meeting is to review previous action items from our last meeting. Since I have all meeting minutes here I can easily review them before the meeting. I’ll open up the meeting notes summary from the Committee kick-off meeting we had May 1st. In my OneNote application I have created tags to mark action items for the key people in my team. This way it’s easier to keep track of the status of everyone’s To Do’s.
I’ve also created a tag for key decisions that have been made. I can see here that all action items from the previous meeting have been marked as complete. To get a summarized view of all the action items on this page I can just click “Find Tags”.
Here I get a summarized view of all the decisions that were made and the action items that were assigned to each person.
Prepare your notebook for handwritten notes (03:55)
I’ll close down this summary view and since the meeting is starting I’ll get ready to take notes. Since I have a Tablet PC with a digital stylus I will take handwritten notes directly on the screen. To help me write better I’ll add some lines to the paper, to do that I’ll click “View” and then under “Page Setup” I’ll click “Rule Lines” here I’ll select rule lines with an appropriate width for my handwriting.
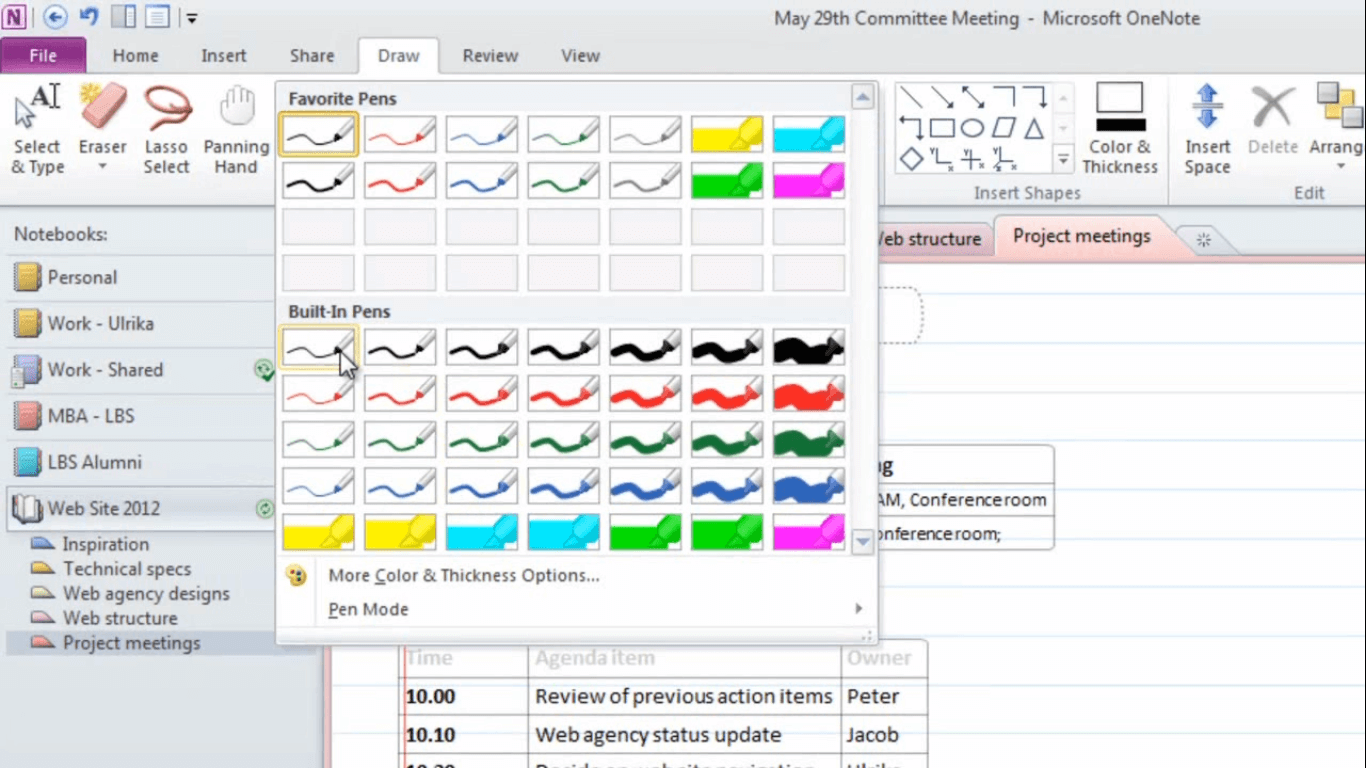
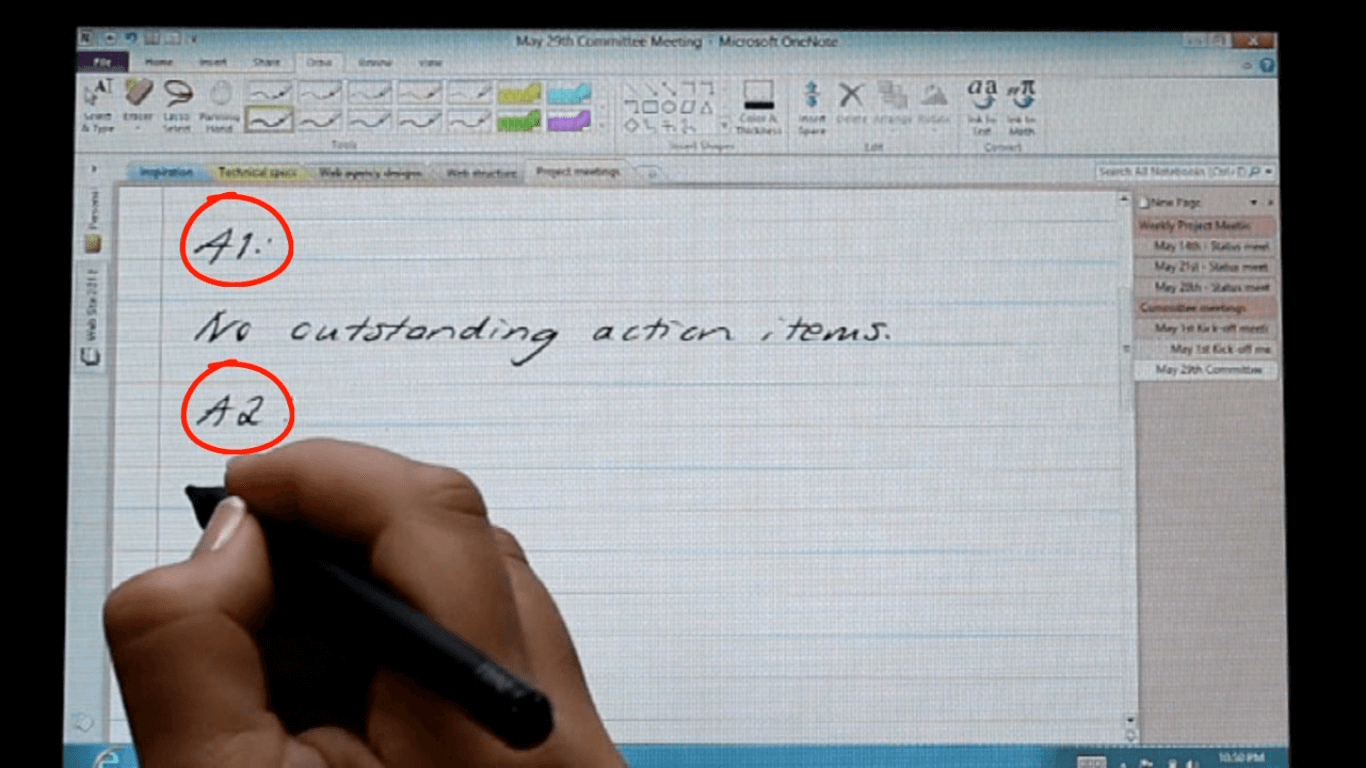
You can add digital ink to your notes in OneNote even without at digital stylus, but it’s really difficult so I wouldn’t recommend that you try to take notes that way. To insert digital ink, click the “Draw” tab and then select color and thickness of pen. You have lots of colors and thicknesses to choose from, you can also select a highlighting pen if you want to highlight something in your text. Here I’ll just select a black pen and start taking notes.
Take handwritten notes using a Tablet PC (04:57)
When you take notes in a meeting you should make sure to write down the most important things such as action items, deliverables, decisions and so on. You won’t be able to write down everything people say. Use abbreviations and symbols as much as you can. As you can see here, I use a capital A for agenda item I also have symbols I use for action items and key decisions made.
After the meeting you can spend some time to clean up your notes so don’t worry about it during the meeting. Just make sure you capture the key points.
When the meeting is over I have captured the meeting minutes in OneNote. The beauty with using OneNote with a digital stylus is that I can easily draw shapes and arrows. Here I’ve inserted a screen clip from our web site and marked some things we want to change.
I’ve also noted done some action items marked with an “At” symbol as well as key decisions made marked with a star.
Convert your handwriting into text (05:59)
Now it’s time for me to clean up these notes and remove some of the symbols only I know what they mean and convert my handwriting to text.
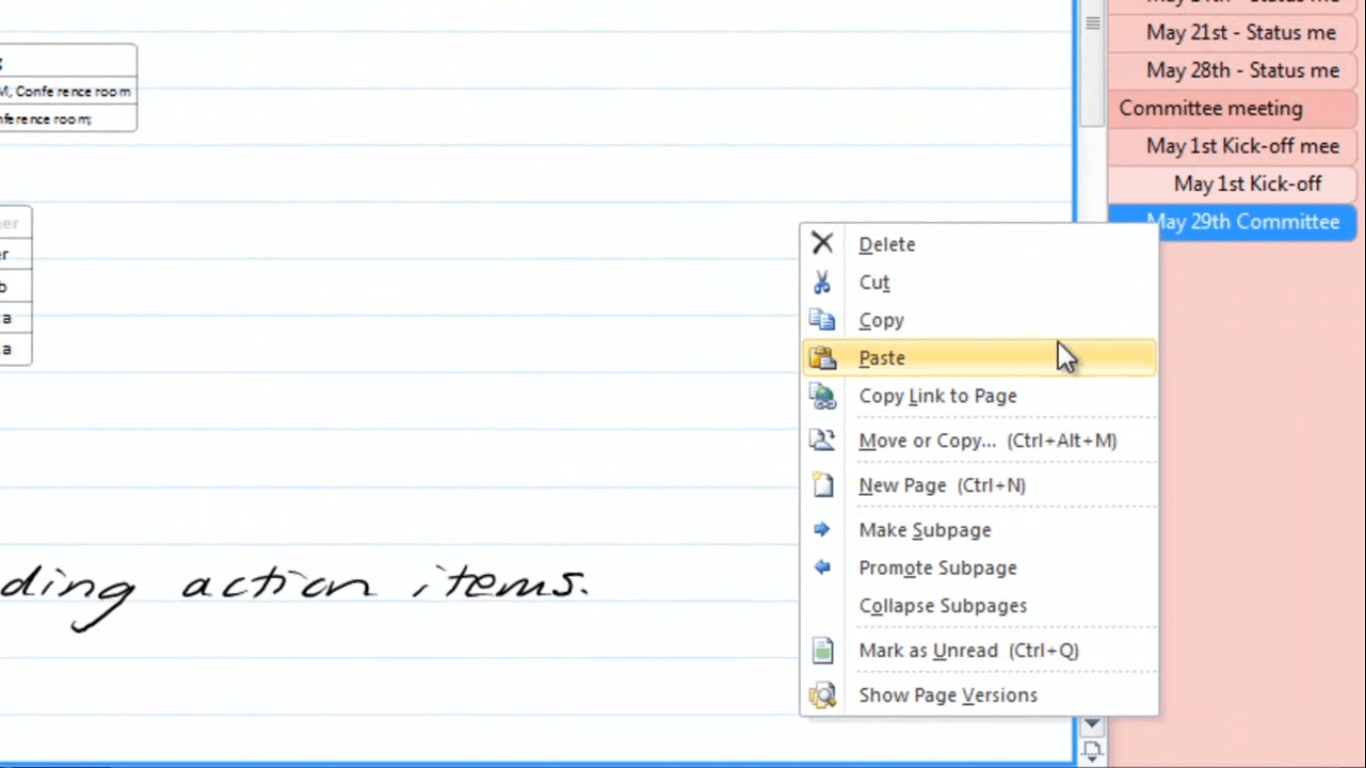
I want to keep a copy of my handwriting as a reference so I’ll right-click the page tab, select copy, right-click again and select Paste.
Now I can convert my handwriting on this page to text. To do that go to the “Convert” section under the “Draw” tab and click “Ink to text”.
The digital ink is converted to text. I’ll just zoom in a little bit so that we can better see the text, I’ll go to the “View” tab and then under Zoom I’ll click 100%. I’ll also remove the ruler lines since we don’t need them anymore.
Now I need to review my notes and correct some of the conversion errors.
Clean up your handwritten notes (06:51)
OneNote does a pretty good job of converting handwriting into text, but you still need to review the text.
Here I have my “at” symbol for an action item assigned to Jacob, I’ll delete this symbol and instead add one of the OneNote tags I’ve created for Action Items. This way it will be much easier to get a good overview of the meeting minute action items.
Here I have a lot of empty space, to remove this space, go to the “Draw” tab and then click “Insert Space”, with this tool you can either insert or remove space in the page.
Here I’ll just drag the arrow up to remove some of the empty space.
Here I’ll just move some of the text that was resized during the conversion, I’ll add some more Action Item tags, one for myself and one more for Jacob and then finally I’ll replace my symbols for decisions made with the pushpin tag that I have defined in OneNote.
Share your meeting notes with the rest of the participants (07:52)
Now that these notes have been reviewed and cleaned up I can share them with the rest of the meeting participants. To send this page I’ll just click “Email Page” under the “Home” tab.
My notes are inserted to the body of the email in Outlook so here I can just add the meeting participants and then send them the meeting minutes. They can also access the notes in our shared project notebook.
Remind people of their action items (08:22)
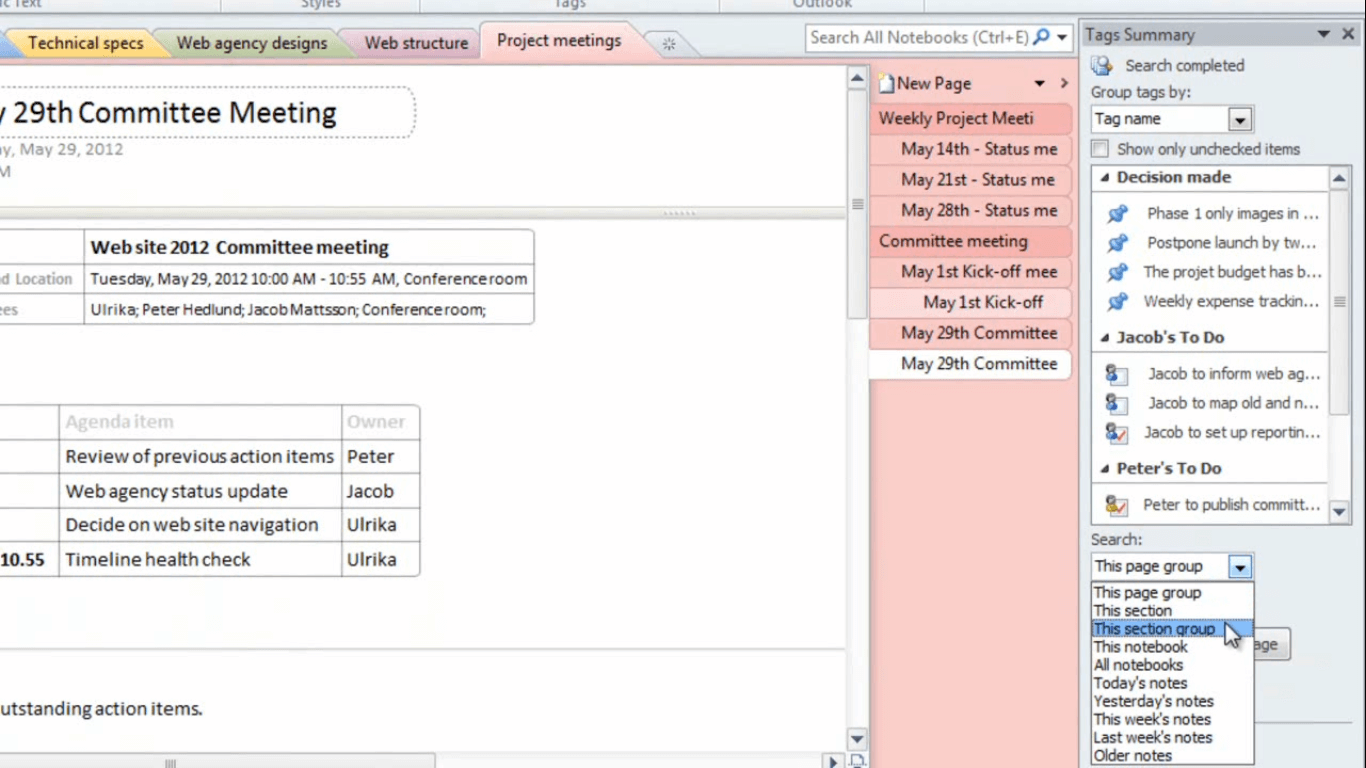
From time to time you might want to send out a reminder to people that have action items that have not been completed. To get a summary of all your meeting action items click “Find tags”, change the “Search” drop down from this page group to this section group and then select only to show unchecked items.
This way you will only see the action items that haven’t been completed yet. If you click Create Summary page you will get all these action items, from the different meeting minutes, summarized in one page. I’ll name this page “Reminder: Outstanding Action Items” and then I’ll click “Email Page”, I’ll send this off as a reminder to those who still have things to follow up on. When I’ve sent the page I’ll delete the summary page since I don’t want to have the Action Item check boxes in multiple places.
Closing (09:21)
Using Microsoft OneNote 2010 is very efficient for capturing meeting notes. It helps you keep track of information that has been shared, decisions that have been made and follow up actions that need to be tracked. It’s also ideal because you can have all your meeting notes in one single place. I’m Ulrika Hedlund for Business Productivity – Thanks for watching!


