Survive working on long documents
Learn how to manage long, complex documents in Word 2010
Introduction (00:03)
Welcome to Business Productivity, I’m Ulrika Hedlund. Have you ever had to work on a really long document? In my previous job I often worked with Request for Proposals and customer analysis reports that tended to be very long and very complex. It’s very exhausting working on long documents – not only all the text you have to write but also how you manage the structure of the document.
In this video I’ll show you the basics you need to know in order to survive working on a long document. I’ll show you how to insert footnotes and references, how you move text around and also to insert a table of contents in the beginning of the document. I can promise you that when you master these steps it won’t be as daunting anymore. Let me show you!
The most important things to remember (00:46)
Here I have written a feasibility study and marketing strategy for an internet startup. This document is almost 30 pages long. Now if you look at it, it looks pretty good; I’ve used a different blue formatting here to clearly show the different paragraphs in my document. I’ve inserted a number of different data points from various sources and I’m also using pictures to illustrate my points.
The problem is that Word has no idea about the structure of this document. If I open up the “navigation pane” by going to the “view” tab and then click “Navigation Pane” you will see that this is completely empty.
So the first thing we have to do is to add headings to the document. We’ll go back to the “Home” tab and then I’ll scroll down to my first heading. I’ll mark this and then I’ll choose “Select” – “Select Text with Similar Formatting”.
This way, all of my headings in the document will be marked. I’ll go to the “Heading 1” style and I’ll right-click and choose “Update Heading 1 to Match Selection”.
The reason why I do this is because I want to keep the formatting that I have in my document.
Move sections around (01:58)
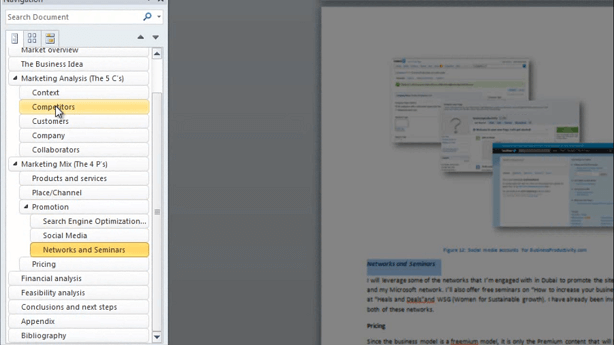
Now you can see that all of my headings are visible in the navigation pane.
Now I can easily move around in the document, using the navigation pane. Now I want to continue to add styles to the rest of my headings. So I’ll just do the same; I’ll mark the text, choose “Select Text with Similar Formatting”, right-click “Heading 2” and choose “Update to Match Selection”. I’ll do the same thing for the third and final heading. And as you can see, as I add the heading styles the hierarchy in the navigation pane grows.
Now that Word understands the structure of my document I can move things around. So for instance, I want to move the company section after the context section. And then I want to have customers after that.
Start each section on a new page (02:45)
Let’s go back to the beginning of the document. Now I’d like to update the “Heading 1” style, so that each time we have a new section with a “Heading 1” it starts on a new page. So to do that I’ll right-click on the “Heading 1” style, select “Modify…”, click “Format”, [click] “Paragraph” and then under “Line and Page Breaks”; select the “Page break before” and click “OK”. And then “OK” again. Now you can see that each new section with a “Heading 1” starts on a new page.
Adding a page with landscape layout (03:18)
Now I want to add some financial projections. I’ll type the name of my excel file and open it up in Excel. I’ll select the entire table, right-click and then copy, I’ll go back to my Word document and select the section where I want to add the financials.
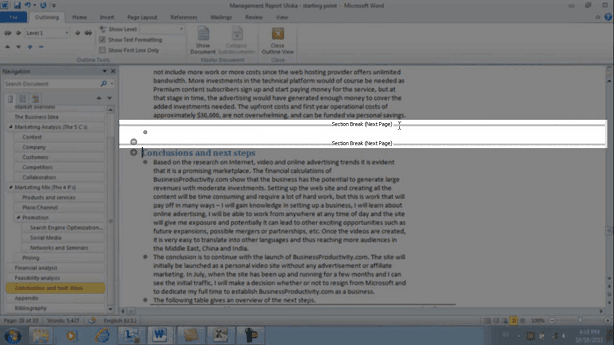
Now, in order to see the numbers properly I want the page to have a landscape layout. To do that I need to insert next page breaks so that Word understands that the landscape layout should only be for this single page. I’ll insert the first break at the end of the preceding section and one at the beginning of the following section.
Click the View tab, and then select Outline view, in order to see that you have inserted the “Next page breaks” properly.
I’ll close down this view and go back to the page where I want the landscape layout, under Orientation I’ll select Landscape.
Then I will right-click and select paste as picture and as you can see I now have a page with financials in landscape mode.
Insert foot notes (04:19)
Now I need some source references in my text. I’ll go back to the beginning, and I’m going to use the zoom slider to zoom in, so we see the text a bit better. If you include information from another source in your document you have to reference that source so that the reader can find the information.
Here, in the “Market overview” I’ve included information about internet users in the United States. So here, I need to insert a footnote so that the reader can find this information. I’m going to go to the source and I’m going to copy information and put into my footnote. But before I do that I’m going to open up the “Clipboard” so that I can copy multiple items and paste into my footnote.
I’ll open up my source and I’ll copy the author, or the speaker in this case, the name of the article, the address, or the URL, and finally the date. I’ll go back to my document, put your marker after the name of the source and to insert a footnote go to the “References” tab click “Insert Footnote”
And then you start with the name, comma, the name of the article, comma, the address, [comma] and then the date. And then I usually take the title and make it in italic. Okay! Now you can see that we have a little number next to the source, and if I hover over the number I will get a comment field, showing me the footnote.
Then just do the same for all of the sources in your document.
Insert reference text under each image (05:56)
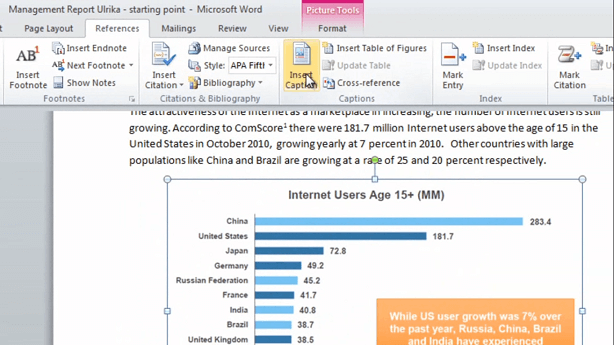
I’ll close down the clipboard. Now I want to add a text to this image:
To do that, I’ll mark the image, go to the “References” tab again, and this time I’ll insert a caption [click “Insert Caption”].
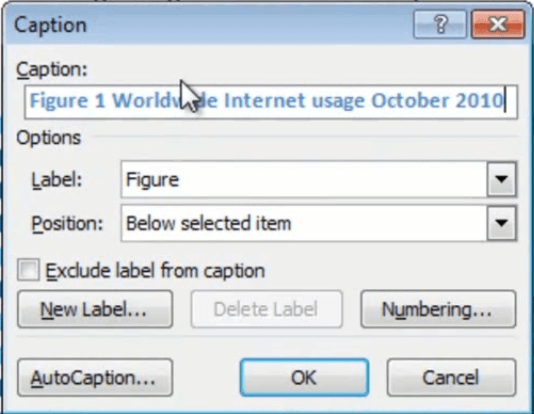
Here I can choose the label, whether it’s a Table, Figure or Equation, and I’ll just keep “Figure”. And then I’ll type in a description for this figure; “Worldwide Internet usage October 2010” and click “OK”.
When you’ve done that for all of your figures we are almost done.
Insert page numbers (06:25)
Now we’re going to insert page number before we do the table of contents. To do that, go to the “Insert” tab and choose “Page Number”. Here you can choose if you want to have it at the top or the bottom of the page. I prefer to have it in the bottom of the page on the right hand side. And then click to close the footer.
Now as you can see, I now have a page number on my cover page. I don’t want to have this, so I’ll double-click the page number and then I’ll just select “Different First Page”,and then click “Close [Header and Footer]”.
Insert a table of contents (06:55)
And now for the final step, we want to insert a table of contents. I’ll go to the first page, click “References”, [click] “Table of Contents” and then I’ll select this second one.
And here it is! We are now done!
Closing
Writing long documents is demanding, but I really hope that after you have watched this video you’ll be able to focus your time and your attention on the contents of your document, not the formatting. So, good luck – I really hope you survive. I’m Ulrika Hedlund for Business Productivity – thanks for watching!


