
Stay up to date with a shared notebook
Introduction (00:04)
When working with others on a project or an initiative you need to share a lot of information with each other – meeting minutes, research, action items, and so on. A great way to keep everyone on the same page is by using a shared notebook in OneNote.
In this video you’ll learn how to share a notebook with others, you’ll learn how to access your notes from anywhere and how to stay up to date to changes others might have made to the notebook. Let me show you!
Sharing a notebook with others (00:33)
Here I have a notebook that I’ve created for a company event we’re planning. Since we’re multiple people working on planning this event, I want to share this notebook.
To share the notebook, click the “FILE” tab and then “Share”.
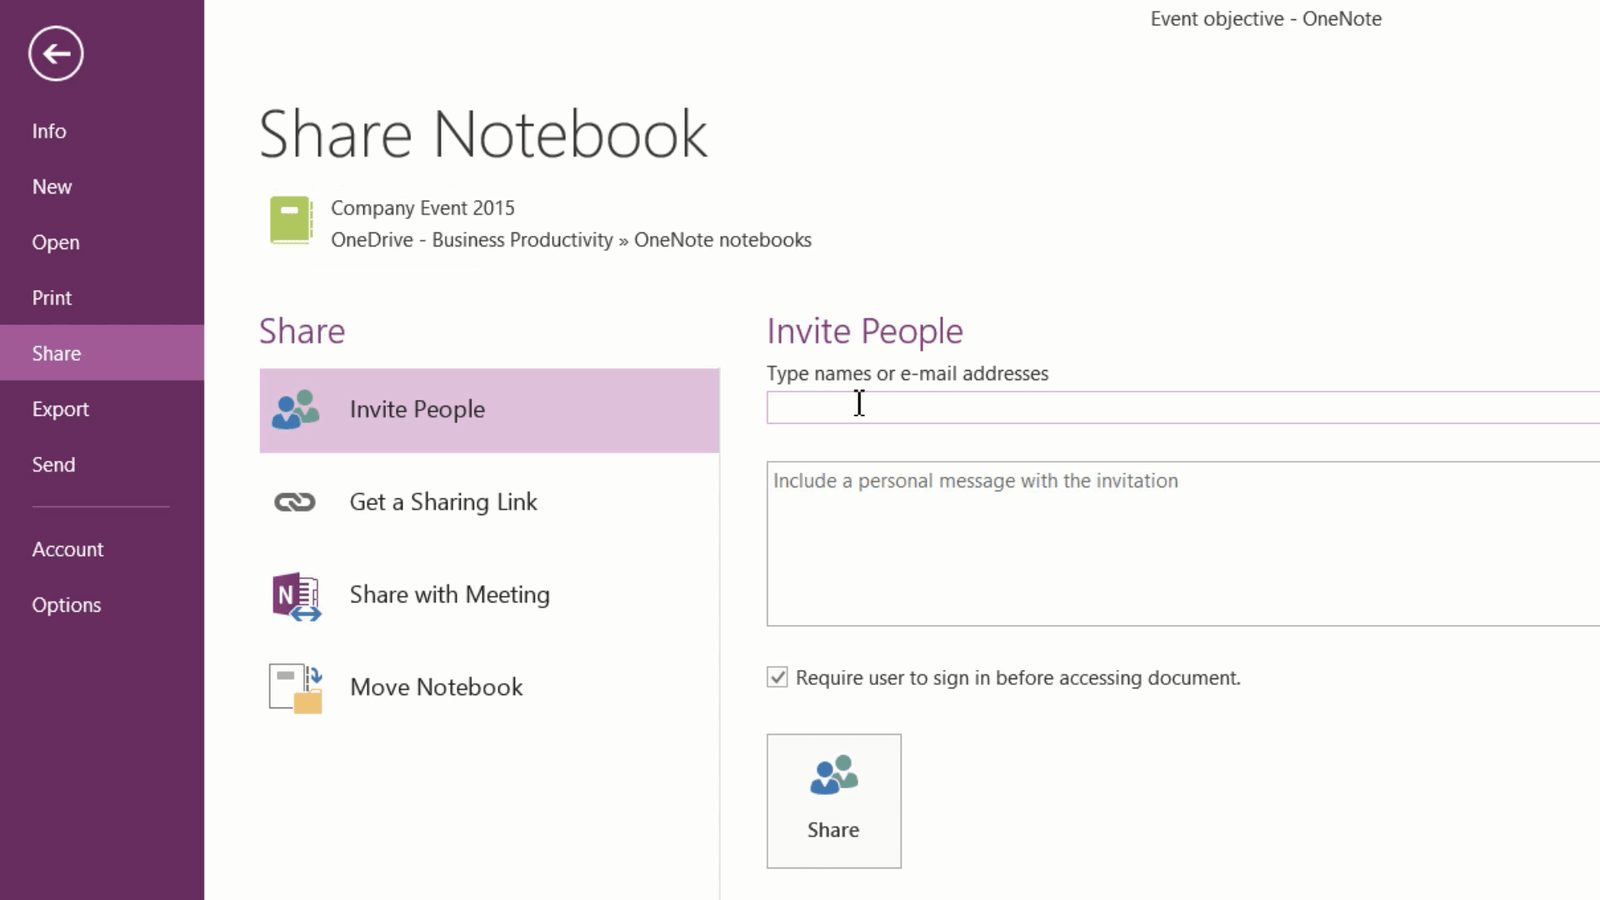
Before you can share a notebook you first need to make sure that it is saved in a place where it’s accessible to others like for example OneDrive which is an online cloud-based file sharing service provided by Microsoft or SharePoint which is a company collaboration platform.
Here I can see the link to where the notebook is stored. This notebook is saved to my OneDrive Business Account. In our organization we can share information with external business partners using OneDrive. Make sure you know what the policies and requirements are in your organization to share company information internally and externally.
Type in the email addresses of the people you want to share the notebook with. I’ll add two of my colleagues Nourah and Jacob. Click the drop down, next to the addressee field to set the permission level. Here you can decide if the invited participants should have editing rights to the notebook or just viewing rights. I’ll leave the default which is editing rights since I want all of us to collaborate on the contents of the notebook. I’ll type in a personal message and then click “Share”. An email is sent with the link to the notebook to all addresses.
Changing permissions to the notebook (02:02)
On the Share tab you can easily see who you have shared the notebook with. At any point in time you can add or remove people and change permissions. To remove a user or change their permission, right-click the user and select “Remove user” or select “Change permission”.

To go back to the notebook click the back arrow.
Accessing a notebook via OneNote Online (02:23)
Let’s switch over to Nourah to see what this looks like for her. Nourah is accessing her email via the browser through Office 365. Here is the email with the link to the shared notebook. To open the notebook she just clicks on the link. The notebook opens up in OneNote Online. OneNote Online is a web application provided by Microsoft free of charge, to enable anyone to access and collaborate on OneNote notebooks from anywhere. You don’t’ have the same rich editing experience as in the rich desktop version of OneNote, but you can still perform a number of actions.
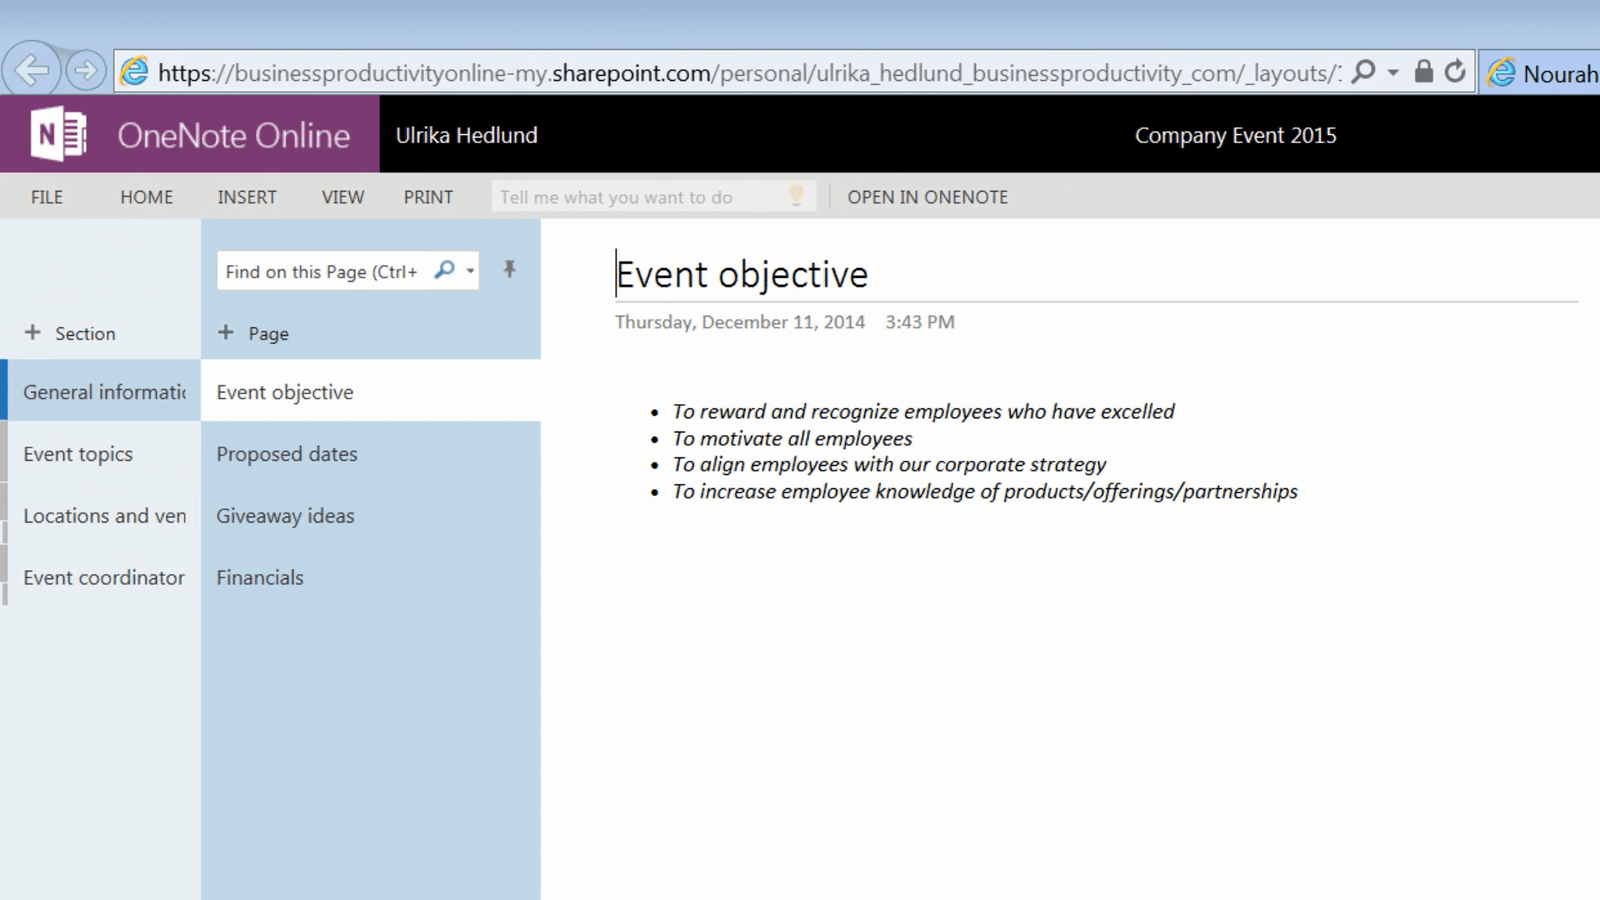
Nourah navigates to the page with recommended keynote speakers and starts adding some of her own suggestions to the list. You never have to worry about saving your changes when you are using Office Online since your changes are saved automatically.
Sharing access to anonymous users (03:17)
Let’s switch back to my PC again. I want to send an email to a business partner called Ariel with a link to the notebook we are using to plan the event. She will not actively be participating in the planning so she doesn’t need editing rights, but I want her to be able to read what we share in the notebook.
To share a notebook with someone, without requiring them to authenticate themselves, click the FILE tab and then “Share” and then “Get a Sharing link”.
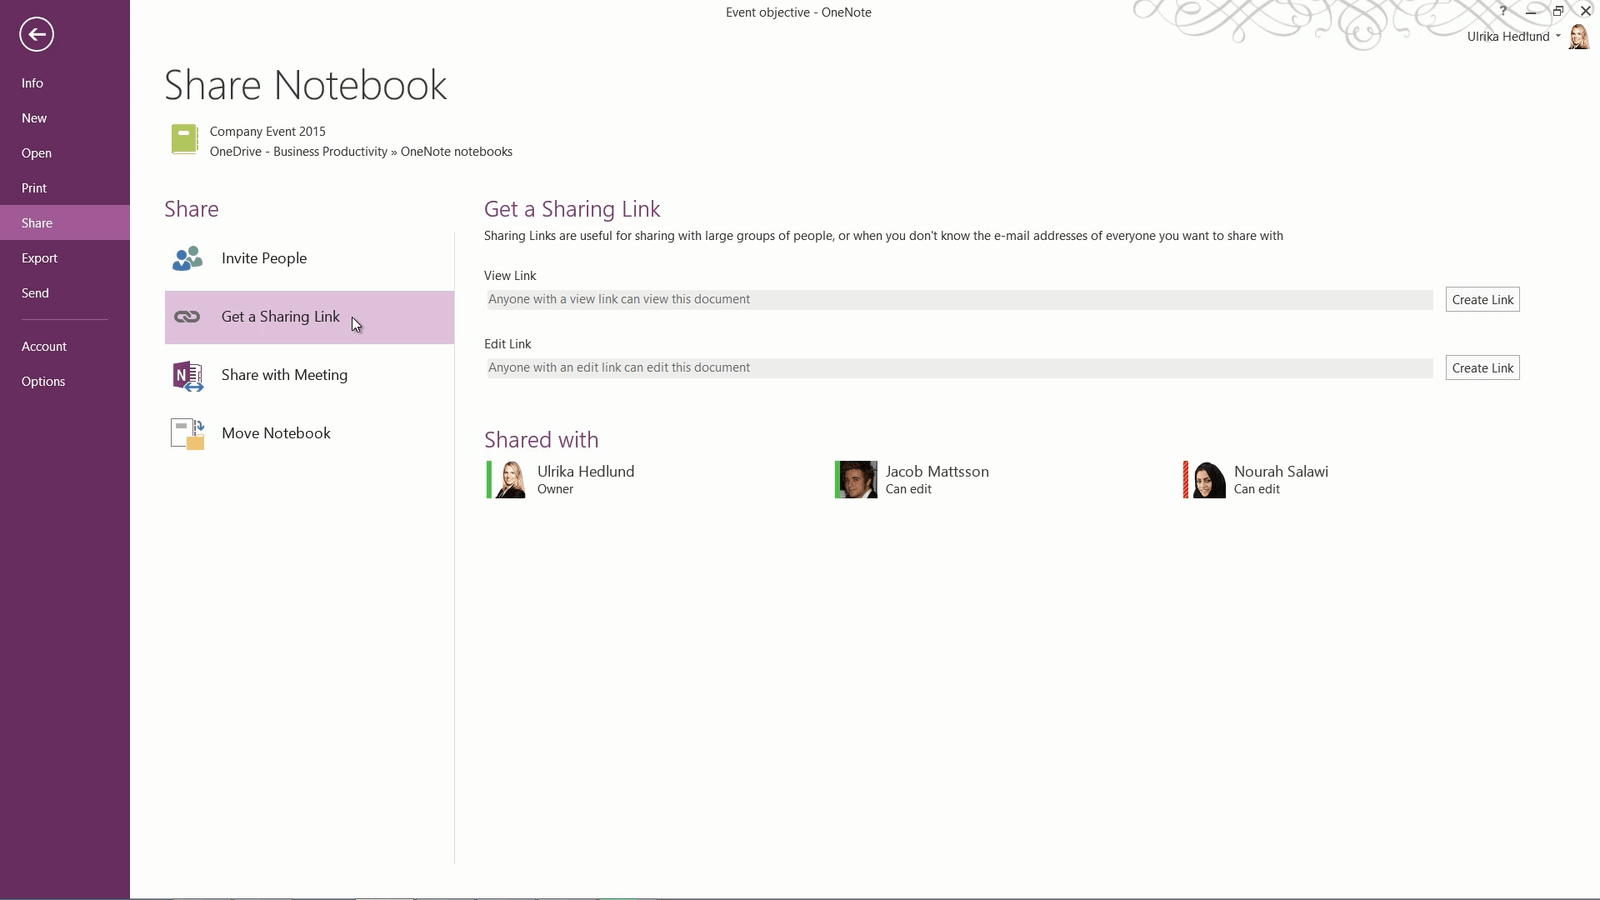
Here you can decide if you want the person to just have viewing rights or if you want them to have editing rights. If you provide editing rights to someone using a Sharing Link, you won’t be able to see the name of the person who has done the changes since they won’t be authenticated. Since I want to share a viewing link I’ll click “Create Link” where it says “View Link”. I’ll copy the link and then paste it into my email to Ariel and send off the email.
Accessing a notebook using a shared viewing link (04:15)
Let’s switch over to Ariel to see what this looks like for her. Ariel receives the email to her Gmail account. From here she can click the link to open up the notebook. Since she doesn’t have to log in to authenticate herself, OneNote just treats her as a “Guest Reader”. She has no ability to edit the notebook, all the editing menus are removed. But she can freely browse the notebook to stay up to date on all the changes that are made.
Synchronizing your shared notebook (04:44)
Now let’s switch over to my PC again. I can see a little green turning circle that indicates that the changes that have been made to the notebook are synchronizing to my PC. As soon as someone makes any change, my notebook is synchronized. You can also force a synchronization by right-clicking the notebook and selecting, “Sync This Notebook Now”.
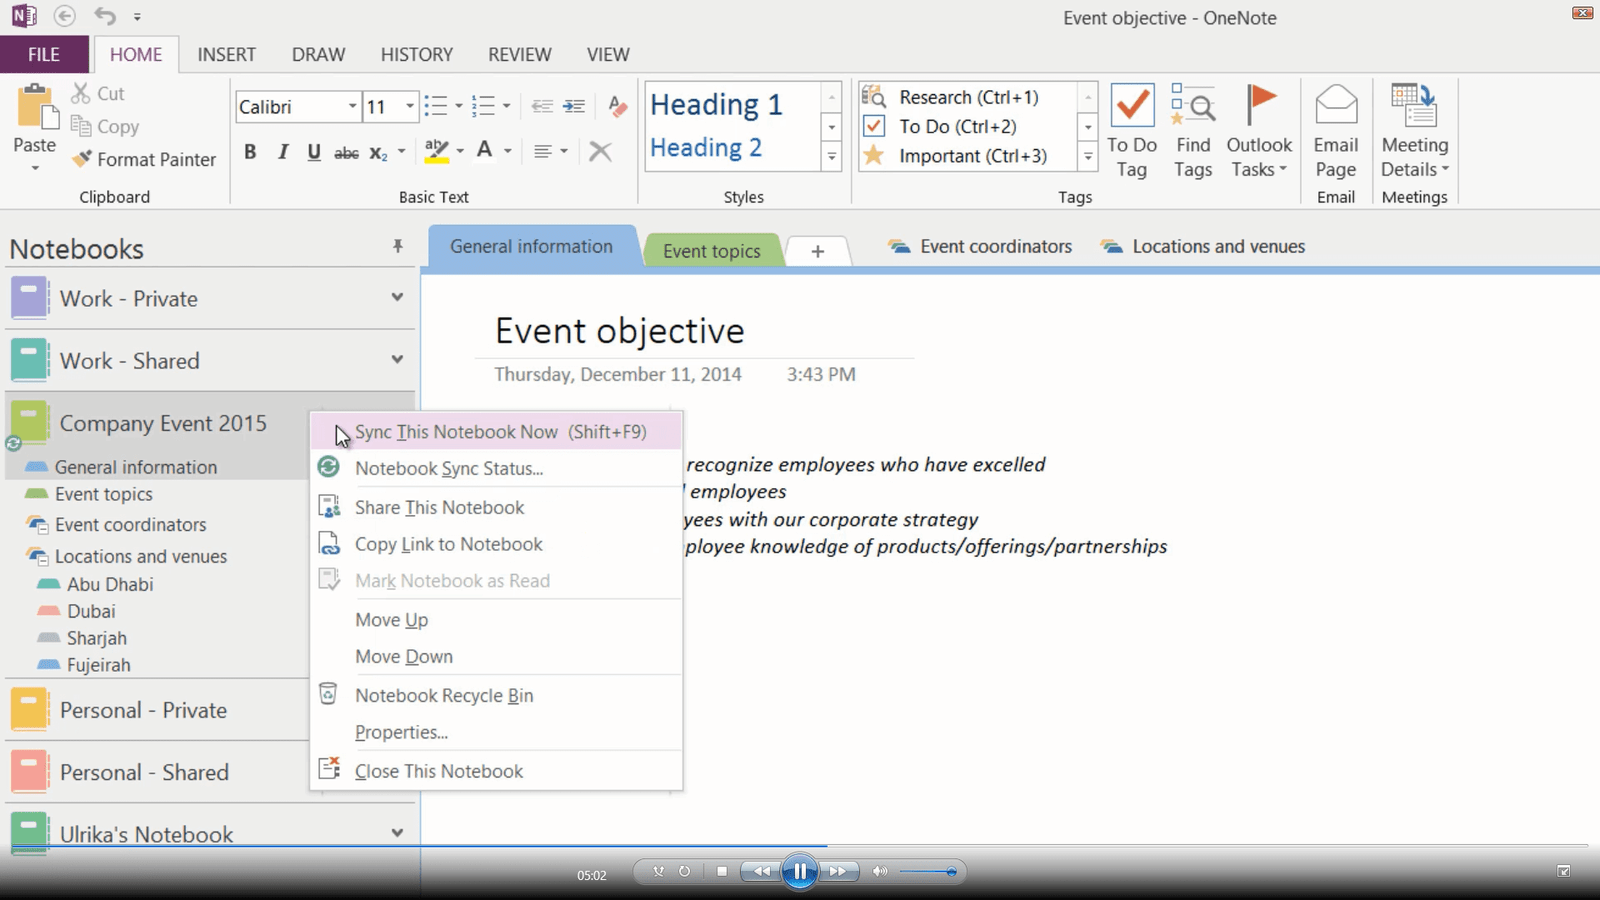
To see the status of the synchronization right-click “Notebook Sync Status”. Here I can see the status of all my notebooks. When all changes have been synchronized you will see message “Up to date” next to the notebook. I’ll close down this window to look at the changes.
Staying up to date on changes made by others (05:26)
All sections and pages that have been changed are highlighted in bold. Here I can see that Nourah has added some more names to the “Recommended keynote speakers” list. All changes are highlighted in green. I can also see Nourah’ s initials next to the text and if I hover over her initials I can see when the modifications where made.
I’ll go to the next section called “Dubai” that is also in bold and go to the page named “Atlantis”. Here I can see changes made by Jacob. To get a good overview of all the changes made to a notebook, click the “HISTORY” tab and then “Recent Edits”.

Here you can select the time frame. I’ll select “Today”. The Search Result panel opens up. You can select how you want the changes sorted, by location in the notebook, by date or by author. I’ll leave the default which is by date. In the search pane I get a summary of all the pages that have been modified and I can easily step through them one by one.
To remove the green highlighting, on the “HISTORY” tab click “Mark as Read”. Here you can select between marking the page as read, or marking the whole notebook as read removing all green highlighting and bold page and section titles. Only the initials of the authors remain. If you want to hide the initials, on the “HISTORY” tab, click “Hide Authors”.
I’ll close down the search pane with the recent edits.
Co-authoring in real-time (06:57)
When you are collaborating on a notebook you don’t have to worry about logging out of the notebook before someone else can make changes. Everyone can make changes at the same time. Here for instance I can see that both Jacob and Nourah are adding text to the same page. Being able to co-author notes together in real-time is extremely powerful and can be beneficial in a number of different scenarios. Once I’m up to date on all of their changes I’ll click “Mark as Read” to remove the green highlighting.
Using page versioning (07:29)
If multiple people are working on the same notebook there might be occasions where you want to go back and see what the initial page looked like before any changes were made. Here I’d like to see if any names have been removed from the initial list of speakers I added. To see previous versions of a page, click the “HISTORY” tab and then “Page Versions”.

You will see subpages of the current page marked with dates. Every time someone makes changes to a page a new subpage is created. To see the original page click the subpage at the very bottom. Here I can see the original page I created with the list of speakers. To restore a previous version of a page, right-click and select, “Restore Version” you can also make a copy of the page if you want to keep both versions.
Here I just wanted to see if any names had been taken off the list, but all names remain. To only show one version of the page again, click “Page Versions”.
Saving a snapshot of your notebook (08:33)
Now I want to share a snapshot of the notebook with a potential vendor. I don’t want to give continuous access to the notebook since I don’t know if we will be working with the vendor or not. To export a snapshot of your notebook to for example a PDF file , click the “FILE” tab and then ”Export”.
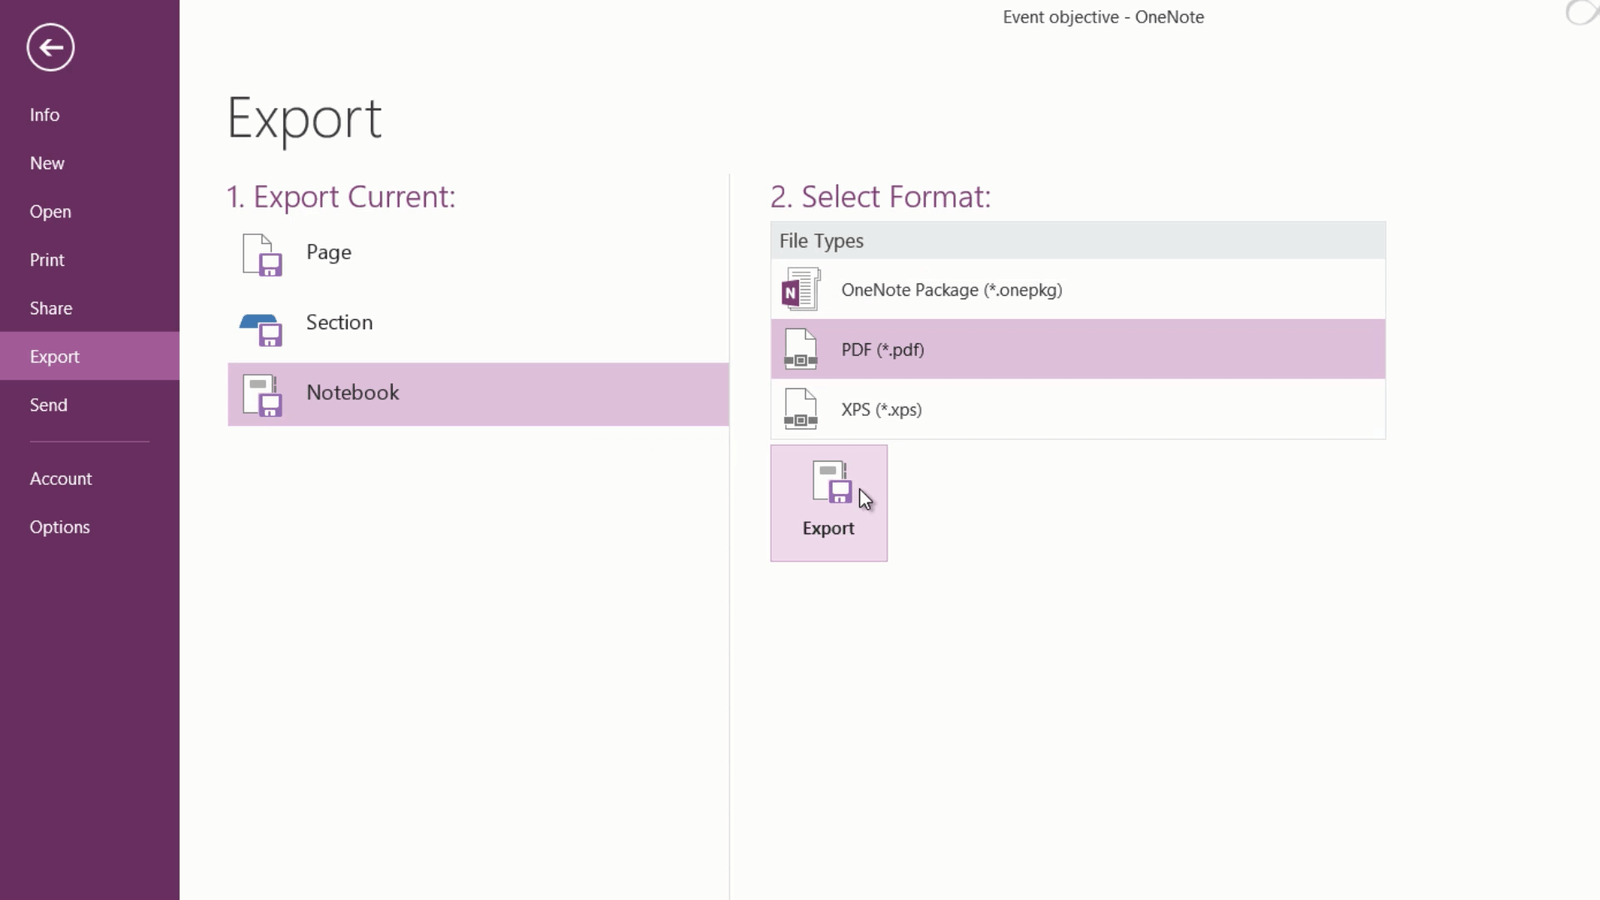
Select what you want to export – a single page, a section or the entire notebook. Here I’ll select the entire notebook. Then select which format you want to export the notebook to, here I’ll select PDF and then click “Export”. You notebook is converted into a pdf document with multiple pages. Now you can easily share the pdf document with others. I’ll add the pdf file as an attachment to my email and send it off.
Closing (09:25)
As I hope you have seen, sharing a notebook with others using OneNote is extremely flexible. You can share notebooks in a number of different ways to make sure everyone stays up to date on the information they need.