
Share calendars for easier scheduling
Introduction (00:03)
Scheduling a meeting with many attendees can be a nightmare if you don’t have access to everyone’s calendar to see when they are available. In this video you’ll learn how to share your calendar with colleagues and external business partners and you’ll learn how to effectively schedule meetings with multiple people.
Scheduling a meeting (00:23)
I want to schedule a meeting with some of my colleagues next week to discuss a customer engagement we are working on. To schedule a meeting I’ll just click “New Meeting” and enter the date and time for the meeting. Or, I can go to the date in my calendar, mark the time for the meeting, right-click and select “New Meeting Request”. I’ll click the “To” button and then select the people I want to invite from our company directory. I’ll hold down CTRL to mark multiple people that are required in the meeting. I’ll add Jacob as optional since he is not required in the meeting but he is welcome to join if he wants to. If your organization has entered conference rooms you can add them from here to the “Resources”. I’ll select our “Conference room” and then click “OK”.
To see the availability of my colleagues I’ll click “Scheduling Assistant”.
By default I can see when people are free or busy. I can see here that Nourah is away during the suggested time. In the top bar you can see a consolidated view of everyone’s availability. Here I can see that everyone seems to be available between 10 and 11 am, so I’ll select that time slot instead, by just marking it with my mouse and dragging the time bar so that the meeting is the full hour. To go back to the meeting invitation I’ll click “Appointment”. In the subject field I’ll type in what we are supposed to meet about, “Customer launch planning”.
Saving an Agenda Table as a template (01:57)
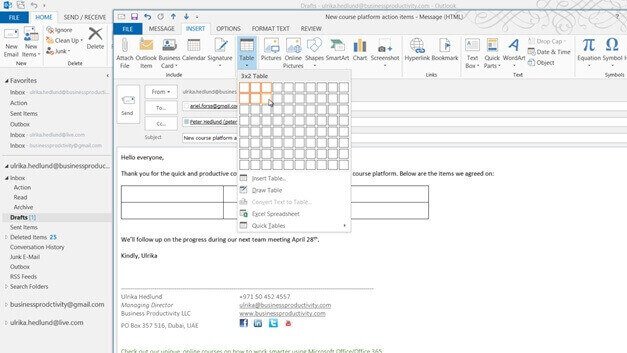
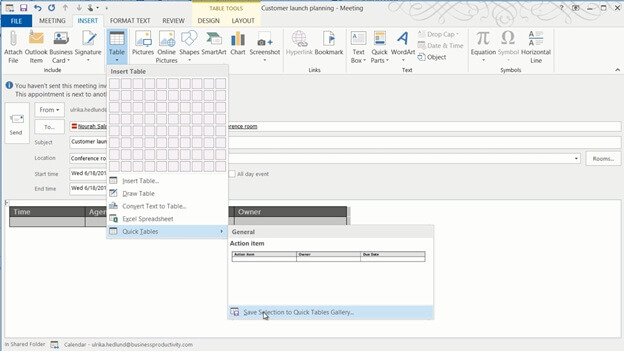
To insert an agenda in the body of the invitation I’ll click “INSERT”, “Table” and then I’ll select my Agenda table that I’ve added as a template. To create an agenda table template click “INSERT”, “Table” and then select a 3×2 table. I’ll name the columns items: “Time”, “Agenda item” and “Owner”. I’ll format the table by making the heading background color grey and the text white and bold. When I’m done formatting the table I’ll mark it, click “INSERT”, “Table”, and then “Quick Tables”. Here I’ll select to “Save selection to Quick Tables Gallery…”. I’ll name it “Agenda” and click “OK”.
Now I can use this template whenever I need an agenda. I’ll fill out the information in the agenda table and then I’ll send off the meeting invitation. Later, to track who has accepted the meeting invitation and who cannot make it, I can open up the meeting invitation and click “Tracking”.
Sharing calendar details with your colleagues (03:04)
By default, other people in your organization can see when you are free and when you are busy. But the calendar becomes even more powerful if you share more details with your colleagues. Before you share your calendar you should make sure that any private appointments are marked as private. To mark an appointment as private, mark the appointment and then click the Private symbol on the “APPOINTMENT” tab, or just right-click and select “Private”. You will see a little lock on all your private appointments.
To share your calendar, go to the “HOME” tab and click “Share Calendar”. Select who you want to share your calendar with. Select how much information you want to share. “Availability only”, “Limited details” or “Full details”. I always recommend that you choose “Full details”. Remember: none of your private details will be shown. You can request permission to view the recipient’s calendar as well. To start sharing, click “Send”.

Another way to share your calendar, without sending email to selected employees, is to change the default sharing permissions of your calendar. To change the settings click “Calendar Permissions” and then click the Permission Level drop down and change from the default “Free /Busy time” to “Reviewer”.
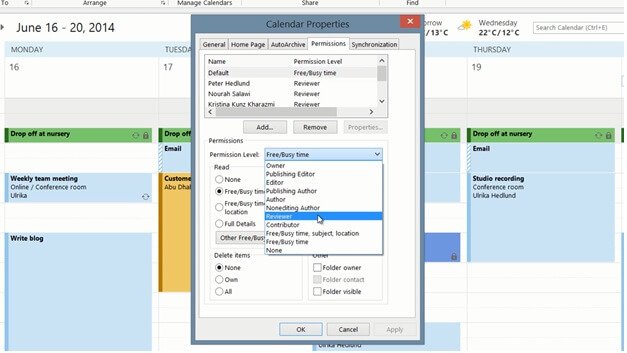
A Reviewer can see your appointments but not make any changes to your calendar. Now all employees within your organization will be able to see appointments that aren’t marked as private in your calendar. I’ll click “Apply” and then “OK”.
Using shared calendars (04:38)
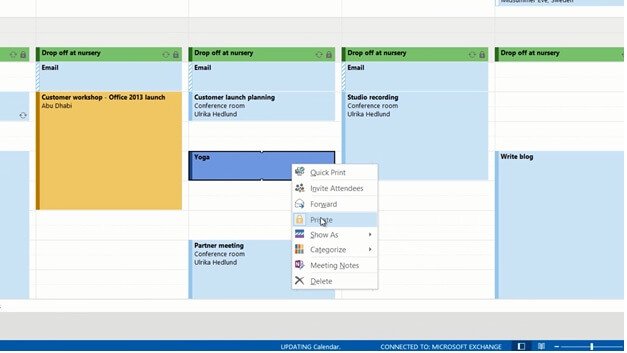
Now I want to schedule a lunch meeting with the marketing team. I want to make sure that they are in the office on Thursday, so I’ll click the “Day” view to see only Thursday. Instead of just seeing when they are free and busy I want to see more details by opening up their calendars. To open up someone else’s calendar, click “Open Calendar” and then select “From Address Book”. Here I’ll select the people in the Marketing team that I want to schedule a meeting with. I’ll hold down CTRL to select multiple people. Now everyone’s calendar opens up side by side, I can see what they have scheduled so it’s easier for me to pick a good time for the meeting. Since everyone in the Marketing team have shared their calendar with me I can see more information about their appointments. Here I can see that Peter has an appointment in Abu Dhabi in the morning so I’m not sure he will make it back to the office for a lunch meeting. To make sure, before I schedule the meeting, I’ll see if he is online and send an instant message and ask. Since Peter is a person I frequently communicate with I’ve added him to my “Favorites” in the “People” tab. I can see he’s online so I’ll send him an instant message: “Peter, can you make it back from Abu Dhabi for a lunch meeting at 1 pm on Thursday the 19th? And I can see here that Peter replies, “No problem, I’ll be there”. Great, now I can go ahead and schedule the lunch meeting with everyone in the team. To create a meeting request with everyone I’ll click the “Schedule View” and mark the time in the time line. I’ll right-click and select “New Meeting with All”.

I’ll write the subject and then a short text in the invitation. Since this is an informal meeting I won’t include an agenda and then I’ll send it off. I can directly see in everyone’s calendars that they have received the invitation for the lunch meeting. To go back to my normal calendar view I’ll deselect the “Shared Calendars” and switch to a week view.
Creating a Group Calendar (06:33)
Since I often schedule meetings with the Marketing team I can create a group calendar so that I have it easily accessible. To create a group calendar, right-click your calendars and select “New Calendar Group”.

Give it a name, I’ll name it “Marketing team”. Right-click the calendar group and select, “Add calendar”. Select the people you want to add to your calendar group. Hold down CTRL to select multiple people, and then click “OK”. And there, now I have the marketing team’s calendars available with just a single click.
Share your availability with people outside your organization (07:08)
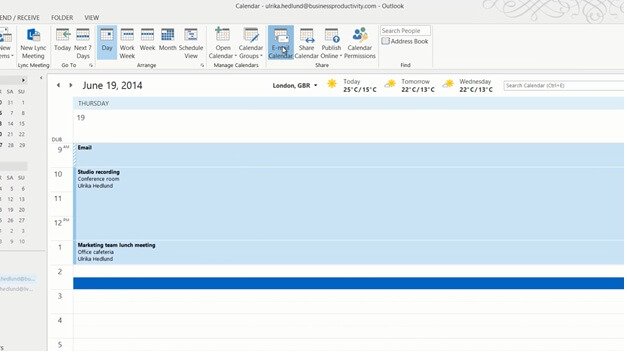
In addition to sharing your calendar with people inside your organization, it’s quite common that you need to share calendar details with business partners outside of your organization. I frequently need to share calendar details with our PR agent Sarah, who works for an external vendor. To share a snapshot of your calendar with someone else click “E-mail Calendar”.
Select the “Date Range” you want to share, I’ll select the “Next 30 days” and then select how much information you want to show. Here I’ll select “Limited details”. A printout of my calendar for the next 30 days is inserted into the body of the email.
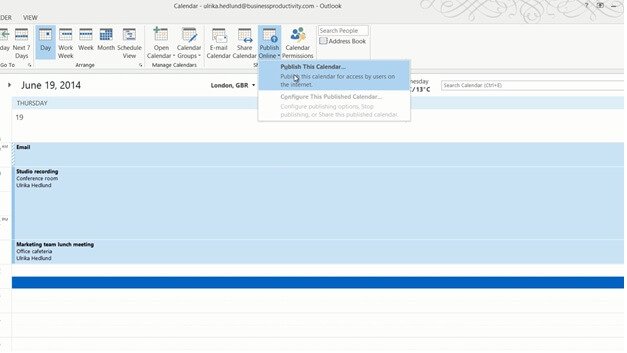
Instead of sending Sarah an email with a snapshots of my calendar I can share my calendar with her over the Internet. To share your calendar with someone outside your organization, click “Publish Online” and then select “Publish This Calendar”.
Select how much information you want to share, and what date range. Since I only use this for scheduling I don’t need others to see historical data. So I’ll just change this to 1 day before today and 30 days after today. I’ll keep the Access Level to “Restricted” which means that only people with this link can see my calendar. And then I’ll click “Start Publishing”. Now you can share this link with anyone outside your organization you want to give access to your calendar.
I’ll copy the links to the clipboard, click “Save” and then I’ll paste these links into an email to Sarah. Sarah can then click on the link to open up a view of my calendar in a browser. Now it’s much easier for her to schedule meetings for me since she knows when I’m available.
By sharing calendars and by knowing how to effectively access other people’s calendars it will be much easier for you to schedule meetings in the future.