
Review a document using Track Changes
Introduction (00:04)
When you’re working on a document it’s very beneficial to ask others to review it for you and to track the changes they make to the document. In Word 2013 Microsoft has introduced a new, cleaner view of tracked changes and a richer experience for adding comments and replying to comments. Let’s have a look!
Inserting comments into a document (00:25)
Here I have a proposal that I’ve been working on for a customer. Before I send it off, I’d like to ask Nourah to review it for me. First I’ll add some comments to the document highlighting things I want Nourah to give feedback on.
To insert a comment into a document, mark the text or object you want to comment on, click the “REVIEW” tab and then click “New Comment”. Now you can add your text into the comment bubble.
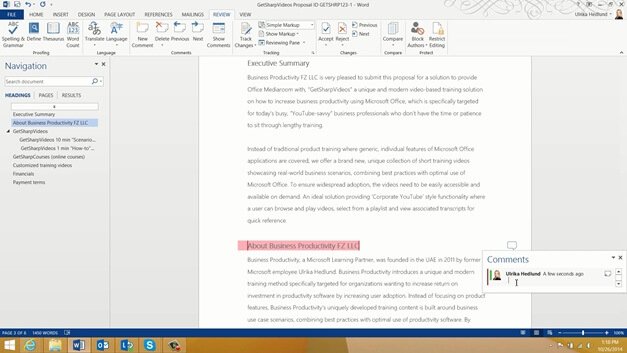
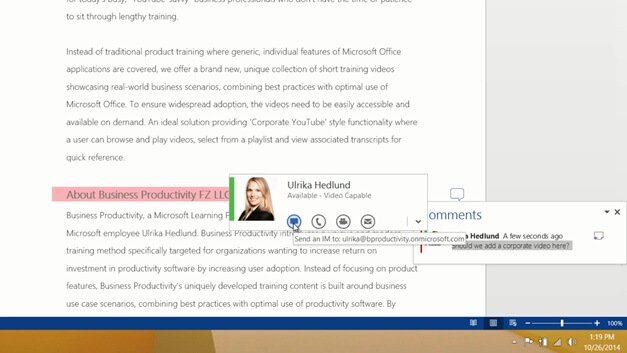
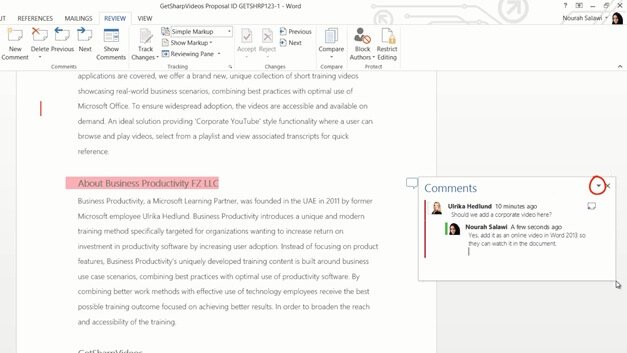
Here I’ll ask if we should insert our corporate video into the document. If you have a profile picture added to your Office account, it will show up next to the comment. This provides the reviewer with a quick overview of who has added the comment. If you are using a real-time communication platform like Microsoft Lync you can also see if the person is online and communicate with him or her directly from within the document.
I’ll insert another comment further down in my document by clicking the paragraph heading in the navigation pane. I’ll mark the section and ask Nourah to insert a picture.
Now I’m ready to ask Nourah to review the document.
Turning on Track Changes (01:36)
To make sure that any changes that are made to the document are tracked, on the “REVIEW” tab click “Track Changes”. However, this is quite easy for someone to turn off by just clicking the “Track Changes” button again.
If you click the little arrow on the Track Changes button you will see the option to “Lock Tracking”. This is a great option if you want to make sure that everyone who reviews the document tracks their changes.
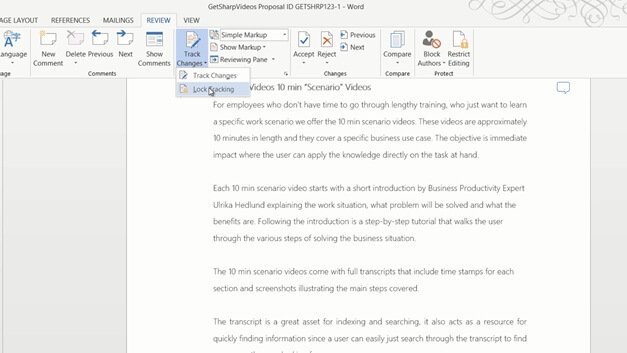
I’ll click “Lock Tracking” and enter a password. Now the “Track Changes” button is greyed out and it can’t be turned off without entering the password.
Adding Track Changes to the Status Bar (02:15)
Sometimes it can be hard to see if Track Changes are on or off, especially if you don’t have the “REVIEW” tab open. I recommend that you add Track Changes to your Status bar so that you can always see if there on or off. To do that right click the Status bar and select “Track Changes”.

Now you can easily see if track changes are on or off when you are working on a document.
Sharing the document via email link (02:46)
I’ll save the document and then ask Nourah to review it. To share the document, I’ll click “FILE”, “Share”, “Email” and then, since I have this document shared on our SharePoint intranet site where my colleagues can access it, I’ll click “Send a Link”. This way we avoid sending multiple, large email attachments and we can all see the latest changes made to the proposal. I’ll write the email to Nourah asking her to review the document for me before I’ll send it off to the customer tomorrow morning.
Let’s switch over to Nourah to see what this looks like for her.
Reviewing a document and tracking your changes (03:20)
Here we are logged in as Nourah – ready to review the document. To review a document, click the “REVIEW” tab and make sure that “Track Changes” is turned on. In this case the Track Changes have been locked down so they can’t be switched off without a password. Then you can start making your changes. All changes – deletions, insertions and formatting changes are tracked.
In the “Tracking” section on the “REVIEW” tab you can decide how your changes are displayed. In Word 2013 there is a new default view called “Simple Markup”. This view is less cluttered. It shows a red line where changes are made.

To see the changes just click on any red line to see the full markup. To collapse the view and go back to the Simple View click any red line again. You can also select view in the Tracking Display drop down. To see the full markup click “All Markup”.
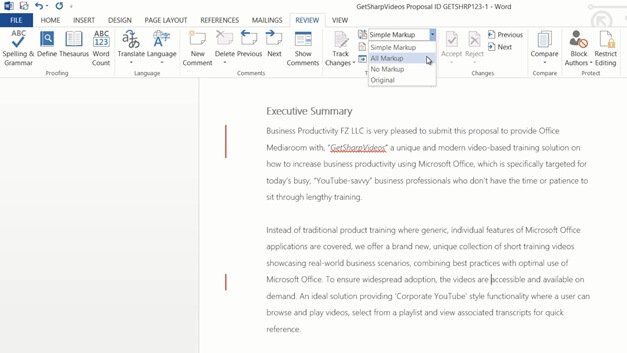
To see the document with all of your changes applied click “No Markup” and to see the original document, without any of your changes applied, click “Original”. Here I’ll go back to the “Simple Markup” view.
Responding to comments (04:38)
In Word 2013 reviewers can easily respond to comments, keeping discussions related to documents organized. Here, Nourah responds to my comment regarding adding an online video. You can easily resize and move comments around by clicking the little arrow in the “Comments” window.
When Nourah is done reviewing the document she saves her changes and sends an e-mail to Jacob with a link to the document asking him to review the document as well.
Accepting or rejecting changes (05:09)
Now I’m back looking through the document that both Nourah and Jacob have reviewed. To accept or reject changes that have been made to a document click the “REVIEW” tab. Here I’ll click “Track Changes” and then “Lock Tracking” to unlock the Tracking of the document. Here I’ll insert my password.
To get a good overview of all the tracked changes that have been made to a document, on the “REVIEW” tab, click “Reviewing Pane” here I’ll select “Reviewing Pane Vertical”. Here I can see that 18 revisions have been made in total and I can see that Nourah and Jacob have made a number of different changes to the document.

I’ll change the display of the tracked changes to “All Markup” to see all changes. To start going through tracked changes, place your marker at the beginning of the document and click “Next” in the “Changes” section.
This takes you to the first change made. Here I can see that the text “for a solution” was deleted. I can hover over the change to see who made it and when.
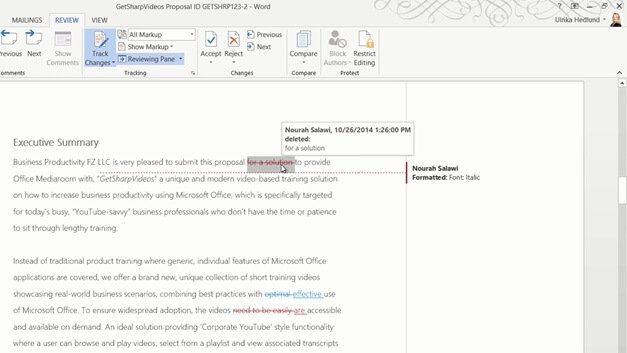
To see this information as a balloon instead I can click “Show Markup”, “Balloons”, and then select to “Show Revisions in Balloons”. Now the details of the deletion are showed. I’ll accept this change and move to the next. Here I can see that Nourah has changed the formatting to Italic, I don’t agree with this change so I’ll just click “Reject” to keep the original formatting. I’ll continue to accept and reject changes in the document as a see fit. Here Word stopped at the comment. I can see that both Nourah and Jacob have replied positively. To delete a comment, go to the “Comments” section and click “Delete”. By deleting the first comment, the whole thread is deleted.
Accepting all changes in a document (07:04)
If you agree with all proposed changes in the document you can just click “Accept All Changes” in the document. Here I’ll select “Accept All Changes and Stop Tracking”.

Now I can see in the “Reviewing Pane” that no more revisions remain.
Inspecting your document for revisions (07:21)
Another great way to make sure that you don’t have any hidden comments or changes is to inspect the document. To inspect your document click the “FILE tab, “Check for Issues” and select “Inspect Document”.
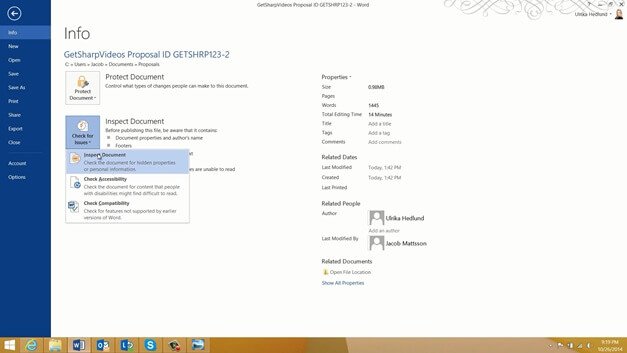
I’ll save the document and then I’m asked what I want to inspect the document for. Here I’ll uncheck all options except for the first which is to check for comments, revisions, versions and annotations. Here I can see that “No items were found” so I can be sure that there are no hidden revisions here. Now I’m ready to share the document with my customer.
Comparing documents (08:00)
Yesterday I sent a blog article called “How to deliver a successful presentation” to Jacob for him to review. Here he has sent me the document with his changes. I’ll open it up to see what changes he’s made. Unfortunately the Track Changes wasn’t turned on, so there’s no way for me to know what changes he’s done to the document. Luckily there is a way for Word to find these changes by using the compare tool.
To compare two documents, click the “REVIEW” tab and then “Compare”.

First select the original document, here I’ll open up the document I sent to Jacob for him to review. Then open up the revised document where the changes were made. You can choose to label the changes, here I’ll mark them with Jacob’s initials JM and then click “OK”.

Now you can see the original document up to the right, the revised document with his changes underneath and the document with the marked changes to the left. In the “Revisions” pane I can see that he made 5 changes to the document.

Now I can use the Reviewing tools to walk through the changes one by one. I’ll approve the changes he made and then when I’ve gone through all changes I’ll save the document.
Many people find the tracking feature of Word a bit difficult to use, but once you get the hang of it, it’s a really useful tool that can save you a lot of time when collaborating on documents.