Present to an online audience
Introduction (00:04)
More and more often you need to present to people who aren’t physically in the room. In Microsoft PowerPoint 2013 you can share your slides over the Internet using a free service called “Office Presentation Service”. To use it all you need is a registered Microsoft Account. Anyone who has a browser and an Internet connection who has been invited to the meeting can join. Let’s see how it works.
Overview of the presentation to present online (00:31)
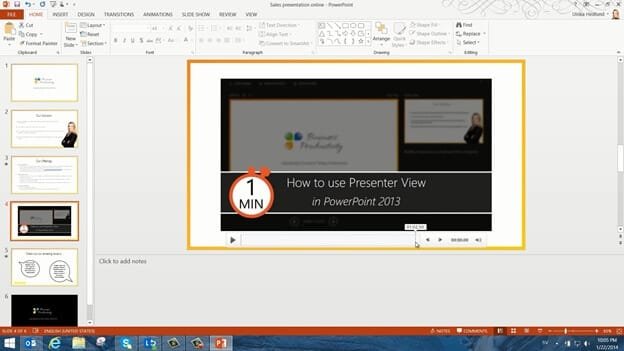
Here I have a presentation about our company and the services we offer, that I’m going to present over the Internet to a prospective client during our phone conference.
Before our phone conference I want to prepare my slides for the online presentation. My presentation contains slides with text, images, animations and videos.
In the previous version of PowerPoint you were not able to show videos online, they would just appear as still images. In PowerPoint 2013 Microsoft has introduced support for videos so now you can play videos with audio streamed over the Internet.
Optimizing videos for online view (01:10)
In this presentation I have two videos, both of them are rather short so they should be ok. The videos can’t be too large for online presentations. The videos should be in an MP4 format for them to play properly online. To make sure these videos are in the proper format I’ll click “FILE” and then “Optimize Compatibility.”
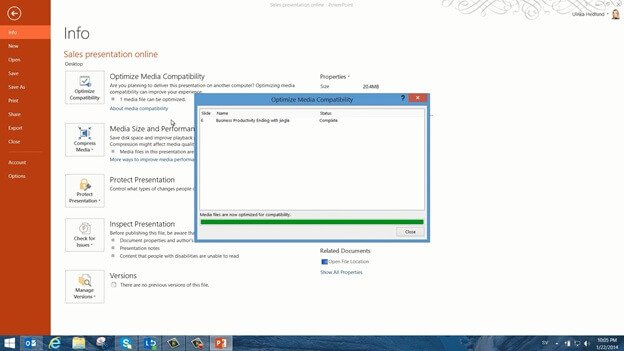
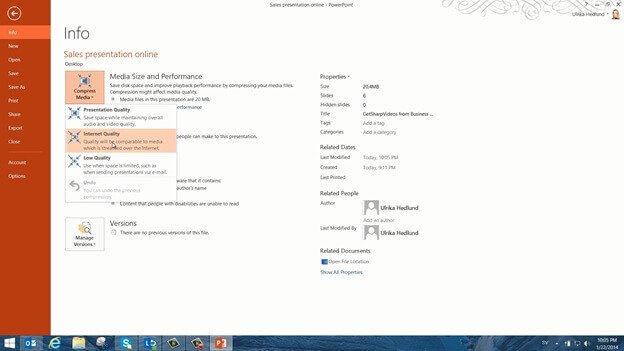
This way PowerPoint will make sure that the video format is supported for viewing online. I can see that the second video in my presentation was optimized. I’ll click “Close” and then I’ll click “Compress Media” and select “Internet Quality” to see if I can reduce the size of my videos even more while keeping a quality that is sufficient for the Internet.
In this case I wasn’t able to compress the videos a lot more, but it’s a good practice to always see if you can compress your videos. I’ll click “Close” and go back to my presentation.
Embedding fonts for online view (02:05)
When you deliver your presentation over the Internet to an online audience you should look out for non-typical fonts. In this slide I’m using a font that is not available in the PowerPoint Web App which is used by the Office Presentation Service to display the presentation to the attendees.
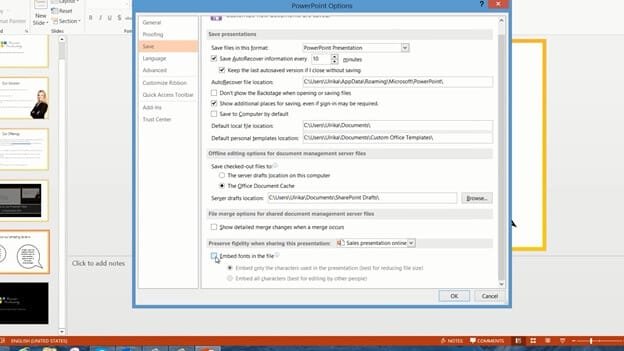
If the font is not available it will be replaced by another font, so the text in these speech bubbles would look like this instead. In order to ensure that your text looks exactly the same online as it does in your presentation you can select to embed the fonts. To embed fonts into the presentation file, click “FILE”, “Options”, and then “Save”. Scroll down to the bottom and mark the option “Embed fonts in the file”. Leave the default option which is to “Embed only the characters used in the presentation” and then click “OK”.
Next time I press “Save” the fonts will be embedded into the file itself. This won’t work with fonts you have purchased that have restricted licensing rights, but it works fine for the fonts included in Office.
Removing hidden data in your slides (03:15)
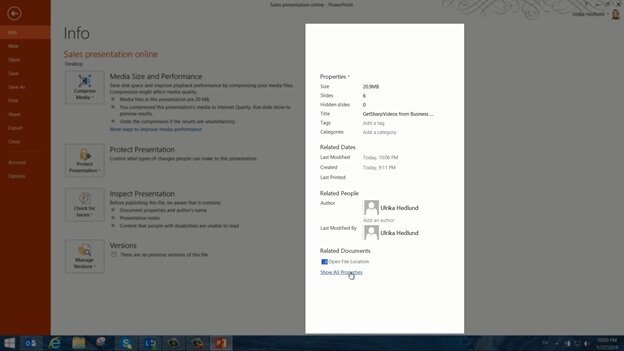
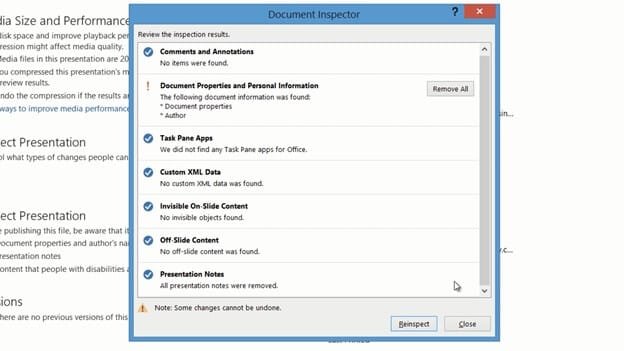
On almost every slide I have presentation notes. I want to share this presentation deck with my customer so I want to make sure it doesn’t contain any personal data. To see the document properties and to remove all the presentation notes from my slides I’ll click “FILE”. Here in the “Info” section I can see all the properties of my document. There is nothing sensitive here so I can keep the document properties.
I do however want to remove the presentation notes. I’ll click “Check for Issues” and then “Inspect Document.” Here I can select which property data I want to inspect my document for. I’ll just mark all of the check boxes to see what the presentation contains. Then I’ll click “Inspect.” Here I can see that the file contains “Document Properties and Personal Information” and “Presentation Notes”. I’ll click “Remove All” next to the “Presentation Notes”. Now I can safely share this presentation confident that it doesn’t contain any sensitive data.
There! Now I’m ready to upload the presentation to the Office Presentation Service.
Initiating the online presentation (04:25)
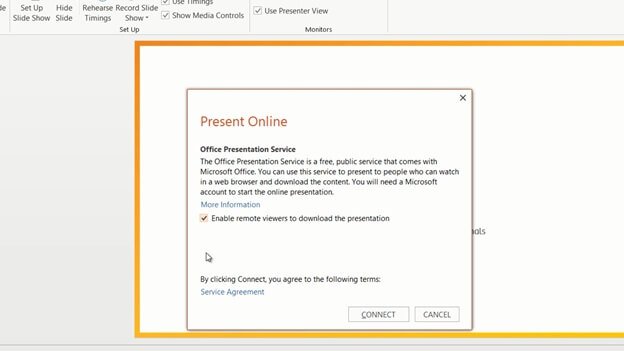
To get started with the online presentation, click the “SLIDE SHOW” tab, “Present Online” and then “Office Presentation Service”.
Anyone who has PowerPoint 2013 and a Microsoft account can use this services free of charge. All the attendees need is an updated browser and an Internet connection. Here you have the option to “Enable remote viewers to download the presentation”. In addition to being able to download the presentation, the viewers can also step through the slides independently, at their own pace.
If you don’t want your attendees to be able to download the presentation or view it independently just leave this option unmarked.
You are unable to change this setting once you’ve connected to the Office Presentation Service, so if you’re unsure it’s better to leave it unmarked. I’ll click “CONNECT” to start the upload of the presentation. I’ll have to wait until the entire slide deck with the video and embedded fonts is uploaded and processed. Since this takes a while it’s good to do this ahead of time, before the start of your presentation.
Inviting attendees to the presentation (05:30)
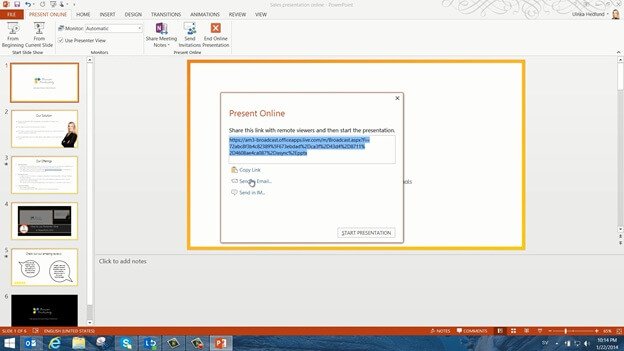
When the presentation has been uploaded I’m given three different options for how to share the presentation.
I’ll copy the link, open up an email that I’ve already prepared, paste in the link and send the email to my costumer.
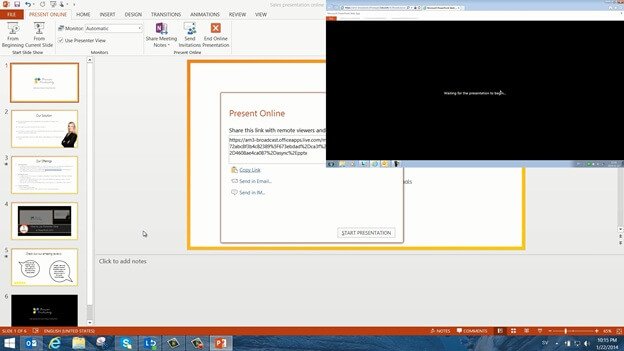
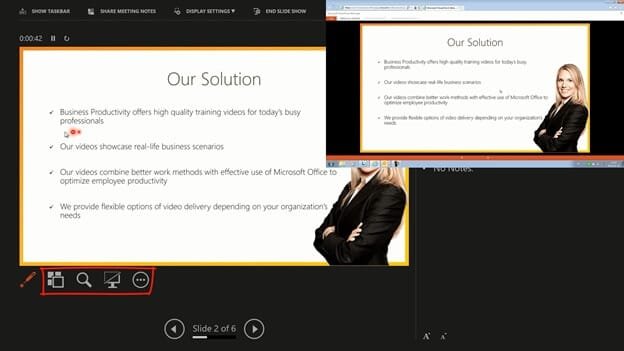
In the top right corner of the screen you can see what the presentation looks like for the online audience.
If the attendees click on the link before I’ve stated the presentation they will just see a black window with the text, “Waiting for the presentation to begin”.
Starting the presentation (06:00)
When it’s time for me to start presenting I’ll just click “START PRESENTATION”. The slide is shown to the online audience and depending on their Internet bandwidth there might be a slight delay. I’ll right-click and select “Show Presenter View” so that I can get a better overview of my presentation.
As you can see, this view is only visible to me, the audience sees only the slide.
Unlike when you present live, you can’t use the highlighting tools when you present online. The pens are greyed out, the laser pointer is available, but as you see it doesn’t show on the audience screen. The other tools in the Presenter View are available so that you can easily navigate your slides as you present.
The attendees view (06:42)
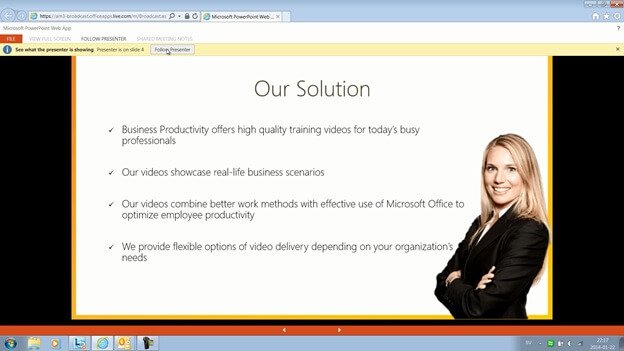
If you as a presenter move to fast for the online audience they can easily go back and forth in the presentation by pressing the navigation arrows at the bottom of the slide, or using their keyboard. Doing this doesn’t interrupt the presenter or change anyone else’s view. If the viewer wants to get back to the slide that you as the presenter is currently showing they just click “Follow Presenter”.
Whether or not you have given the viewers the ability to browse the slides independently, all viewers have media controls on the videos in the presentation so that they can play and pause the videos.
Editing your slides while presenting online (07:18)
At any time during the presentation you can go to the top menu in the presenter view and click “END SLIDE SHOW”. This does not end the online presentation. Your audience still sees the last slide you showed them.
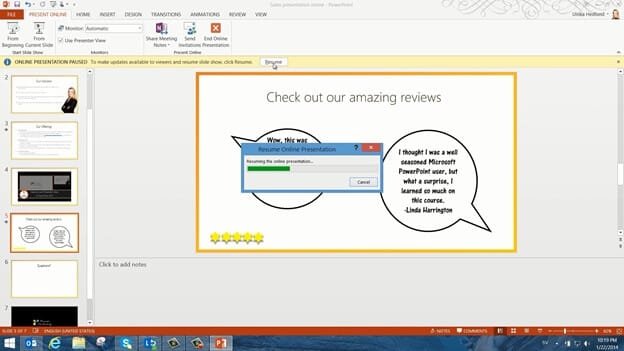
If you need to add something to your presentation or edit the slides, you can do this during your online presentation. The audience will see the last slide you were showing. Here I’ll add an additional slide to make room for some questions at the end. To resume the presentation again I’ll press “Resume”. It takes a while to resume the online presentation so only do this if you feel that it’s absolutely necessary and if it doesn’t cause too much disruption to your presentation.
As you can see the additional slide has been added to the online presentation without the audience noticing that you just inserted the slide.
Downloading the presentation (08:11)
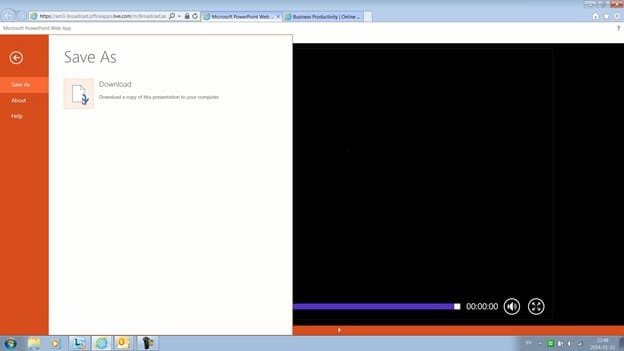
Before you end the online presentation you should ask you online audience to download the presentation. They do this by clicking “FILE” and then “Download”. The full presentation with embedded fonts and videos will be downloaded.
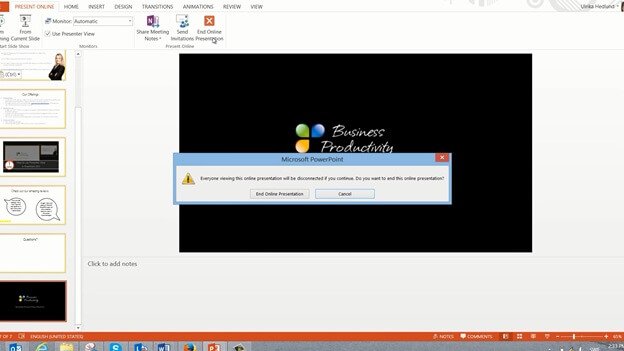
When the audience has downloaded the presentation I’ll click “END SLIDE SHOW” and then “End Online Presentation”. I’ll get a warning message saying that everyone who is watching will be disconnected. To confirm I’ll press “End Online Presentation” again.
There! Now I have successfully delivered a presentation to an online audience over the Internet.


