Organize your contact directory
Learn how to organize your contacts in Outlook 2010
Introduction (00:04)
Welcome to Business Productivity – I’m Ulrika Hedlund. As I shared with you in a previous video when I was growing up I used to have a paper calendar, a Filofax, where I kept all my important information. At the back of the FiloFax I had my address book where I wrote down all phone numbers and addresses to people I knew. Then, when I got my first mobile phone I entered all phone numbers into the mobile phone book. And then, when I started using email I put down all email addresses in the email application. I’m sure many of you can relate to having contact information in many different locations. It’s a nightmare to manage. Today I store all my contacts in one single directory. I manage the contacts from Outlook 2010 and I can access the information from my mobile phone, my tablet, my laptop or any computer with a browser and an Internet connection.
In this video I will show you how you can use Outlook 2010 to organize your contacts. I will show you how you can configure Outlook to see the contacts exactly the way that you want to see them. I’ll also show you how you can use views and categories to effectively organize your contacts. Let me show you.
Understanding the different Contact folders (01:30)
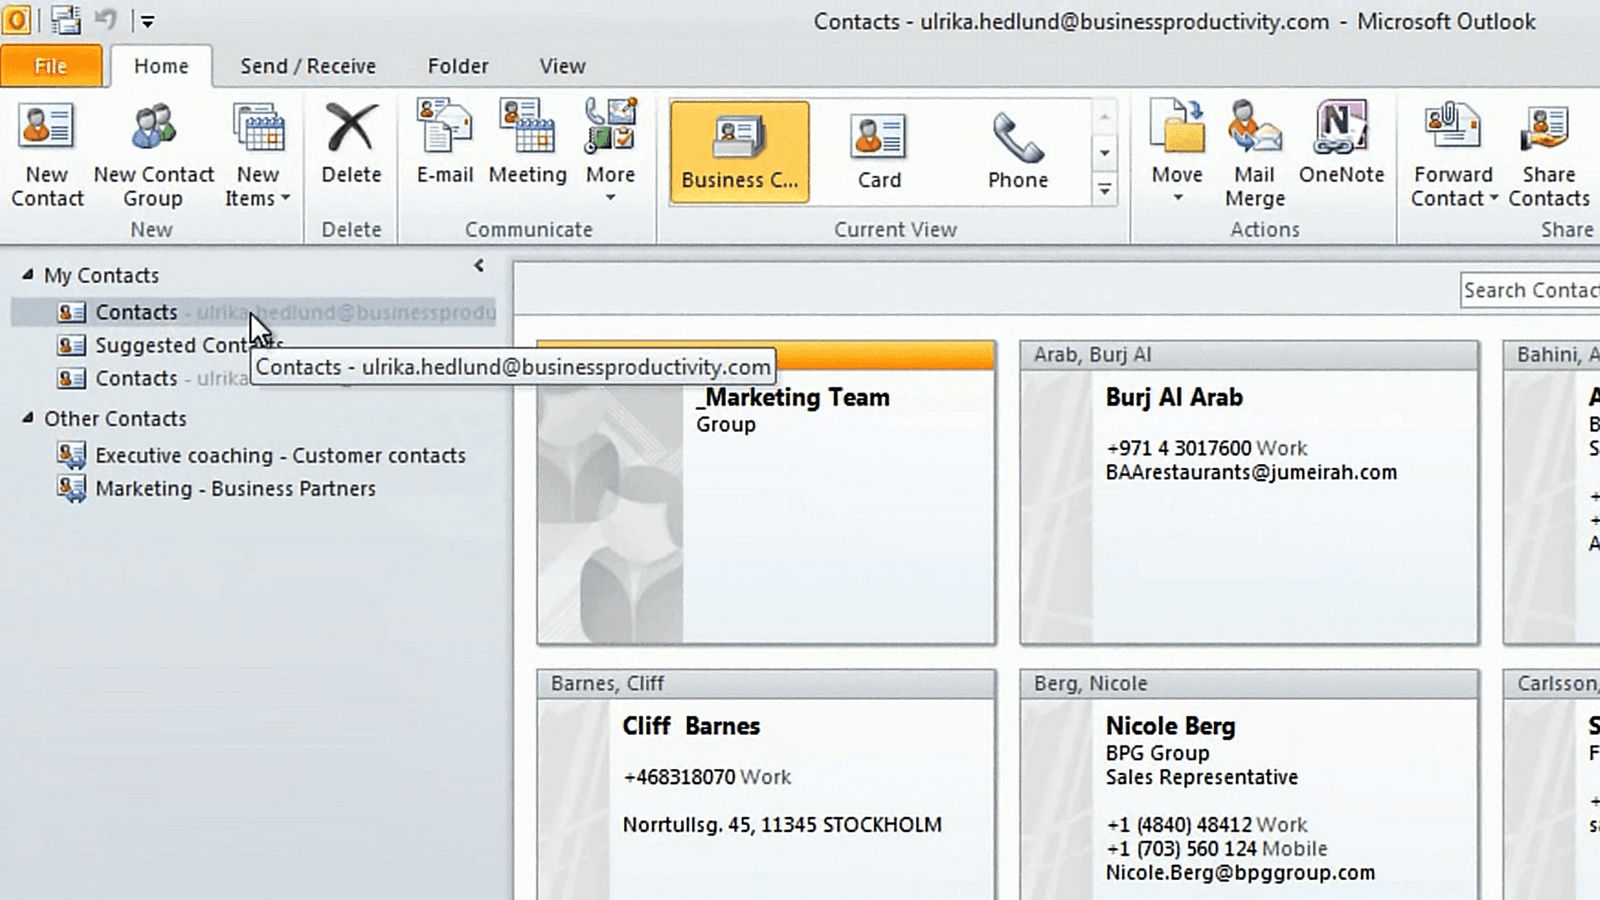
To go to your contact directory in Outlook just click “Contacts” in the navigation bar, alternatively you can use the keyboard shortcut which is “CTRL + 3”. You have a number of different contact folders. The first one is my main folder, this is the one that opens up by default when I open up the contact view.
I have another contacts folder called “suggested contacts” this is new in Outlook 2010. Here Outlook stores all email addresses that you’ve used in your communication but that you don’t have in your normal contacts folder. So here for instance I can see that I have Sarah Carlsson’s email address. I’m quite surprised to see that I don’t have Sarah’s email in my contacts folder since Sarah is someone that I frequently communicate with. So I’m going to take this contact card and I’m going to copy it in to my normal contacts folder. I can see that I actually do have Sarah Carlsson as a contact in my main folder but that her email address was missing. So, here I’ll just choose to update the contact card. If I go back to my main contacts folder and search for Sarah you can see that I have her contact card with the full email address. This is a very convenient way to keep your contact cards updated with the correct email addresses and you don’t have to type them in by hand.
The third contact folder is associated with my private Windows Live account. These contacts are synchronized with the Windows Live account. However, I don’t use this as my contact directory. If you use the Outlook Social Plugin you’ll have a fourth contact folder called “LinkedIn”. I’ll talk more about this in another video. In addition to the contact folders in the “My Contacts” group I also have another group called “Other contacts”. These are contacts that we have on our SharePoint site that we share together as a team (see the video “Share important business partner contact details with your team”).
Creating your own contact folders (03:19)
You can easily create your own contact folder. To do that just right-click and select “New folder”.
I’m going to create a new folder called “Networking contacts”. In this folder I want to save contacts that I meet at different networking events, that I don’t stay in touch with frequently but I still want to keep their contact details if I need them in the future. Something to be aware of if you create new contact folders is that in most cases contacts in these folders will not be synchronized with your mobile phone. Only the contacts in your main contact folder will be synchronized so this is something you need to consider. If you want the contacts in your mobile, you should not create a separate folder for those contacts. But in this case for networking contacts that suits me fine.
Configuring the Address Book (04:06)
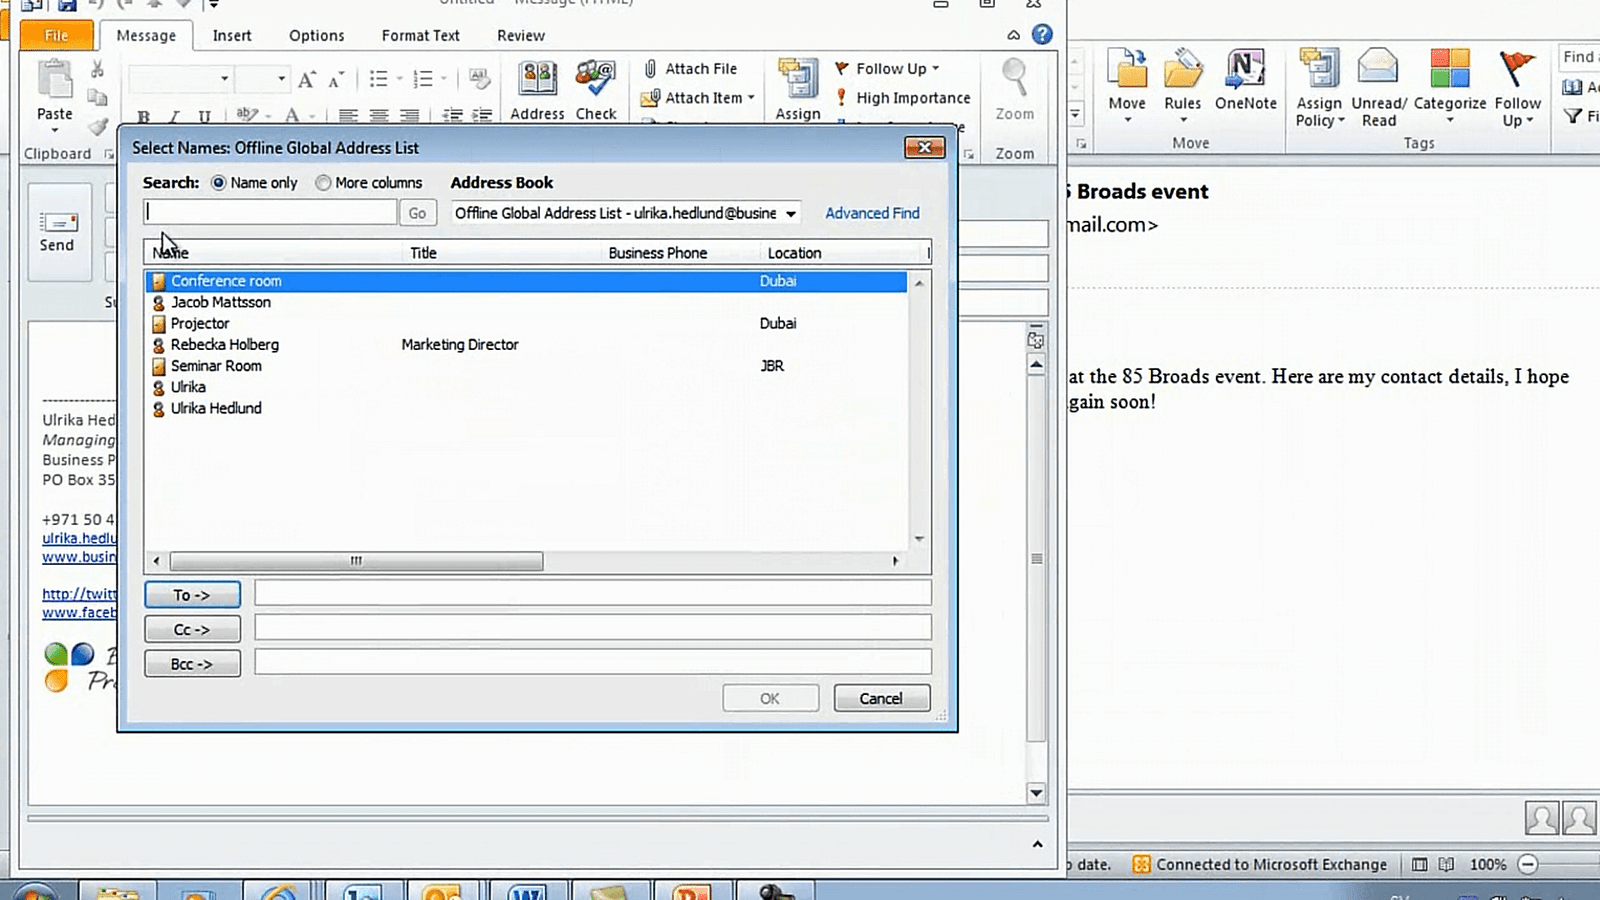
When you compose a new email and you want to address it to a contact in your directory the Address Book opens up.
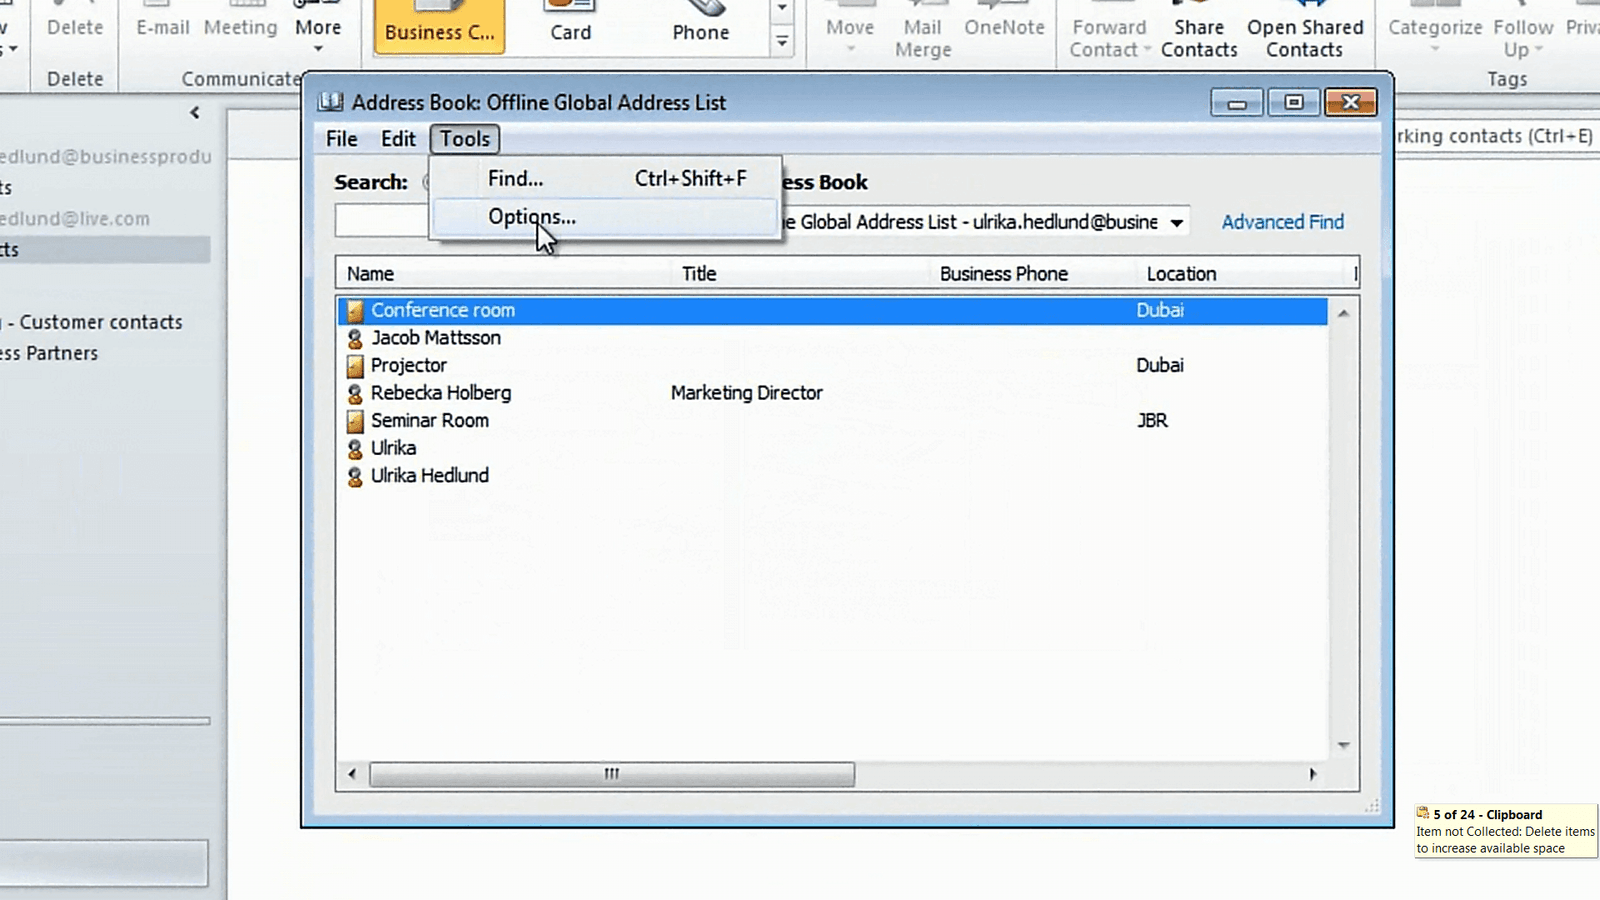
The Address Book is a collection of all your different contact directories, the contacts folders we just looked at, our SharePoint folders, but we also have a global address list which is our company directory that is stored in Exchange Server. If you work in a large organization and most of your email communication is done internally I recommend that you keep the Global Address List as your default contact directory in the Address Book. However, if you like me, work in a smaller organization and most of your communication is done with contacts in your contacts folder then you should change the default contact directory to your contacts. To change the setting, go back to your contacts folder and click the Address Book. Here click “Tools” and then “Options”.
Here you can change two settings the first one is which contact directory should be used when addressing email and we’ll just select the “Contact folders”. In the second setting you decide which contact directory should open up when you click on the Address Book. So here again I’ll just change it to my “Contacts” and click “Ok”.
Ways to create new contacts (05:18)
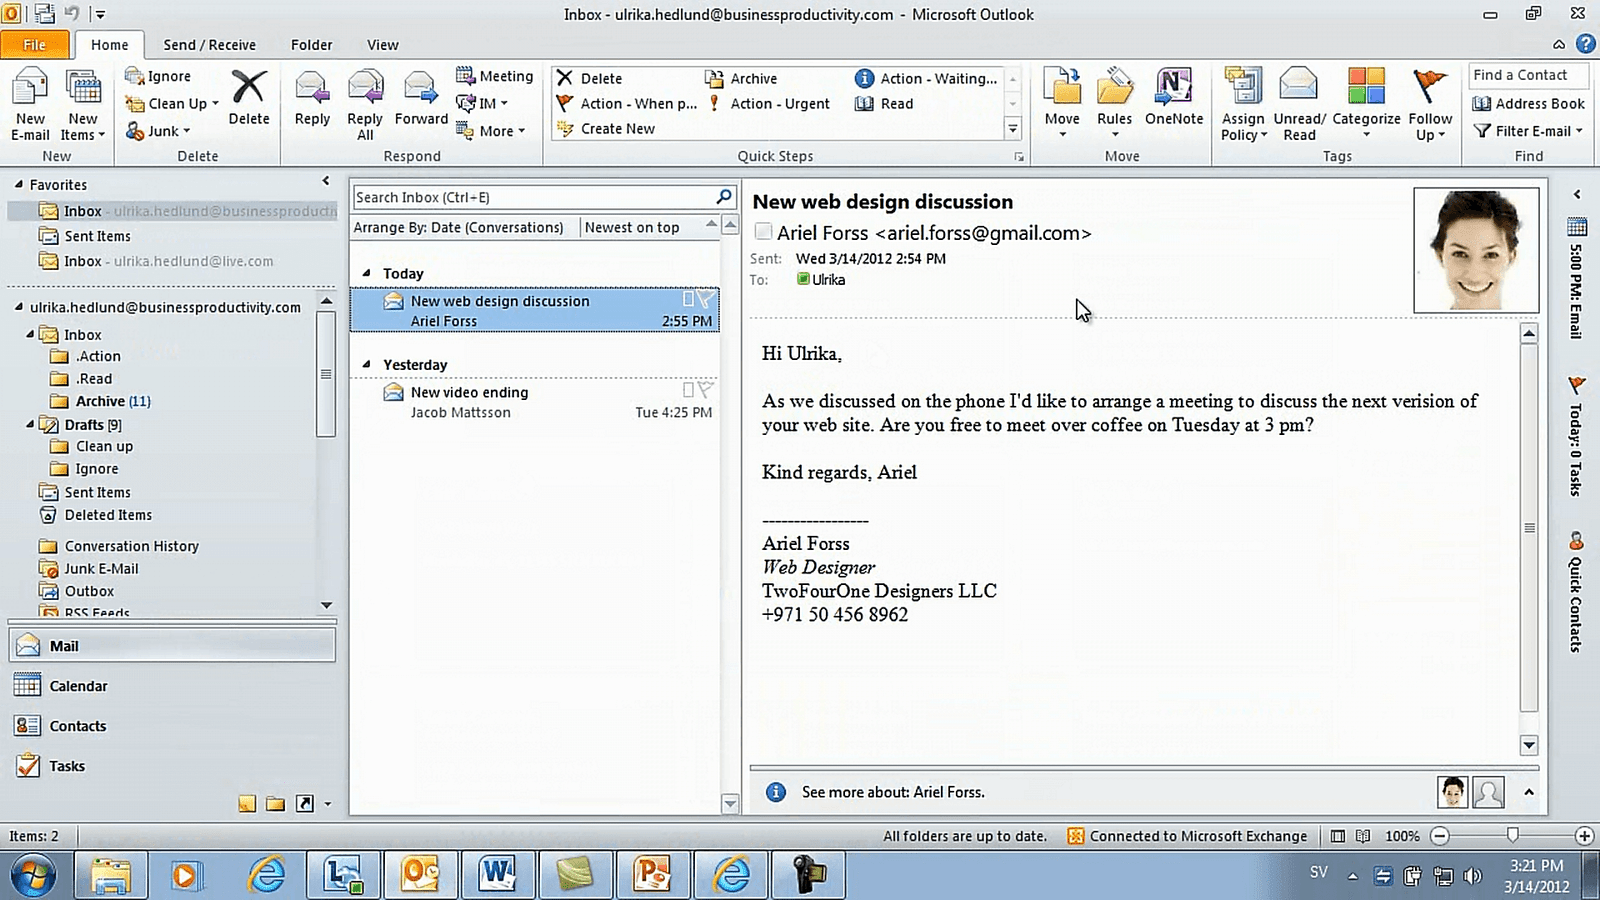
Let’s go back to my main contacts folder and look at ways of creating new contacts. I can either click “New Contact” on the “Home” tab, I can right-click in an empty area and select “New Contact” or I can use the shortcut key “CTRL + N” to open up a new contact. But the most convenient way, and the way that I usually add contacts to my contact folder is by adding them through and email. If I go to my inbox you can see that I’ve received a new email from Ariel. In most cases people have their digital signature in the email so it makes it really easy for you to add the contact details. Here I’ll just mark and copy her contact details and then I’ll right-click on her email address and select “Add to Outlook Contacts”.
A contact card is created for me with Ariel’s name and her email address. I’ll paste in the rest of the information in the Notes field and now I can just drag and drop the fields to the right location. I don’t have to type anything myself.
Adding profile pictures to your contact cards (06:18)
Now Outlook also enables you to add a profile picture to your contact card. If you want to add a picture you can always check the online professional network LinkedIn. I’m going to go to LinkedIn and see if Ariel has her picture there. I’ll type in her first name and then last name and just click “Go”, and here I can see that she has her profile picture available.
I’ll just right-click and save this picture and then I’ll go back to my contact card, click on the profile picture and select the picture of Ariel. In addition to having the profile picture visible in the contact card I’ll also see her profile picture in emails.
Organize contacts by first name or last name (07:00)
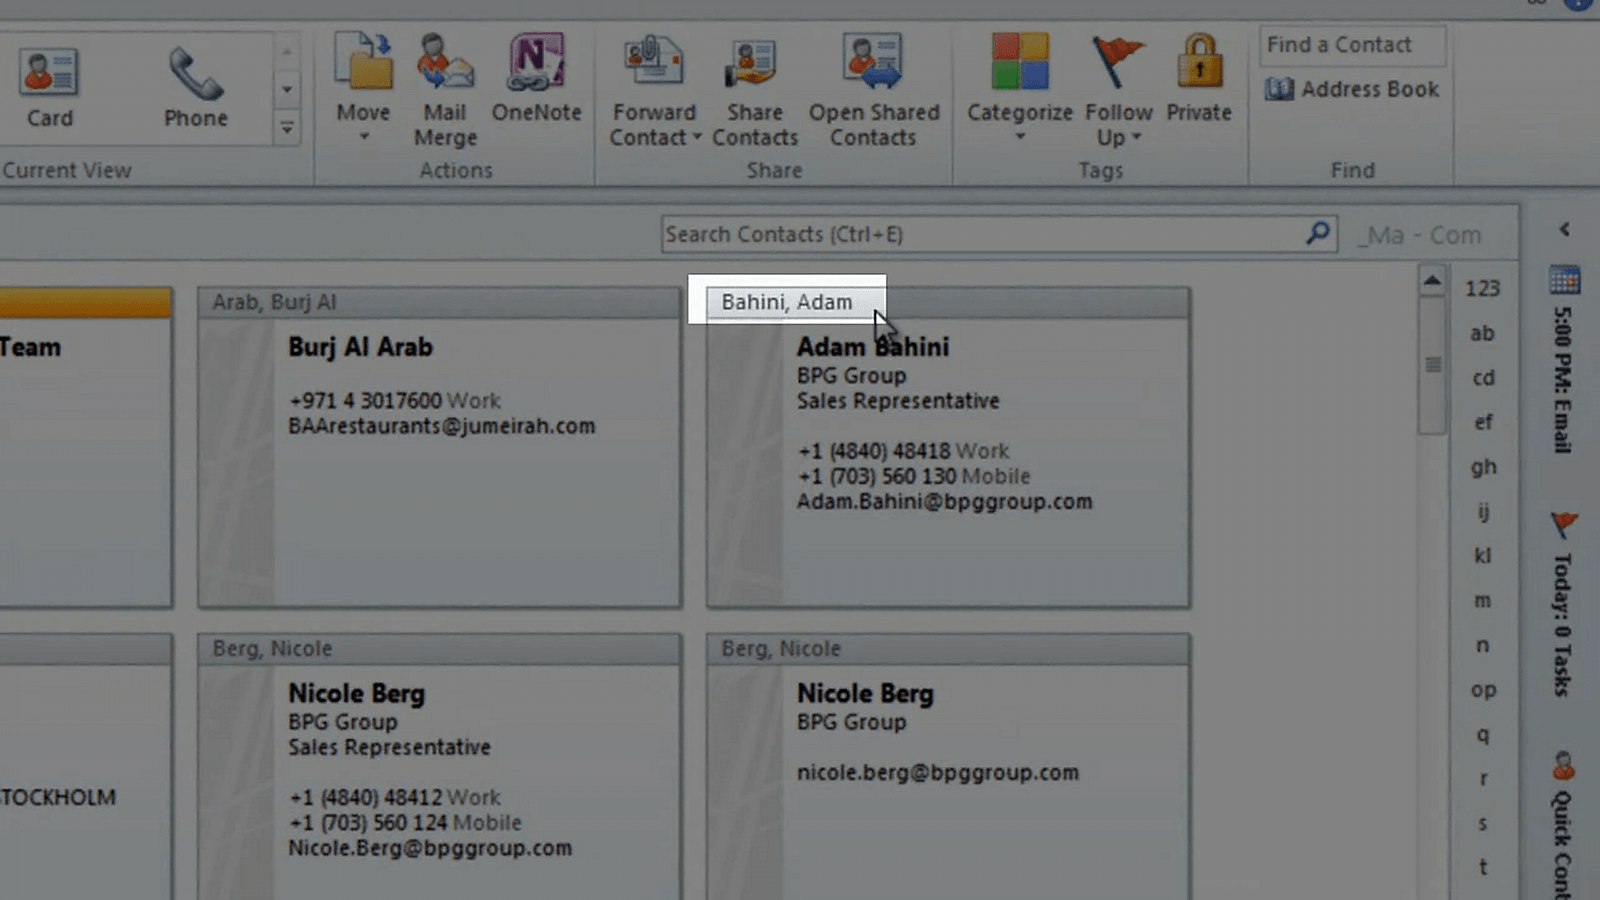
By default Outlook files all contacts starting with the last name and then the first name.
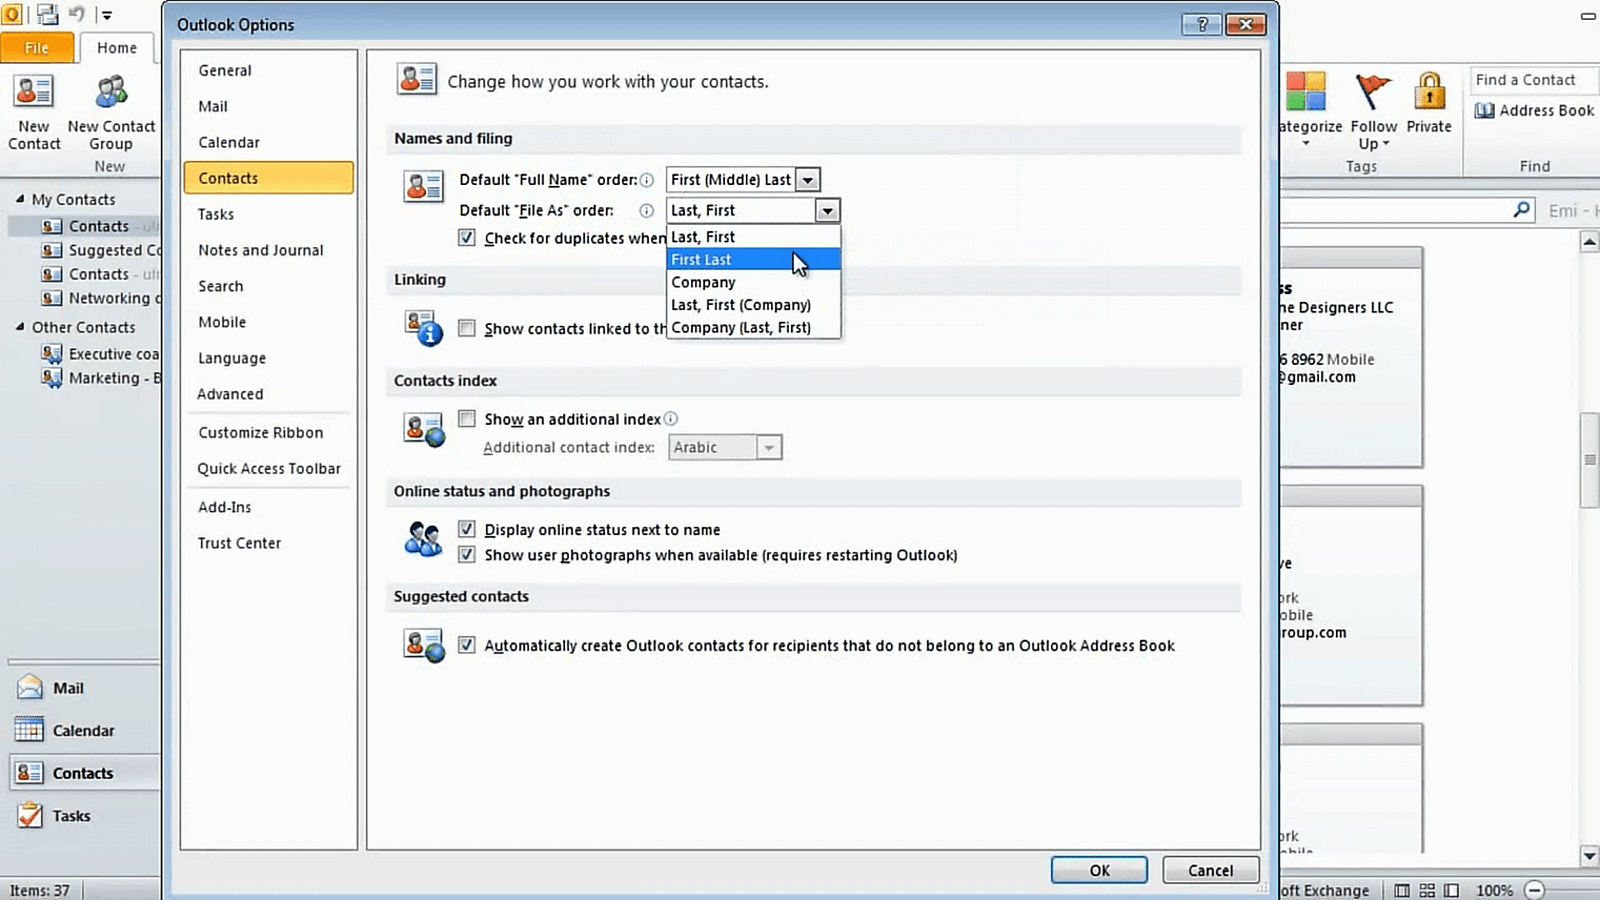
This means that all contacts are organized in alphabetical order by last name. So if I want to search for Ariel Forss I’ll just click “F” to find her under “Forss”. If you would rather file your contacts starting with the first name you can change this file order. To do that click “File”, “Options”, “Contacts” and here under “Name and filing” change the “Default File As order” to “First Last”.
Now, it’s important to note that this will only be applicable to all new contacts that you add to your contact folder. The ones that you already have there will stay the same. So I only recommend that you change this if you’re starting from scratch. If you already have a lot of contacts that are organized by last name just keep the default “Last, First”.
Using different views to get a better overview of your contacts (07:54)
Here I’m looking at my contacts using the “Business Card” view. I can change the view by clicking on another icon under “Current View” on the “Home” tab, or I can click the “View” tab, select “Change View” and select another view. The one I use most frequently is the “List” view.
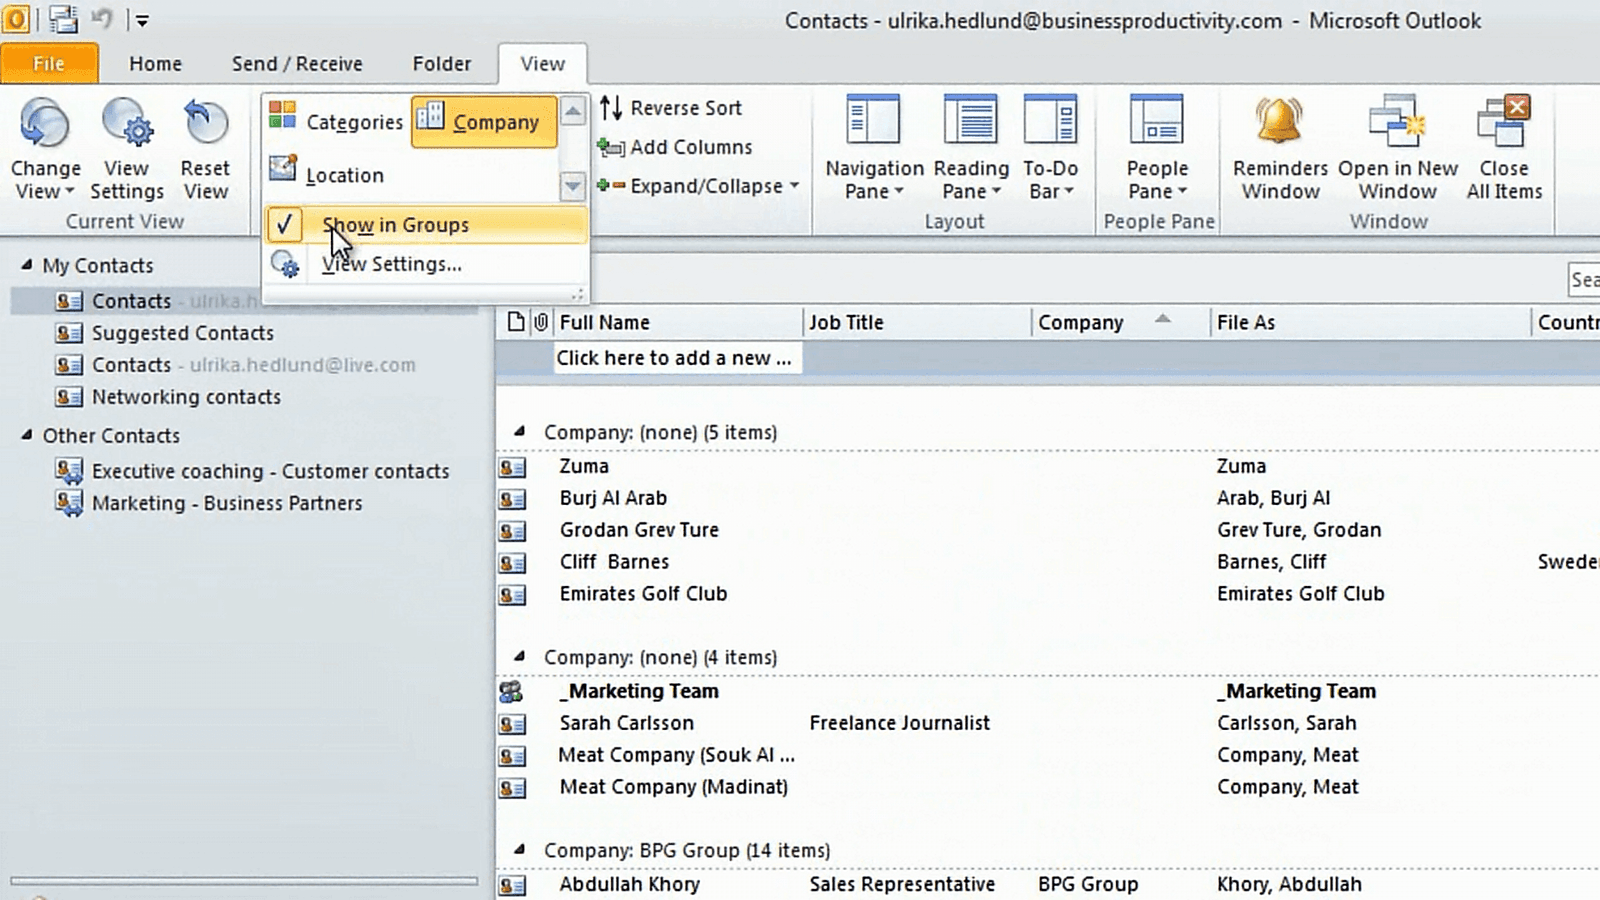
Here I can easily group and sort all of my contacts. Say for instance that I want to see all of my contacts sorted and grouped by company. I’ll just click “Company” [in the “Arrangement” section] and make sure that the “Show in Groups” is marked and here you can see all of my contacts sorted and grouped by company.
Organize your contacts using Categories (08:30)
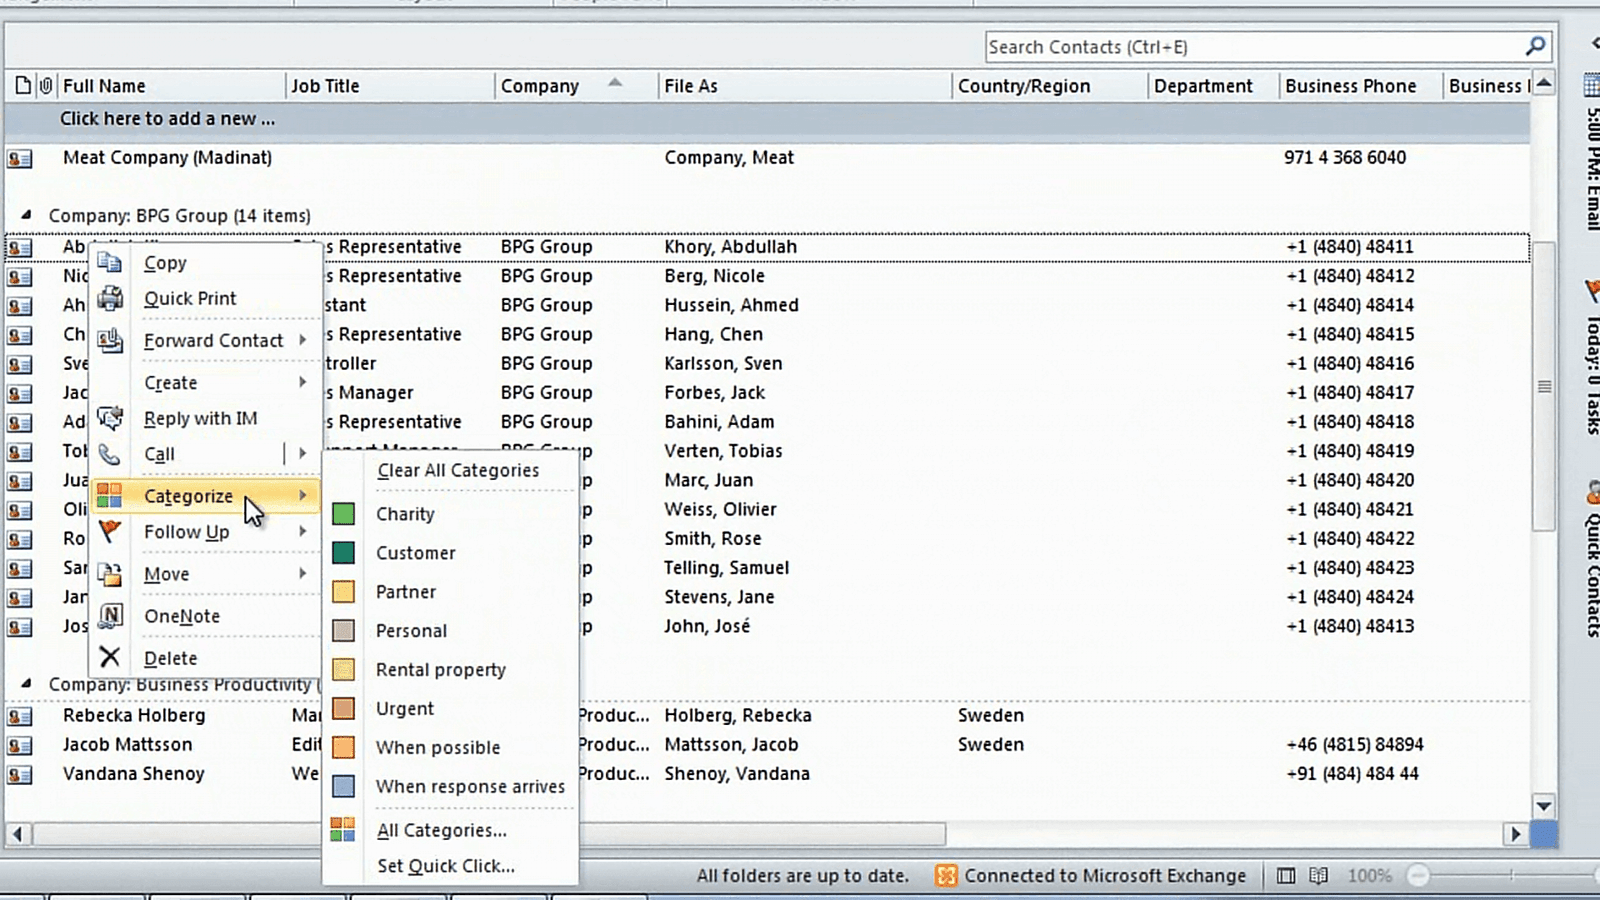
A great way to organize your contacts is by using Categories. To add a category to a contact you can just right-click and select “Categorize”.
If you want to create a new category just select “All Categories” and click “New”. Here I actually want to add all of the contacts from the BPG Group to the customer category. So I’ll mark the first contact in the list, hold down the “Shift” key and then mark the last one. I’ll right-click, select “Categorize” and then select the “Customer” category. Now I can choose to see all of my contacts by category, and here you can see all of my contacts that are in the “Customer” category. Another way to assign a contact to a category is simply dragging and dropping. Here I want to add “John Carsson” to my Customer category. I’ll mark John and then by holding down the left mouse button I’ll just pull him down to the category and now John has been categorized as a customer.
Closing (09:33)
I warmly recommend that you use categories to organize your contacts; it makes it so much easier when you need to communicate with groups of people. Now that you know how to organize your contacts the next step is to learn how to work with them effectively, but more on that in another video. I’m Ulrika Hedlund for Business Productivity – Thanks for watching!


