Invite an external business partner to a project workspace
Learn how to invite external partners to an Office 365 SharePoint team site
Introduction (00:04)
Welcome to Business Productivity – I’m Ulrika Hedlund. More and more people are seeing the benefits of sharing documents and other type of information with each other using a shared digital workspace. Many organizations today are setting up intranets where employees can easily collaborate with colleagues on projects. But sometimes you need to invite external business partners that are not part of your organization to your projects.
In this video I’ll show you how you can use Office 365 to securely set up a shared digital workspace to which you can invite external business partners that are not part of your organization. Let me show you!
Set up a shared workspace (00:44)
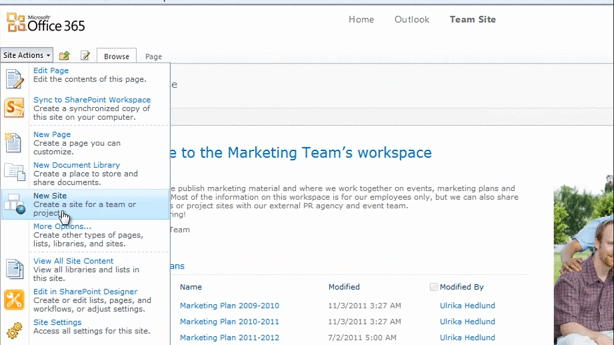
We’ve just launched a new project to develop a number of new websites. A few members from our marketing team are involved, but we’re also working with an external designer and developer. Now, I want to set up a shared workspace so that we can all share documentation with each other. To do that I’ll click “Site Actions” and then “New Site”.
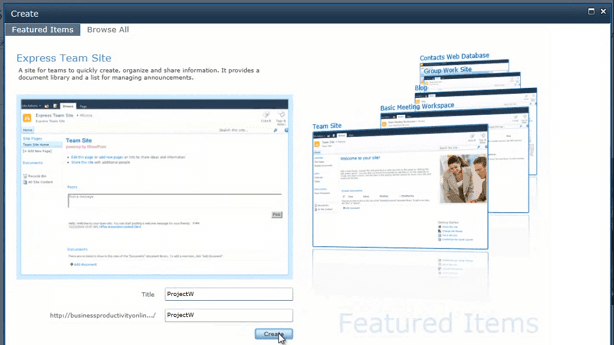
Here I can browse between the different site templates available. In this case I’ll select the “Express Team Site”, because I want a simple site where we can just share documents and announcements with each other. I’ll name this “Project W” and click “Create”.
And here is the new team site for our project.
Customize your team site (01:26)
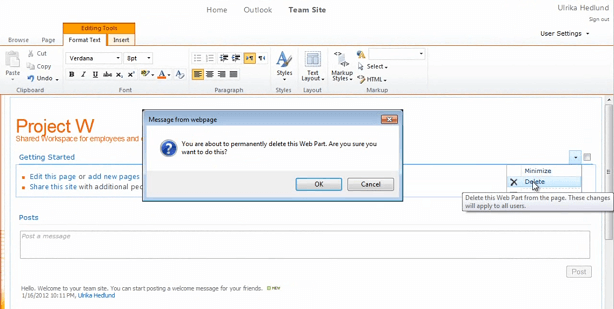
Before I upload documents I want to make some changes to the site. First I want to edit the title, to do that I can just click “Edit [this] page” or I can go to “Site Actions” and “Edit Page”. Here I’ll mark “Team Site” and just write “Project W” and write a description; “Shared workspace for employees and external vendors”. Next, I’m going to delete this getting started web part, to do that I’ll just click the menu and say “Delete”.
“OK”. And then I’ll say “Save and Close”. Now I want to change this announcement, to do that I’ll go to the “Posts” list.
And just select “Delete [Item]” from the drop down menu.
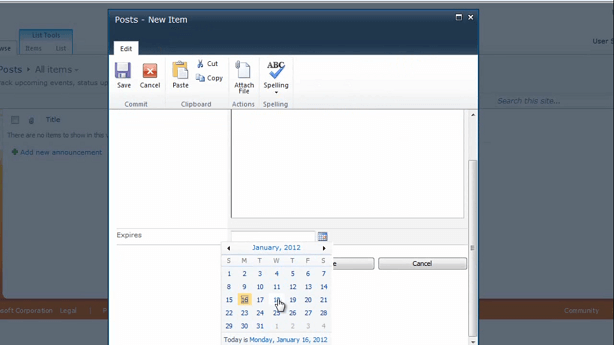
I want to add a new announcement. Here I’ll write; “Welcome to the Project W Workspace”, “We will be sharing all documentation related to the project on this site so that we’re all on the same page”. I can also put an expiry date, this means that the announcement will be removed from the first page but it will not be deleted all together. So since this is a welcome message I only need to show this for the first two days. So I’ll just select a date, on the 18th and click “Save”.
Now if I go back to the first page you can see that the original message has been replaced by my new post.
Upload your documents (02:55)
Now I want to upload my documents, to do that I’ll just click “Add document” and “Browse for files”. I’ll select all of the documentation and click “OK”. Now I can see the documents being uploaded and then I’ll just click “Done”. Now we have all of the documents uploaded and now I want to invite our external vendors.
Check your external invitation settings (03:20)
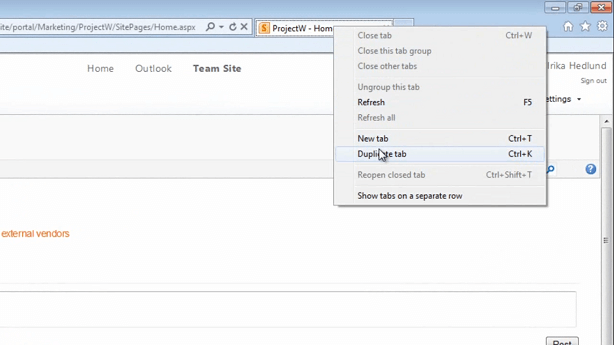
Before you can invite external people to your project site you need to ask your administrator of Office 365 if this setting has been enabled on your site. If you are the administrator you can check these settings yourself. To do that, first I’m going to duplicate this tab so that we can easy find our way back.
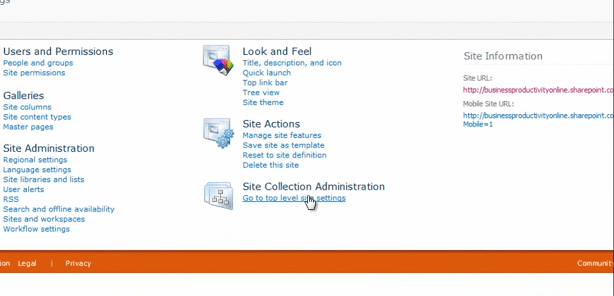
Now, go to “Site Actions” and then “Site Settings”, under “Site Settings” go to “Site Collection Administration” and go to the top level site settings.
Here, go to “Site Collection Administration” again and go to “Site collection features”. Here, you need to make sure that the “External user invitation” is active.
If it’s not active you just activate it by pressing the “Activate” button.
Invite your external partners(04:05)
Now we want to invite our external business partner. To do that I’ll click “Site Actions” and say “Share Site”.
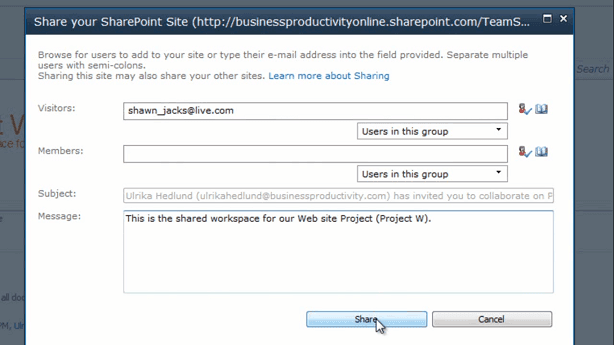
In the visitors field I’ll invite our external partner by just typing his email address; “shawn_jacks@live.com”. People are authenticated using Windows Live ID, so the people that you invite need to have a hotmail or a live email address. Even if they’re not using this as their primary address they can set up a new account and just use it as a log in for this team site. And then I’ll just write a message; “This is the shared workspace for our Web site Project (Project W)”. And then I’ll click “Share”.
SharePoint has now sent an email invitation, so I’ll just click “OK” here.
Logging in as an external partner(04:51)
Now let’s log in as Shawn and see what this looks like. Here he has the email that I sent. If he clicks on “Accept your invitation” he will be taken to the project site where he can log in using his Windows Live ID credentials.
Sometimes it takes a few hours for the permissions to go through, so I recommend you send out invitations the day before you need to start collaborating, just to be on the safe side.
Closing (05:17)
Whenever you need to work with multiple parties on a project I highly recommend that you use a shared workspace. It helps to keep everyone up to date on the progress of the project and if new people join they quickly get up to speed since they have direct access to all information in the project. I’m Ulrika Hedlund, for Business Productivity – Thanks for watching!


