Enrich your email communication
Learn how to include more than just text in your Outlook 2010 email
Introduction (00:03)
Welcome to Business Productivity, I’m Ulrika Hedlund. The way we communicate today is vastly different than it was just a few years ago. Today face to face meetings and even phone calls are being replaced with emails and instant messages and text messages. Unfortunately this means that we lose out on a lot of what we’re trying to communicate. According to some experts, as much as 90% of communication is non-verbal. This means that the actual words don’t mean as much as your tone of your voice, your facial expression and your body language.
Even though email will always be a very limited form of communication, you can learn how to enrich your email messages by going beyond words and inserting graphics and tables and pictures. In this video I’ll show you how you can enrich your email messages. I’ll also show you a fantastic tool that I use daily. Let me show you!
Sharing contact details (01:06)
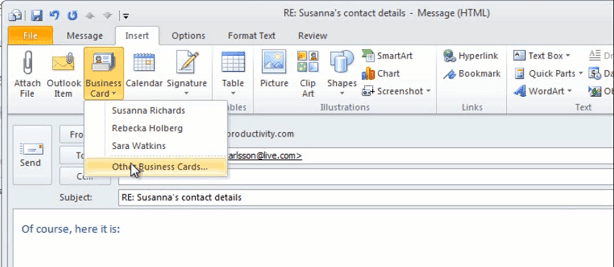
As a true networker, I’m often asked to share other peoples contact details. Instead of typing the information in the email, I can easily insert a business card to my email, provided that I have the contact details in an Outlook contact. To do that, just go to the “Insert” tab, and then click “Business Card”. Here I can select a card that I have frequently inserted, or I can select one among all of the business cards I have. I’ll select Susanna Richards, then I’ll just click “OK”.
The Outlook contact card is attached to the emails, so that the recipient can add it to their Outlook contacts. In addition, an image of the business card is pasted into the body of the email, so that the recipient can easily get an overview of the contact details. Now I’ll just go ahead and send this to Sarah.
Sharing calendar details (01:52)
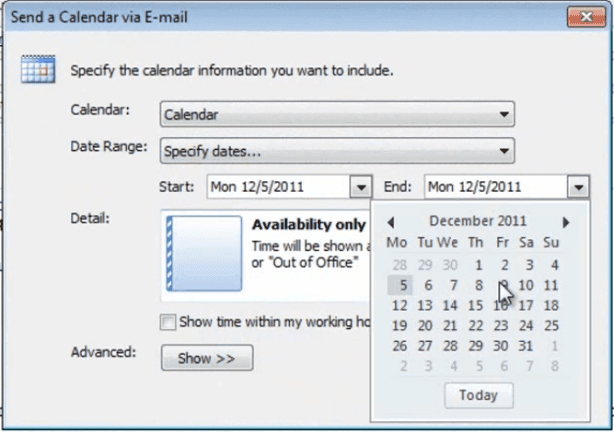
Here I have an email, where I’m asked to share the dates and locations from my upcoming roadshow. I have all of these details in my calendar; however I don’t want to share my private details, so I don’t just want to take a screenshot of my calendar. But what I can do instead is that I can reply to this email by inserting a calendar. [Go to the “Insert” tab then click “Calendar”] I’ll choose the dates, and in this case the roadshow is December 5th to 9th.
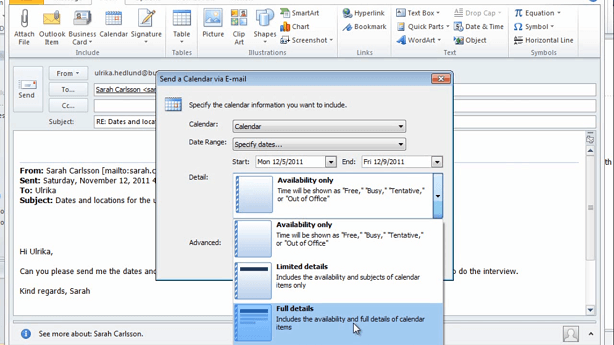
Here I can choose how much details I want to show, I want to show full details.
However, I don’t want to include items marked as private, so I’ll keep this box empty:
And I’ll change the email layout to a “List of events”; this only lists my bookings. And then I’ll click “OK”. Outlook is now formatted in the email for me, with all of the details for this upcoming roadshow. However, it doesn’t show any information about my private appointments. If I scroll down under details more information about the various appointments is displayed. This is a great way to share calendar information, it’s quick and it’s very rich in detail which reduces the correspondence needed to find a good time for a meeting.
Using tables to structure your information (03:05)
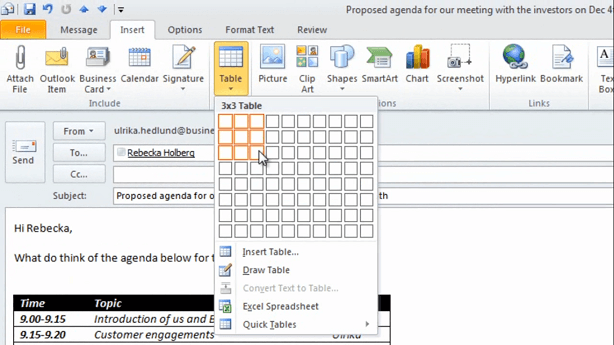
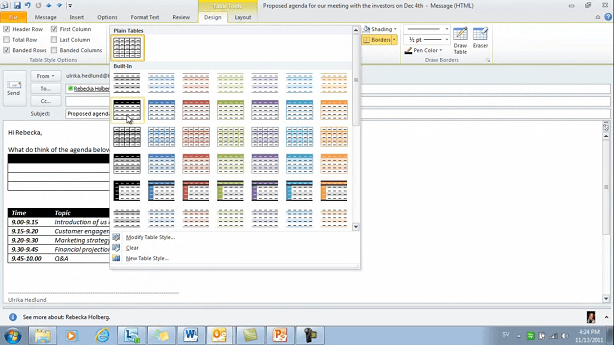
Now let’s go to my drafts folder and I’ll show you additional ways in which you can enrich your email communication. Here I have an email where I have included a proposed agenda for a meeting. Whenever you have information that can be structured in various columns, such as agendas or a list of action items, I recommend that you insert a table. To insert a table, click the “Insert” tab, and then the “Table” button. You can just select how many columns you want and how many rows you want for your table.
And then you can select the design from the design gallery.
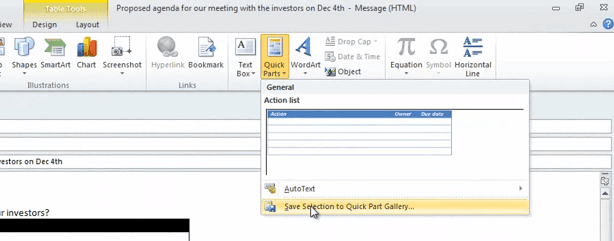
To save time, you can save tables that you use frequently in your email communication to something called “Quick Parts”. To do that, first remove the content of your table, mark the table, go to the “Insert” tab, and then “Quick Parts”. Choose “Save Selection to Quick Part Gallery”.
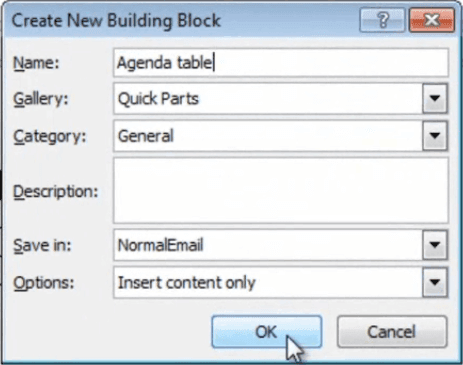
And give it a name, so I’ll just call this; “Agenda table”. And click “OK”.
Now if I want to insert a table, just remove these. And then, to include the table, I just click the “Quick Parts” gallery and select my agenda table. Now I can just enter the information and it will be clear and precise.
Enrich your text with graphics (04:21)
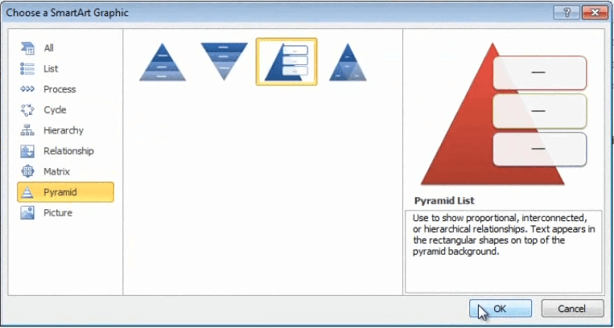
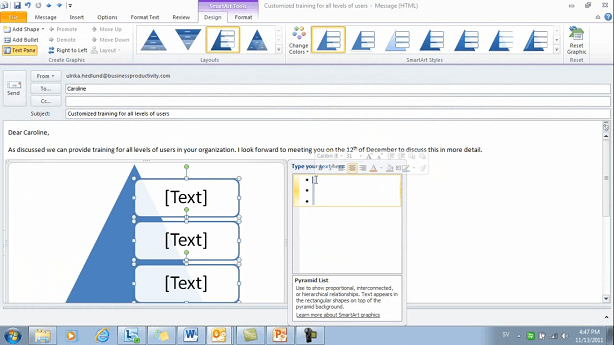
Let’s have a look at another one. Here I have an email to Caroline where I’m telling her about the different trainings we provide. Instead of just displaying this information as a bulleted list I want to display this in a richer way using SmartArt graphics. In Outlook I’m not able to just convert text into SmartArt graphics, but what I can do is I can copy this text and I can cut it. And then I can go to the “Insert” tab and select “SmartArt”. I will select the appropriate SmartArt graphic, and in this case, I’m going to select this pyramid and click “OK”;
Then I’ll mark the bullets, and then I’ll press CTRL+V to paste in my information into this graphic.
Here I can also change the style, and I’ll select one of the 3D styles.
And then I can resize it a little bit by just pulling the corner. There! That’s a much better way to represent the trainings that we do!
Adding photographs or pictures to your message (05:12)
One of the most common ways to enrich your email messages is by inserting a photograph or a picture. To insert a picture in the body of the email, just go to the “Insert” tab, and then click “Picture”. Select the picture that you want, and then click “Insert”. Most photographs taken today with digital cameras are quite large, you can reduce the size by just dragging one of the corners, or you can click on the little arrow under size and select a percentage size. I’ll just click 10 % here.
Whether or not you choose to resize your image like this, Outlook will actually resize it for you. If you go to the start button and write “Internet options” [and press ENTER] and go to the advanced tab, and scroll down to the multimedia section, here you can choose whether or not you want to enable automatic image resizing. If you want to send a high resolution picture in the body of the email, you need to uncheck this box.
When you have a picture marked like this in Outlook, the picture editing tools appear, one of the ones that I use most frequently is the crop tool. If I click “Crop” I can just move the handles, in order to select the part of the image that I want to use.
Adding screenshots to your message (06:24)
Another way to easily communicate things you’re working on is to use screenshots in your emails. In this case I want to get feedback from Jacob on images I’m working on in PowerPoint. So to insert this image I’ll click “Insert” and then select “Screenshot”. Here I can insert screenshots of all the available windows I have open.
But in this case I don’t want to insert the entire window I just want to choose a screen clip. So I’ll choose “Screen Clipping” and then I’ll just drag a square around the image I want to include. This is much quicker than attaching the PowerPoint presentation.
Share screen images by using the Snipping Tool (06:58)
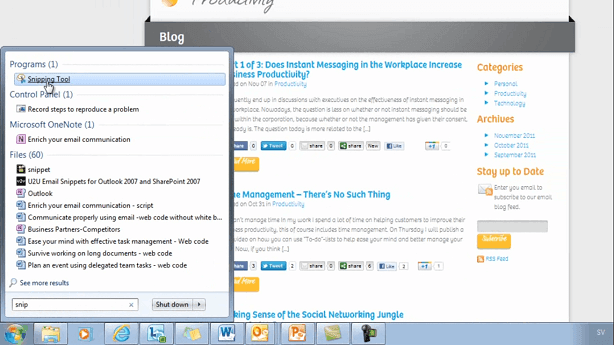
Another great tool that I use frequently, whenever I want to share a good website, is the “Snipping Tool”. The Snipping Tool is included in Windows version Vista and later, just type “Snipping tool” and it will appear.
Mark the part of the page that you want to share, then you can mark a specific area of the page and then click “Email”. Your clip is then included in the body of the email as well as the link from where you took the clip. If you’ve never used this tool before, I warmly recommend that you do, you’re going to love it!
Closing (07:28)
Now that you know how you can enrich your email communication I really hope that you will start writing your email differently, and even though nothing goes up to a face to face meeting, at least now you know how to make your email communication more effective. I’m Ulrika Hedlund for Business Productivity, thanks for watching!


