Enhance corporate communication by blogging
Learn how to create a blog using SharePoint in Office 365
Introduction (04:00)
Welcome to Business Productivity – I’m Ulrika Hedlund. Lack of internal communication within the organization is a key challenge for many companies. Often employees complain about being left in the dark, they don’t know what the executives in their organization are doing or planning for the future. At the same time many managers are struggling to make their voice heard through the large amount of “noise” in the organization. There are always too many emails and too many meetings.
A blog is a great channel to enhance corporate communication, both internally with your employees as well as externally with customers and partners. A blog is easy to read since it’s not as strict as formal document and it’s more interesting since it tends to be more personal.
In this video I will show you how you can create a blog using SharePoint in Office 365. I’ll show you how you can use Word 2010 to write, edit and publish your blog. I’ll also show you how you can insert pictures, add categories and check for comments that people might have added to your blog post. Let me show you!
Create a blog in SharePoint (01:27)
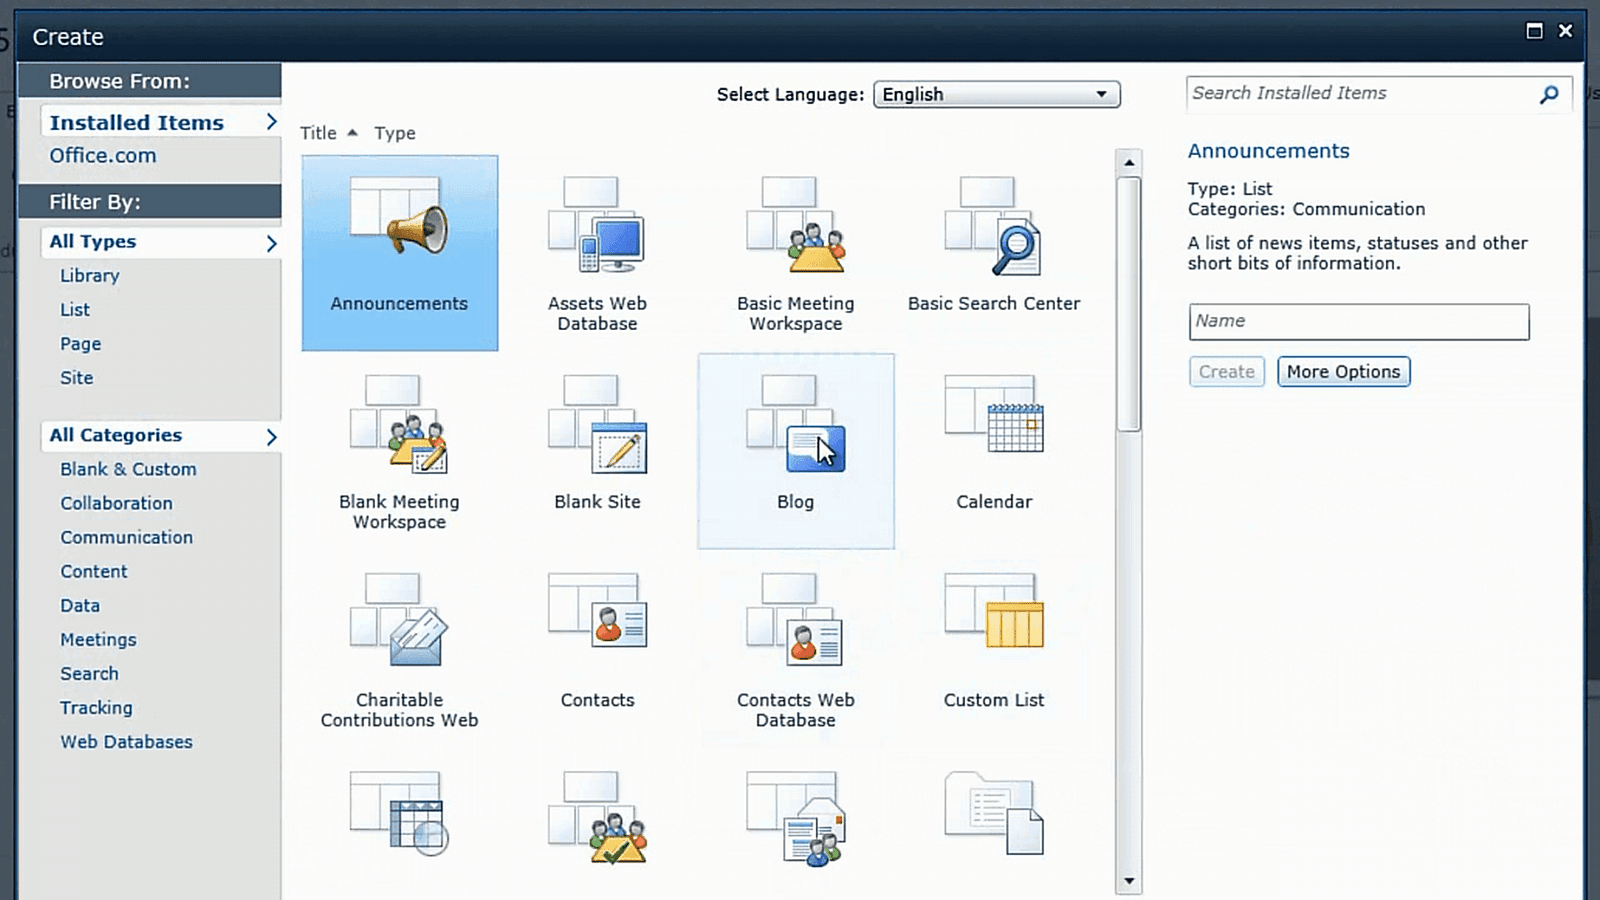
To create a new blog, go to the team site where you want the blog to be located. I’m just going to go to our main company portal page since I want the blog to be visible from here. Click “Site Actions” and then “More Options”. Select “Blog” and just give your blog at title, I’ll just name this “Ulrika’s Blog” and I’ll write the same in the URL and then click “Create”.
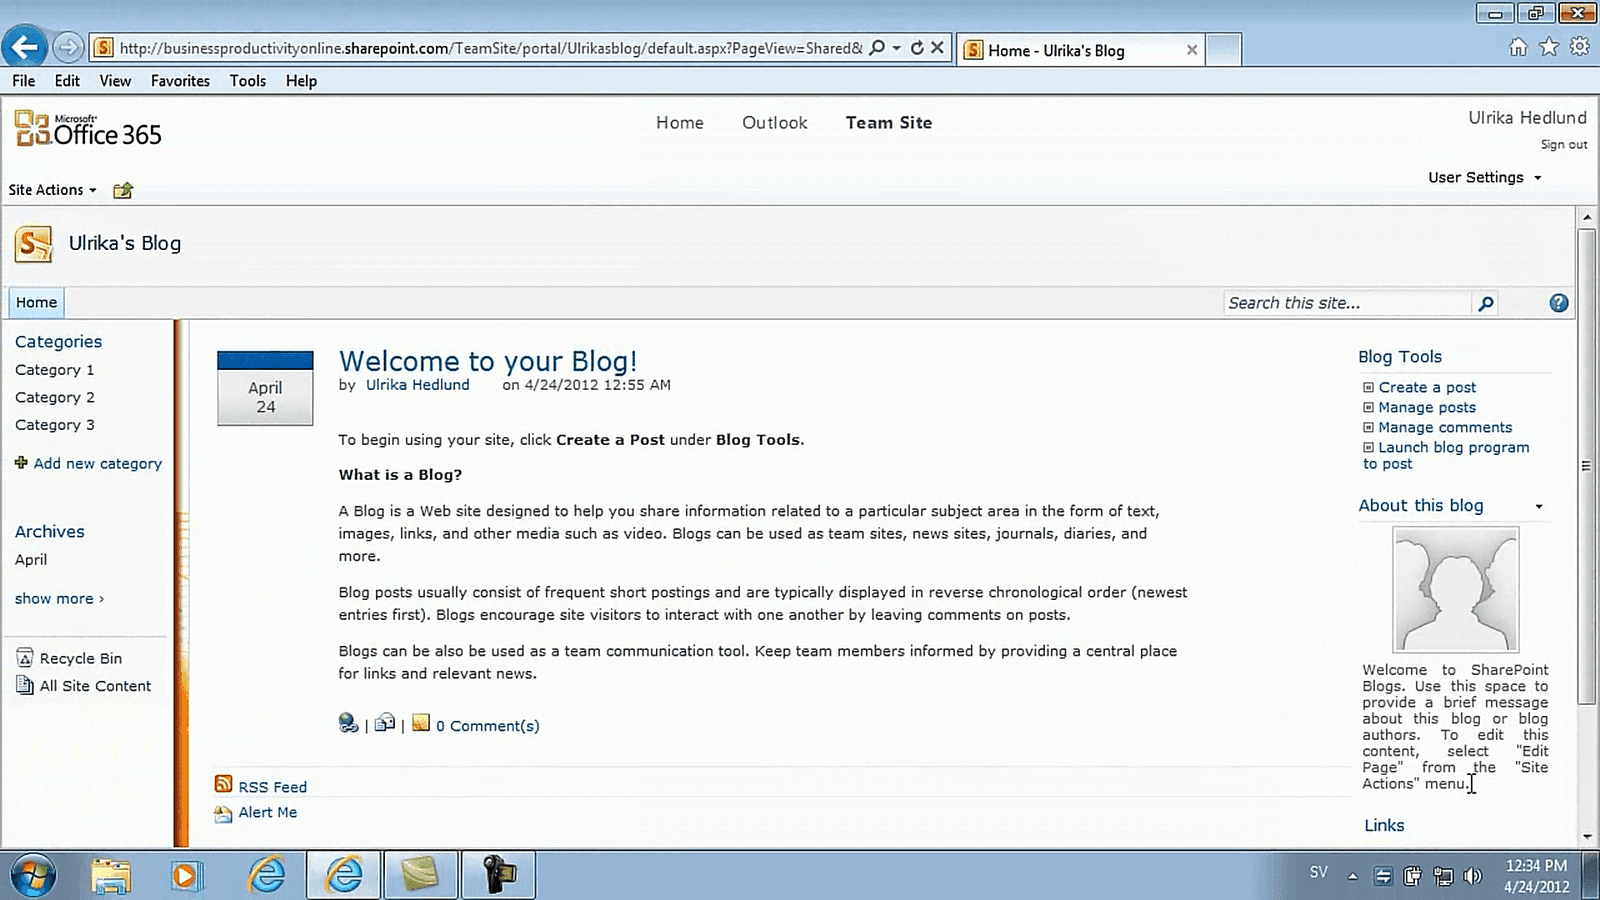
There, now the blog has been created for me! On the left hand side I have different categories, and archives. In the middle I have my blog posts with the date the blog post has been added, and on the right I have tools in order for me to manage my blog. These are only available to the administrators of the blog. Finally I have a description, a picture and a short text describing what the blog is all about.
Add a description and a picture to your blog (02:21)
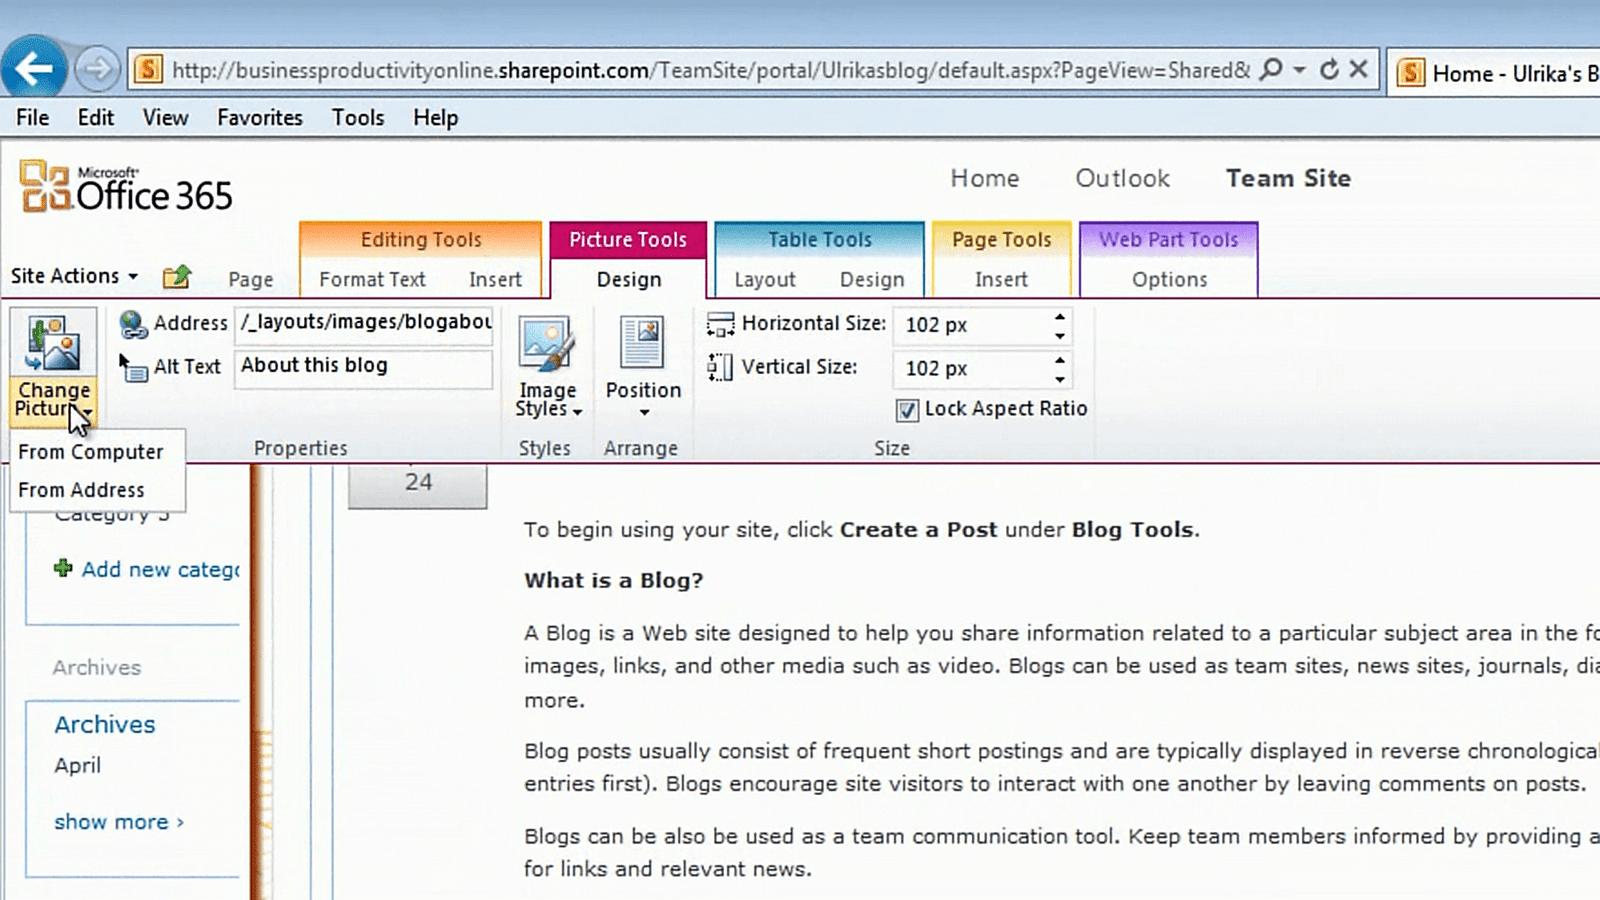
To change the description and to add your own picture click “Site Actions” and then “Edit Page”. Now you can just write your own description. I’ll just remove this text and write my own descriptive text. Now I’ve changed the descriptive text and now I want to change the picture. Just click the picture, then the “Picture Tool” will appear. Click “Design” and then select “Change Picture”.
I’ll select one from my computer. I’ll click “Browse” and then select a blog profile picture and then click “Ok”. I’ll click “Save” and now the profile picture has been added to the blog description. Ok, now we are done editing. Click “Page” and then “Stop Editing”.
Create your own blog categories (03:10)
Now I want to change the categories. Click “Categories” and select all categories by clicking the check box. We’ll just choose to delete all of these. Ok. And now we’ll add our own. I’ll just name this “On my mind” and click “Save”. I can add more categories later when I start writing my blog, for now I’ll just start with one category. To go back click “Browse” and then the link to the blog. This will take you back to the first page.
Write a blog post in the browser (03:47)
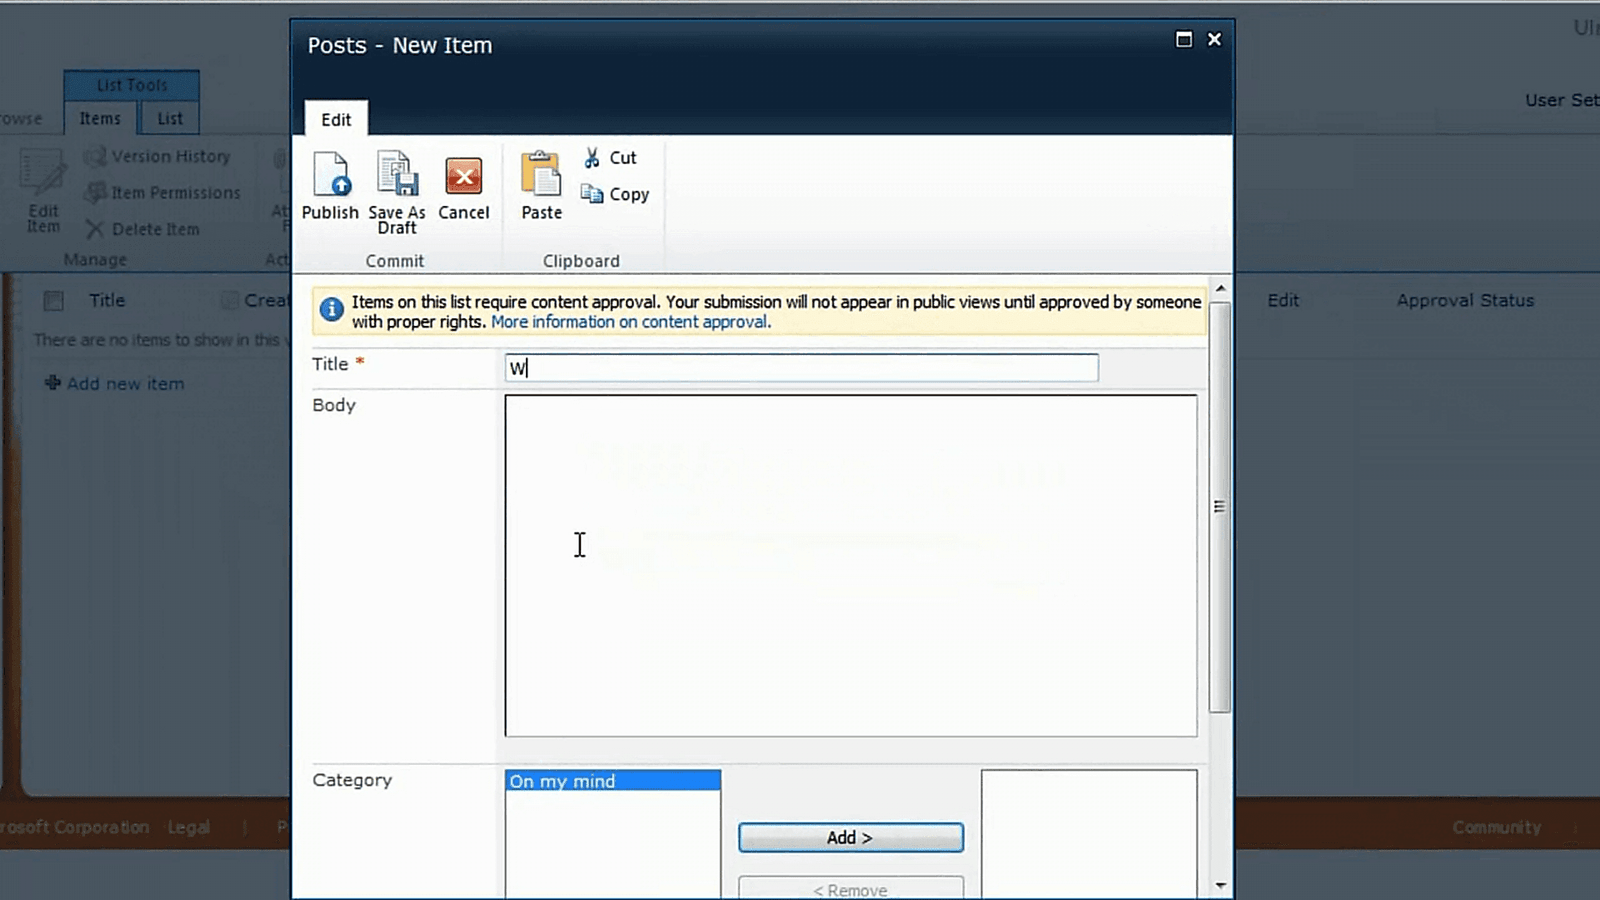
Now we’re ready to add our first blog post. First I want to delete this welcoming message. So I’ll click “Manage Posts” and then I’ll select this post and click “Delete”, “Ok”. And now I’ll add a new blog post. I can add a title to my blog post “Welcome to my blog”. Now I can start writing my post.
I can insert an image to my blog post by clicking “Insert” and then selecting “Picture”. Here I can select the category and I’ll just select the one that’s “On my mind” and then I can select the date and click “Publish”. I can also save this post as a draft if I want to work on it later before I make it visible to others, and then I’ll click “Publish”. I’ll go back again to the first page to see what this looks like. And there it is – my first blog post!
Write a blog using Word 2010 (04:45)
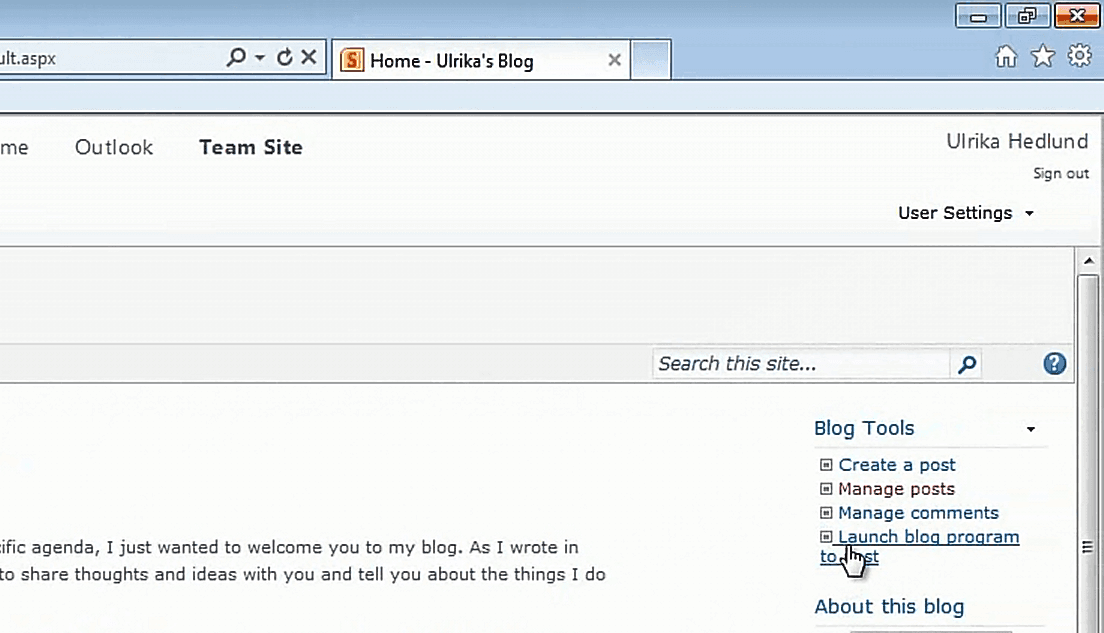
Even though you can write your blog post directly in the browser like we did now, it’s much easier to use Word. To open up Word, just click “Launch blog program to post”.
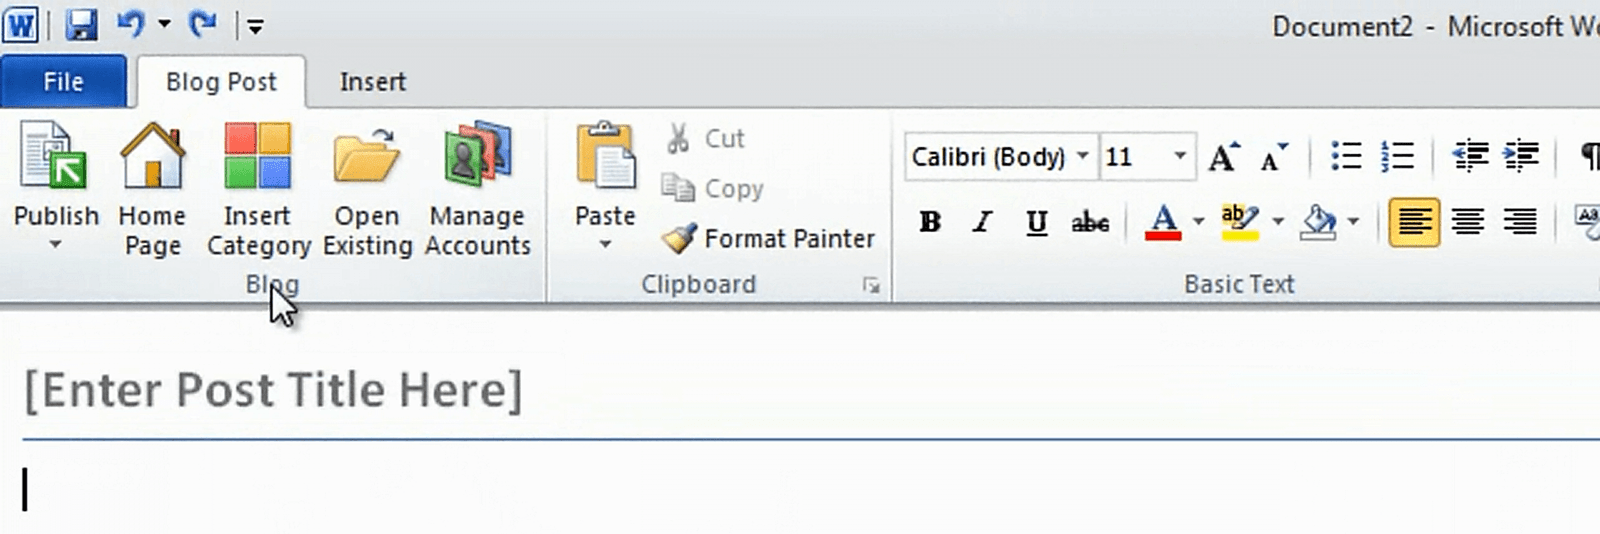
Word will open up and ask you to confirm your SharePoint blog account. I’ll click “Ok” and then I get a warning message where Word tells me that someone might be able to read the information that’s being sent to the SharePoint Server. Since I’m not submitting anything confidential I’ll just select not to show this warning text again and click “Yes” to continue. Now my account has been registered and I’ll just click “Ok”. Now I can use the familiar tools I have in Word to edit my blog. In addition I also have tools related to the blog.
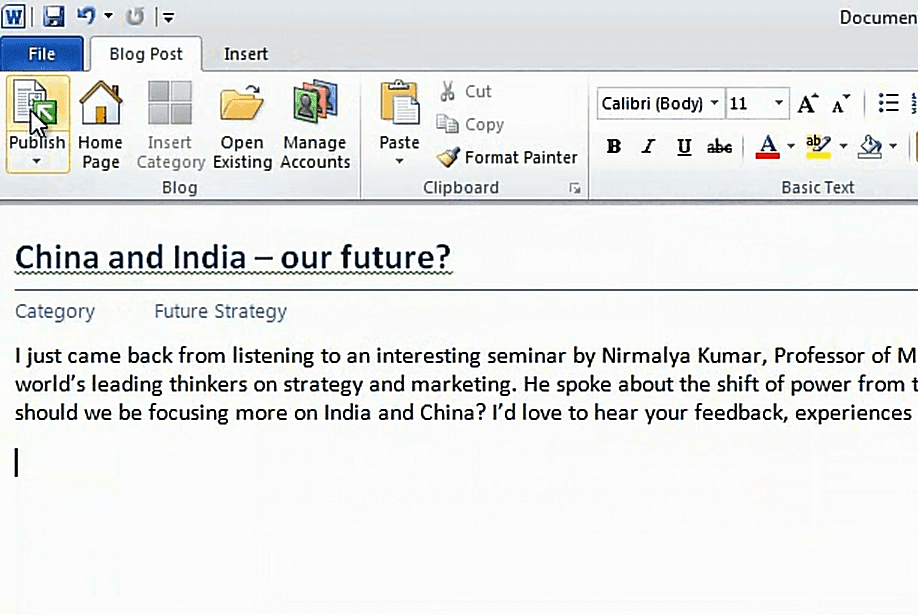
So for instance here I can insert category. Here I can select among the categories that I already created in SharePoint or I can just type in a new one “Future Strategy”. I’ll put a title for this post and here I’ll put: “China and India – our future?” And then I’ll start writing my post.
Editing pictures in your blog (05:54)
It’s much easier to insert pictures because here I can use the picture editing tools in Word. So I’ll click “Insert”, select “Picture” and then I’ll select a picture again. Now I can use the Picture Tools to edit the picture. I’ll select to wrap the text as square and position the picture to the right. I’ll add a picture style, now I’m ready to post my blog. I’ll click “Publish” and now the blog post is being submitted to the SharePoint site.
When the blog has been published I’ll get a notification. I’ll go back to the web site and click “Refresh” and here I have my new blog post with the text and the image that I added in Word.
Change permissions to your blog (06:41)
The final thing I have to do now is change the permissions for the blog posts. Again I’ll go to “Manage posts”, under “List Tools” I’ll click “List” here I’ll click “List Permissions”. This list inherits permissions from its parent site but I here I want to change the permission for who can add posts. So I’ll click “Stop Inheriting Permission” and I’ll click “Ok”.
I’m a member of the “Owners” group so I already have Full Control. I’ll select the others and just deselect “Owners” and select to “Edit User Permissions”. Since I only want other people to read the blog posts I’ll click “Read” and then click “Ok”. Now you can see that the permission levels for all other groups have been updated and now I can go back to my blog.
The blog as seen by the reader (07:33)
Let’s see what this looks like if we log in as Jacob. Now we’re logged in as Jacob and as you can see the blog tools are not visible. Here Jacob can add comments by just clicking the “Comment” link and then click “Submit”. The comment is added to the blog post.
Staying on top of comments (07:58)
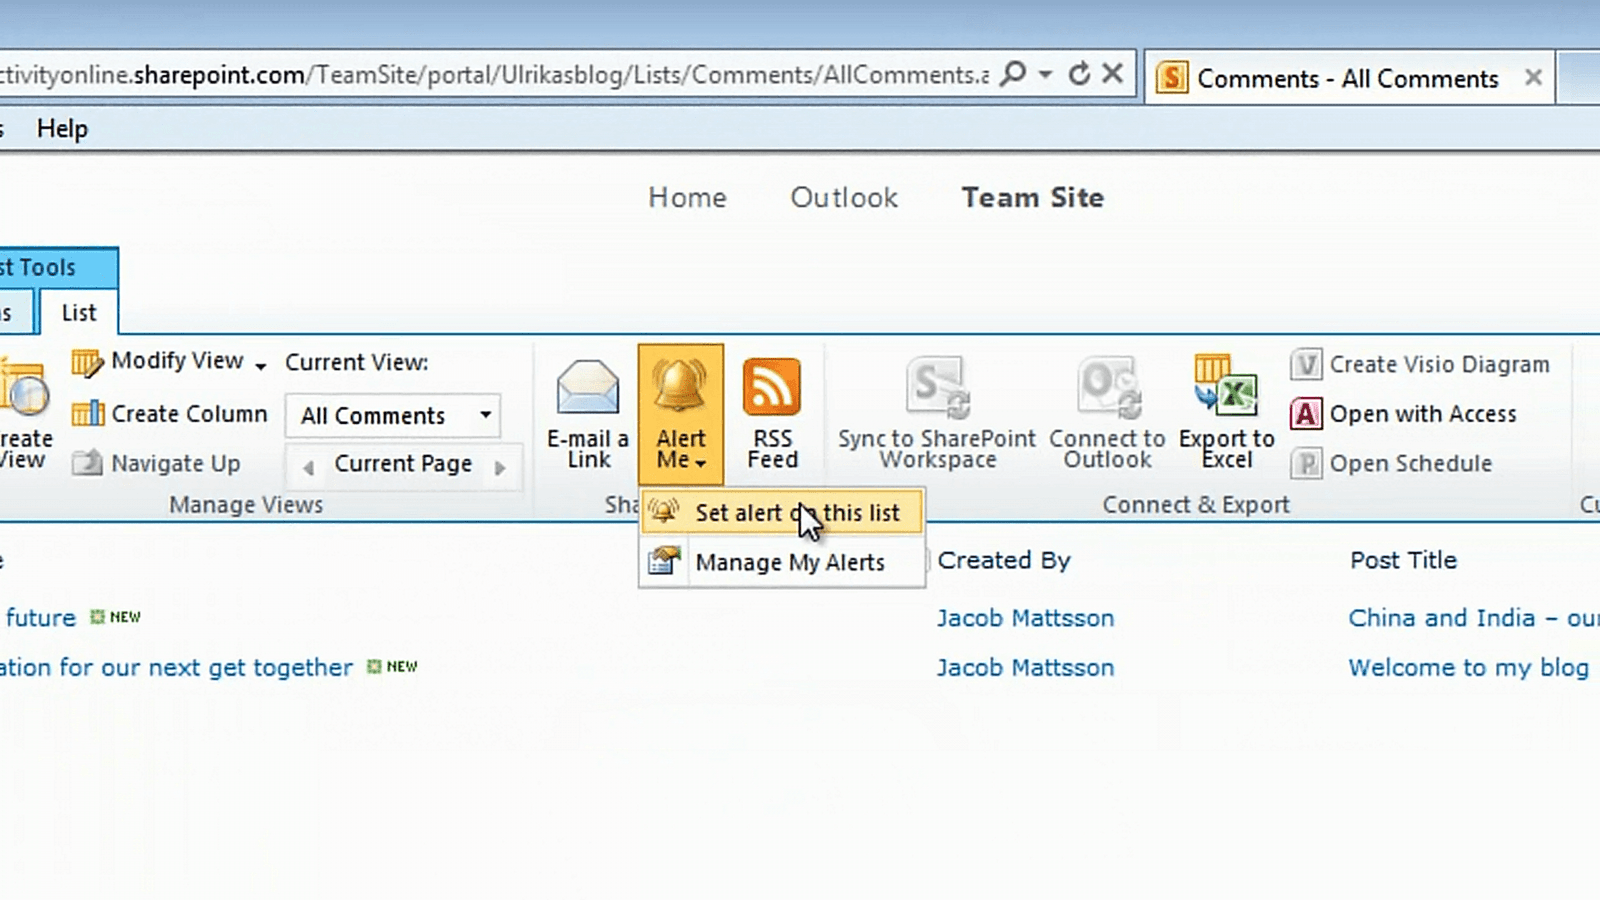
If I go back to the site logged in as myself you can see that I have the blog tools available I can also see that a new comment has been posted. If I click on the comment the blog post opens up and I will see the comment from Jacob. If I want I can set a notification so that I always get an alert if someone adds a comment. To do that click “Manage comments” click “List Tools” and then “List” and “Alert Me”. Select to “Set an alert on this list”.
Here I will select to be alerted by email as soon as a new item is added and then I’ll click “Ok”. This way I’ll get notified if someone adds a comment to my blog and I can respond to their comment. This is a great way to increase visibility into your corporate communication.
Closing (08:53)
As you can see it’s quite easy to set up a blog and get started – the challenge is to continue writing. A lot of bloggers have started with enthusiasm but then their blogs have slowly died off. If you don’t feel that you can commit to writing the blog yourself you can always start a team blog, that way you can share the task of writing. I’m Ulrika Hedlund for Business Productivity – Thanks for watching!


