Create a professional letterhead template
Learn how to create a professional business letterhead template in Word 2010
Part 1
Introduction (04:00)
Welcome to Business Productivity – I’m Ulrika Hedlund. Any document that represents official correspondence from your company should be written on a document with a letterhead. This goes for printed documents as well as documents sent digitally. The letterhead should include your company name, your logo and your contact details. Using a letterhead adds professionalism to your communication; it also helps customers and partners to get in touch with you.
In this video I will show you how you can create a simple, clean and professional letterhead template to be used for all of your correspondence. I’ll also show you how you can design a more advanced design template to be used for digital communication. Let me show you!
Overview of different letterhead samples (00:55)
Here I have a document with a simple, clean letterhead. It has the logo at the top in the header and in the bottom in the footer we have our contact details. Now if I look at this document in Word the logo looks a bit faded a bit washed out.
But this is just Word’s way of showing you that this is part of the header. When you print this document, let’s look at the print preview, you can see that the logotype will be printed using the full colors.
I recommend that you use a simple design for your letterhead this is to make sure that it looks the same no matter what printer you use. Different printers have different capabilities when it comes to printing images some can print all the way to the edge of the document whereas other printers will leave a margin. Let’s look at another example to demonstrate this. Here we have a letterhead with a grey image in the background. This looks good in Word, however, if I look at the print preview you can see that the image will not be printed all the way to the corner.
Create a new template (01:59)
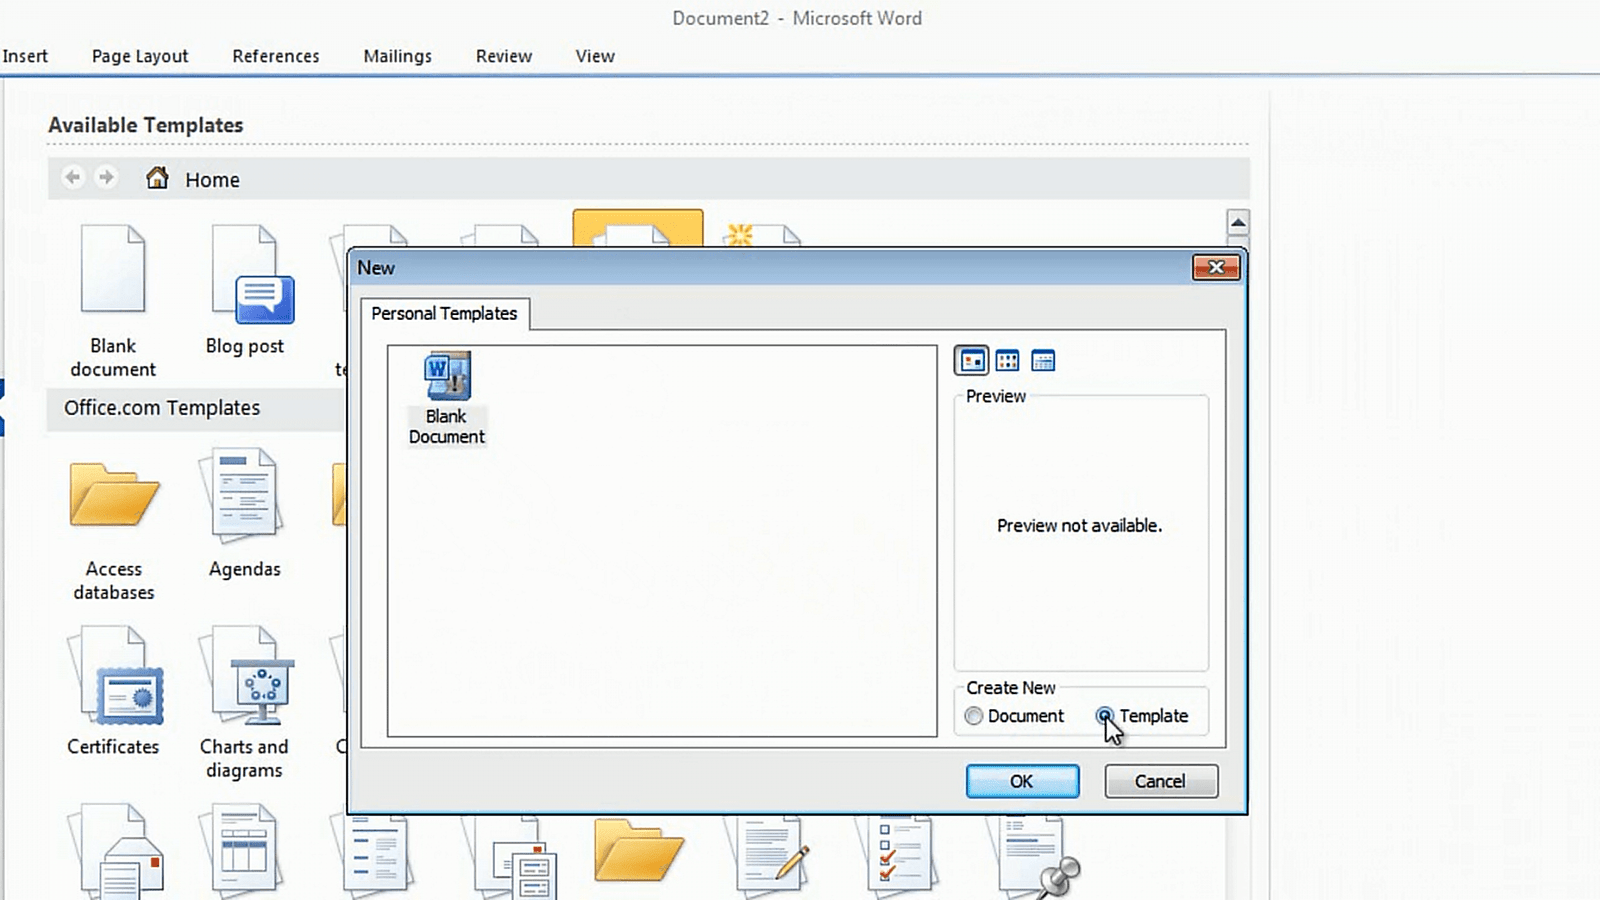
Now let’s go back to the document with our first letterhead. Now I want to show you how you can create a new template with this letterhead. To create a new template click “File” and then click “New”. Select “My Templates” and here you are going to find all of the templates that you’ve created. Since I haven’t created any previously this is almost empty. The only one I have is the “Blank Document” and this is here by default. I’m going to select the “Blank Document” and select to create a new template and then I’ll click “Ok”.
Now this looks just like normal document but in fact we are building a template.
Insert your logotype in the header (02:35)
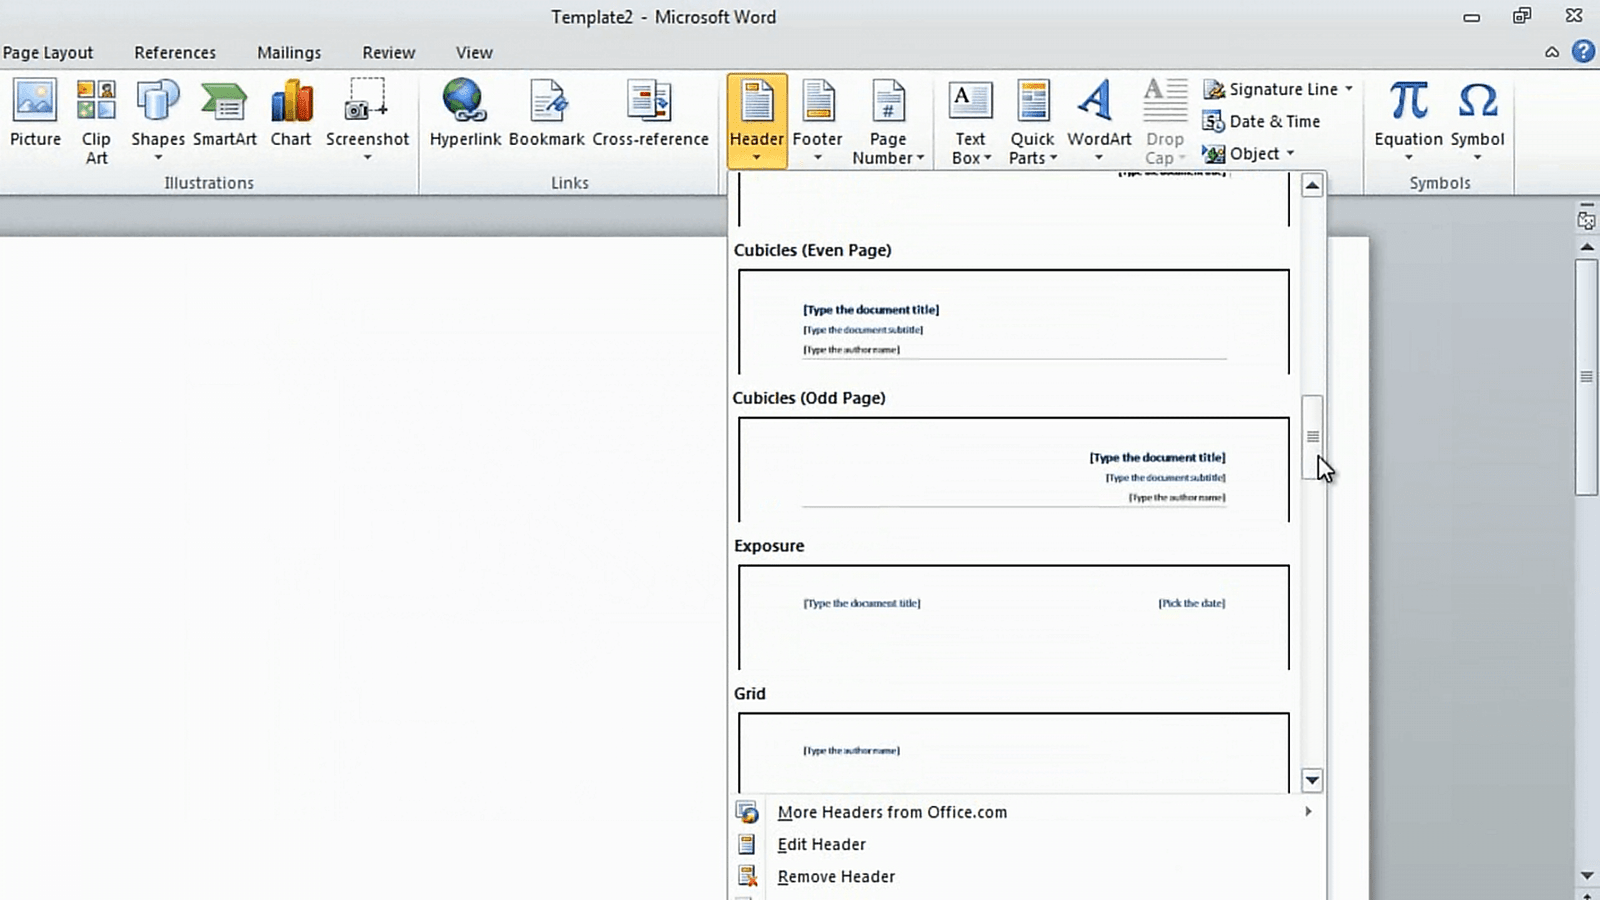
The first thing I want to do is to insert our logotype in the header. To insert a header click the “Insert” tab and click on the Header icon. Here there are a number of built in designs that I can choose from. But since I only want to insert a logotype I’ll just select “Edit Header”.
Now I can insert my logotype. I’ll go to the “Insert” section and just select “Picture”, and here I will select our logotype [from the Picture folder]. As you can see this image is way too big, so I’ll just resize it by grabbing the bottom right corner to make sure we keep the proportions of the logotype. Now I want to place the logotype up in the left hand corner, so I’ll click “Wrap Text” and then select “Behind Text”.
This way I can position the logotype exactly where I want it and I don’t have to worry about text or margin settings. There, to close the header I can just double-click outside the header area or I can go to the “Design” tab and just click “Close Header”.
Insert your company details in the footer (03:38)
Now let’s insert our text in the footer. Again we’ll click “Insert” and select “Footer”. Click “Edit Footer”. Now I want to insert our contact information. But instead of just typing it in here I’m going to add the text into a text box so that I can have more control over how the text is placed. To insert a text box click “Insert” and then “Text Box”.
Here I’ll select to draw a text box. I’ll just draw a text box across my footer and then I’ll change the design so that the text box has no outline because I don’t want this text box to be visible. Now I can start adding my text. I’ll start with our company name and then our web and email address. I’ll remove the hyperlink underline by just pressing the backspace key. I use the “pipe” symbol; this is the one that looks like a straight line to separate the fields. Finally I’ll add our phone number and our postal address. I’ll mark the text and just reduce the font size and then I’ll center the text. I want to insert a line to have a clear divider. To do that I’ll click the “Insert” tab again and click “Shapes”. Here I’ll select a straight line. I’ll hold down the “Shift” key when I draw the line to make sure that it is straight.
I’ll move the line up a little bit and then I’ll change the color to a dark grey. Ok, let’s see what this looks like! I’ll click outside of the footer and preview.
Saving and using the template(05:08)
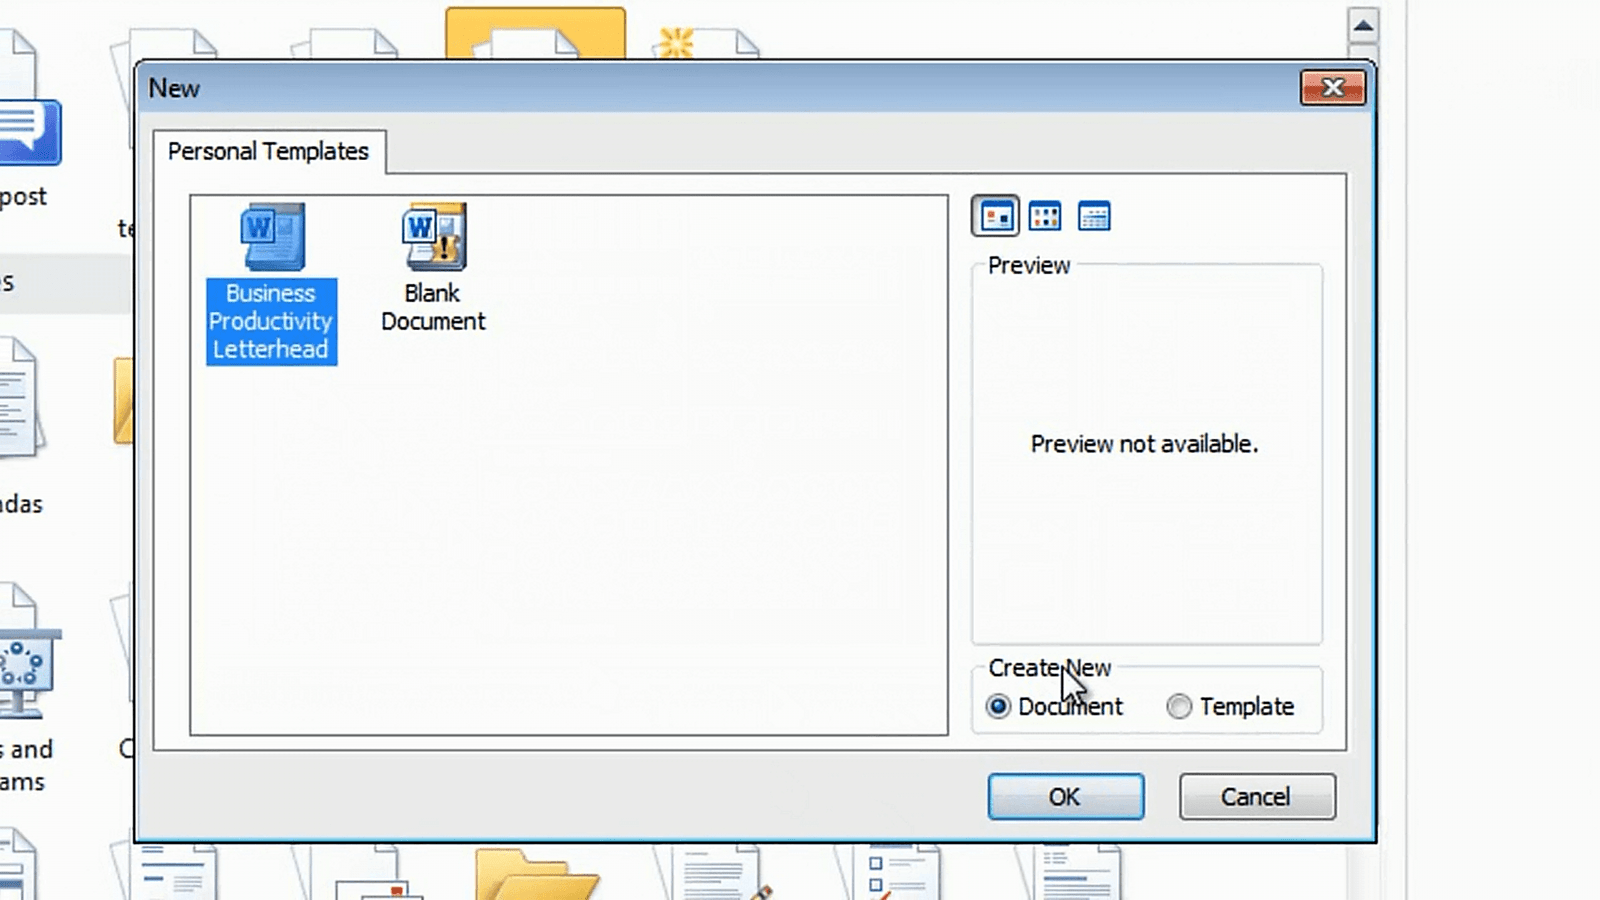
This looks pretty good now I’m happy with the footer and the header. Now I’m ready to save the template. To save it I’ll click “File” and then “Save As” and then I’ll just give the template a name: “Business Productivity Letterhead”. The template is saved in the template folder. So next time I want to open a new document I can go to “My Templates” and I’ll have the “Business Productivity Letterhead” template that we just created. To write a new letter using our letterhead I’ll just click the template and select to create a new document. Now I can start writing my letter.
If you only want the letterhead on the first page (05:44)
If I add multiple pages to this document each page will have the same letterhead. Sometimes you want to write a letter but you only want the first page to contain the letterhead you want the following pages to be blank. If you try to remove the logotype from the header on the second page this [the logotype] will be deleted in the header on all the pages so we can’t do that. The way to solve this is by inserting a section break. Close the header and footer and then go to the “Page Layout” tab. Under “Breaks” click “Next Page” section break.
Now click on the header on the second page, here you can see that it says “Header – Section 2 –“. In the “Navigation” area on the “Design” tab click “Link to Previous” to unlink this [the header].
Now you can delete the logotype but only in the header in section 2, the header in section 1 is still intact. Do the same thing for the footer in the second section. Click “Link to Previous” and then delete the footer. Now we can close the header and footer and as you can see we only have the letterhead on the first page not on the following pages. What we just did is a bit tricky for most people. So if you know that your employees often use letterheads that only have the letterhead on the first page you can create a template that looks this way by default.
Create a template with a letterhead only on the first page (07:08)
To do that click “File” again, “New” click “My Templates” and again we’ll start from the blank document and create a template. Click “Insert” and again we’ll start with the header. Under the “Design” tab in the “Options” section we’ll click “Different First Page” this means that the template will have a different first page.
Now I can insert my header and footer again. Now I’ve created a template where the letterhead is only visible on the first page, the following pages are blank. So now I’ll just save this as a new template.
Part 2
Create an advanced design for online correspondence (00:00)
If you’re not going to print your letterheads you can be more creative when it comes to your designs. Here I have a document design that’s a bit more advanced.
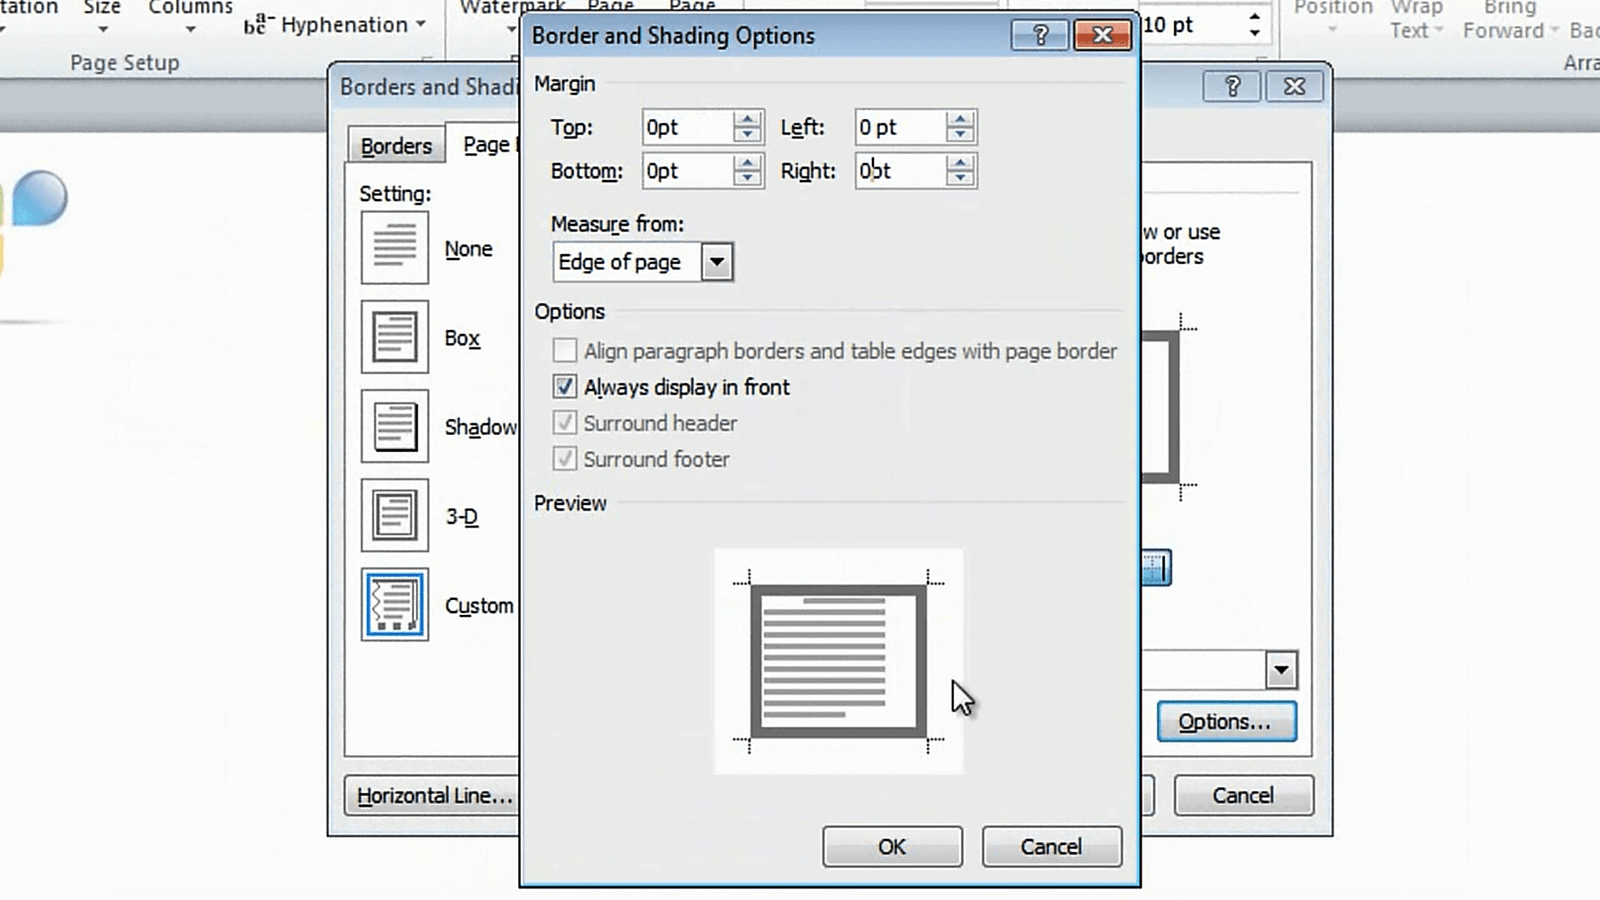
I’ve already started to design this template. Just like before I’ve added a logotype in the header. Now I want to insert a page border. To insert a page border click “Page Layout” and then “Page Borders”. Select the color, I’ll select a dark grey, and the width of the line. I’ll apply the borders to each side of the document and since I want the border to go all the way to the edge of the document I’ll put the margins to “0” and then click “Ok” and there I have my border.
Now I’d like to add this grey rectangle with our company text information to my template. Even if this [the grey rectangle] is located across the page we’ll add it to the header so that we can have it on each page. We’ll go back to our template, click “Insert” “Header”, “Edit Header”. I’ll change the view so that we see the full page and then I’ll select to insert a rectangle. I’ll draw the rectangle across the page,
change the design so that there is no outline, and change the filling to a gradient fill and click “Close”. Again, I’ll insert a text box with our company information. I’ll remove the shape filling and the outline. Now I’ll insert our company information but first I’ll change the text direction 90 degrees.
There, now I have the border, the grey shaded rectangle and our company information going across the right edge of the document. This is a great letterhead that I can use for my online correspondence. Now I’m ready to save it as a template and share it with my colleagues.
Closing (01:55)
Many larger organizations already have letterhead templates, but if you are a startup or smaller organization you can easily create one yourself following the advice I gave you in this video. But remember to test what the printed letterhead looks like before you distribute the template within the organization. I’m Ulrika Hedlund for Business Productivity – Thanks for watching!


