Collect feedback using a survey
Learn how to create a survey using SharePoint in Office 365 to collect feedback
Introduction (00:04)
Welcome to Business Productivity – I’m Ulrika Hedlund. It’s quite common that you want to gather input and feedback from colleagues on something you’re working on. You might be planning an offsite and you want to know where your colleagues want to go, or you’re changing your company brand and you want input from your employees on a design, or you just want taste preferences for your team dinner. Using surveys is a great way to quickly collect feedback from other people.
In this video I will show you how you can use SharePoint in Office 365 to create surveys. I will show you how to add various types of questions, and then how you can view a graphical summary of all of the responses. I’ll also show you how you can export the responses into Excel for further analysis. Let me show you!
Create a survey (00:52)
I’m planning a team dinner and I’d like to collect some input from my colleagues on their preferences. I want to know which date suits them the best, what type of cuisine they prefer, what they would like to do after dinner, if they would be interested in a joint bus transport and finally if there are any special dietary needs that I need to be aware of.
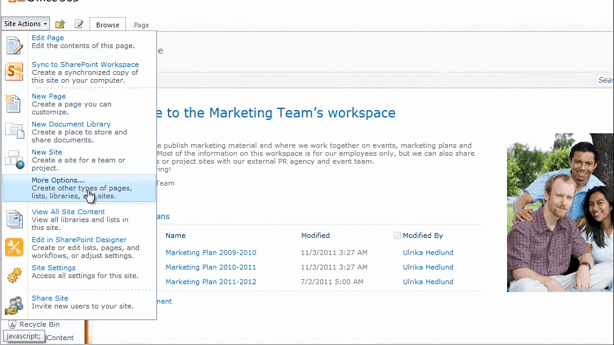
In order to collect this information in an efficient way I’m going to create a survey. To do that I’ll go to our team site and I’ll click Site Actions, here I’ll click More Options and just scroll down to the Survey.
And then I’ll give the survey a name; Team dinner survey. And click Create.
Add questions to your survey (01:37)
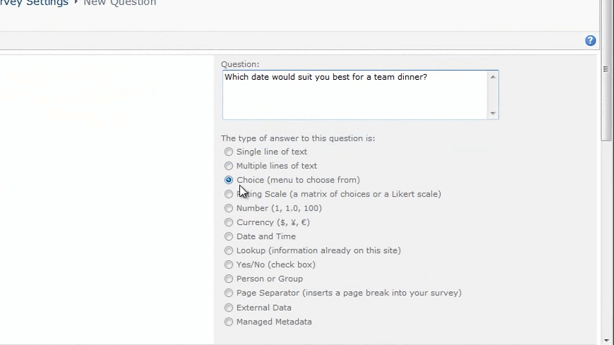
Now I can start building my survey. I can select between a number of different types of answers, but in this case we’ll keep it rather simple. The first question is regarding which date suits them the best, so I’ll just copy this and paste it into the first question. Here I want the different options to be displayed in a drop down menu. So I’ll just leave the type of answer to this question to Choice.
Here I can select whether or not I require a response to this question and since I want everyone to answer this question I’ll change this to Yes. Next I’ll add my different options, so I’ll go back and I’ll copy the options that I have in my word document. And just paste them in again. Here I can select how I want these options to be displayed; in this case I want it to be in a drop down menu. I can select whether or not I’ll allow people to fill in their own choices, but since I don’t want people to add any other dates I’ll just leave this to No.
And then I’ll go to the next question.
Questions with a rating scale (02:43)
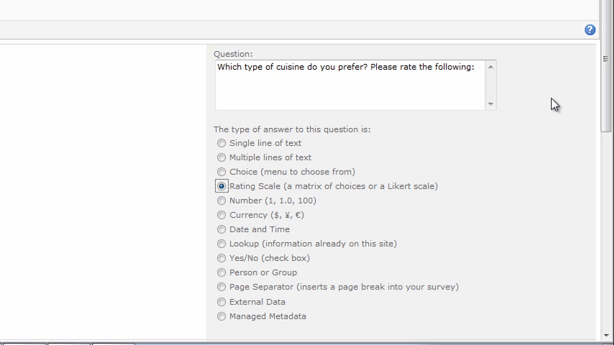
Here I want people to rate between different types of cuisine, so again I’ll just copy the question and paste it in. and for the type of answer I’ll select a Rating Scale.
People don’t have to respond to this question, so I’ll just leave the default, which is No, for the required response. And then again I’ll copy my options. Here I can select the number range, meaning the scale that people can choose from, I’ll just leave the default, 5. And then I’ll change the text. So instead of having Low, Average and High, I’ll have; Dislike, Ok and Love it. I also have the option to show a N/A option, but in this case I won’t show that.
And then we’ll go to the next question.
Questions using radio buttons (03:32)
The next question is another choice; what would you like to do after dinner? So again; copy the question and paste it in and then we’ll leave the default, which is Choice. We’ll copy the options and paste them into our choice field. And here I want to display my options using Radio Buttons, so that people can easily see all of the options at once. Here I’m also going to allow ‘Fill-in’ choices if people have other ideas of what they want to do after the dinner.
And then click Next Question.
Yes/No and free text questions (04:08)
The following question on whether or not a bus transport would be of interest requires a Yes/No type of answer. Even though there is such an option in the answer type list, I’m going to leave the default, Choice option, because in my opinion this is easier to understand. So I’ll just type in Yes and No and leave it as a Radio Button.
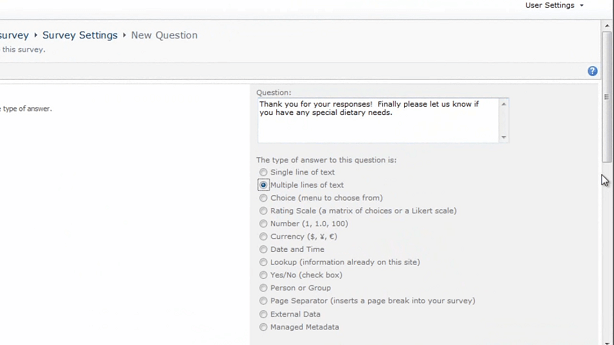
Now for the final question: and in the last question I’d like to include a thank you because they spent their time filling in the survey. I’ll paste in the last question and here I want to have a free text field with multiple lines of text.
And now we’re done and I can finish this survey.
Preview your survey (04:57)
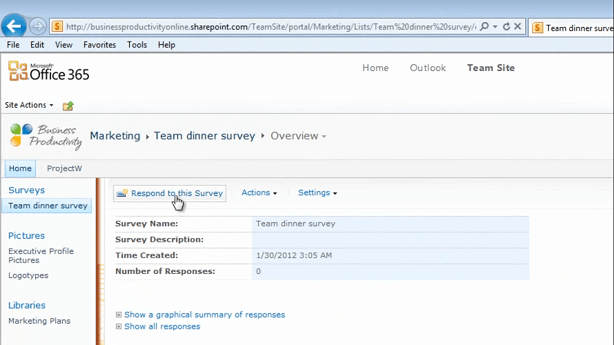
Now before I make any changes to this survey I want to see what this survey looks like. So to do that I’ll go to the Team dinner survey and I’ll click Respond to this survey.
And here’s what the survey looks like:
Great!
Check the permissions of your survey (05:15)
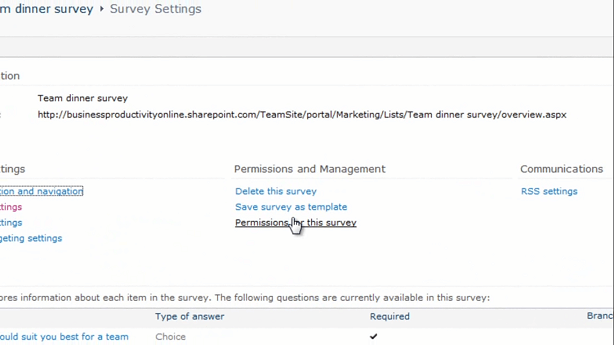
Now before I share the link of the survey with my team members I want to change some additional settings. To do that I’ll click Settings and then Survey Settings.
I’ll click Advanced Settings. Under Item-level Permissions I’ll change the Read access so that users can only see their own response because I don’t want them to be influences by each other.
The other settings I’ll just leave as they are.
Now the final thing I want to do before I send this out is that I want to check the Permissions for this survey.
In order for someone to fill in this survey they need to have the permission that will contribute. And in this case all of our team members have the permission level Contribute, so this is okay.
Share the survey with your colleagues (05:57)
Now I want to share the link to this survey with my team members so I’ll just copy the link here to the survey page and I’ll open up the email that I’ve prepared to the team. I’ll paste in the Hyperlink
And click OK. And now I’ll send this out to the team and just wait for their responses.
Analyze the answers (06:17)
Okay! Now I can see that three people have responded to the survey, now I can choose to Show a graphical summary of the responses.
Here I can see that, currently, Thursday is the preferred date, we currently seem to have a preference for Indian food, to go dancing, to arrange for a bus transport and finally I can see the special dietary needs here.
If you have more data it can sometimes be useful to export the answers to Excel. To do that, go back to the team dinner survey overview page, click Actions and then Export to Spreadsheet.
This way you can use the power of Excel to analyze your data.
Closing (06:57)
As you can see using surveys is a great way to quickly collect feedback from other people on various types of topics. Remember to keep your surveys short because people have a very limited patience when it comes to long surveys. I’m Ulrika Hedlund for Business Productivity. Thanks for watching!


