
Clean up your inbox and easily find email
Introduction (00:04)
There are a number of built-in tools in Outlook 2013 that can help you clean up your inbox. In this video you’ll learn how to use the Clean-up tool to eliminate duplicate email, you will learn how to use the Ignore tool to stay out of email conversations you’re not interested in, and finally you’ll learn how to use the search tools to quickly find what you’re looking for.
Sort email by conversation for a better overview (00:27)
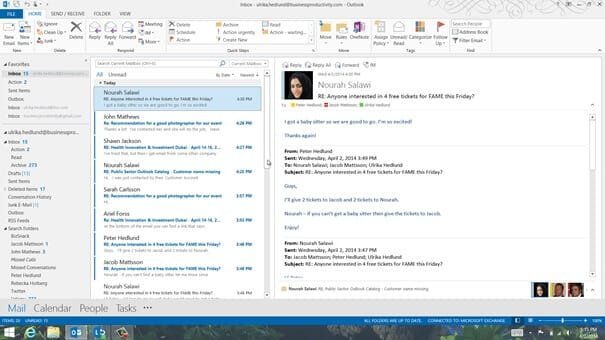
Here I am in my inbox going through my email for the afternoon. It looks like a lot, but many of these email relate to the same conversation. So instead of going through them one by one, I can view them by conversation to save time.
To view your email by conversation click the sorting title which here is “By Date” and select “Show as Conversations”.
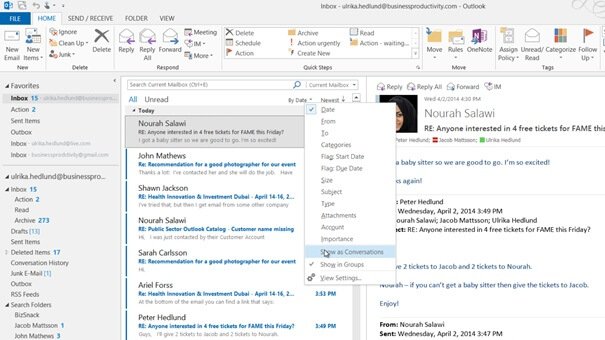
I’ll apply the settings to this folder. Now I can see that most of the email where related to 4 conversations, so there really isn’t too much going on.
I can see by the number in the parenthesis how many unread email I have in that particular conversation.
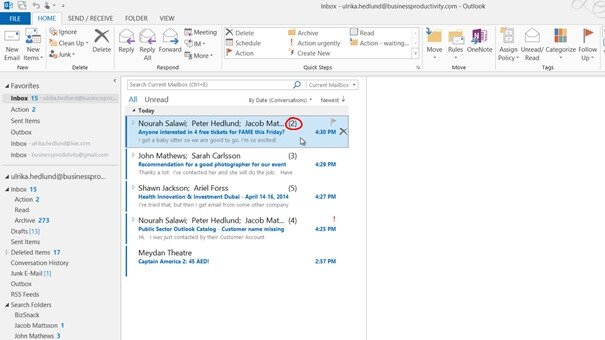
If I click a conversation I get to see the first unread email in the thread and the ones following that email. If I click again all email in the inbox – read or unread, are visible and instead of showing the names in the title I can see the subject line. I prefer this view as I like to get a full picture of all the email in the thread, whether or not I have read them. You can change the settings of the conversation view by clicking the “VIEW” tab and then “Conversation Settings”.
Here you can choose to see messages from other folders to get a full picture of the entire conversation no matter where the email are located. For the Inbox I prefer not to apply this. Here I will choose to “Always Expand Selected Conversation”.

Now if I click the conversation again, it’s directly expanded showing me all the email in the conversation. I can see that all of these email were related to free tickets to a musical that two of our colleagues signed up for, so I can just delete the entire conversation by clicking the “Delete” button next to the Conversation title. I will get a warning message saying that all the email in the conversation will be deleted, and that’s fine, so I’ll mark not to show the message again and “Delete selected messages”.
Here is another email conversation about a recommendation for a photographer. Sarah has already responded with the name of a photographer so there is no need for me to respond. I want to keep the name as a reference so I’ll save this conversation into my “Archive” folder. I’ll go back to the “HOME” tab and then I’ll apply my Quick Step that moves the email into my Archive folder. Again I get a warning message that the Quick Step will be applied to the entire conversation. I’ll select not to show it again and click “OK”. The entire conversation is moved to my Archive folder and I can continue to walk through my email.
Using the Ignore Tool to stay out of unwanted conversations (03:16)
Here is an email conversation that has totally gone out of line. It started with an invitation to an event that I’m not interested in and then a number of people have done reply all. I’m not interested in these email – or any future emails related to this conversation. To delete current or future messages related to a conversation you are not interested in, mark the conversation or any email in the conversation and click “Ignore”. I’m warned that the conversation as well as future messages will be deleted and I’ll select not to see the message again and click “Ignore Conversation”.

The email are moved to the “Deleted” items and you don’t have to worry about spending time on cleaning up future email that might be sent related to the same conversation. This really is a great tool that helps you stay out of irrelevant and sometimes frustrating email conversations.
Using the Clean Up Tool to delete duplicate email (04:16)
This conversation between a number of my closest colleagues I want to make sure to read properly, but I actually don’t have to read through every one of these since people have replied to each other. To save time and remove duplicate email you can use the “Clean Up” tool.
To use the “Clean Up” tool mark an email in the conversation and click “Clean Up.” You can apply the “Clean Up” tool to individual conversations, or even better to an entire folder. The Clean Up” tool is great to use if you have been away from your inbox for a while and you want to quickly clean it up.

Here I’ll select “Clean up the Conversation” and I’m informed that the duplicate emails are moved from the inbox and put in my Archive folder, since this is where I have told Outlook to put them. I’ll select not to see the message again and then click “Clean Up”. And as you can see instead of having to go through 6 email, I can just read 2 to get up to speed on the entire story. I can scroll down to the bottom of this email to find the initial email from Nourah.
I’ll click on the next message to see the email from Jacob which wasn’t included in the other email. If I go to my Archive folder all the individual email in the conversation are saved here.
To change the settings for the “Clean Up” tool, go to the “FILE” tab and then click “Options”. Under “Mail”, scroll down to “Conversation Clean-Up” and where it says “Cleaned-up items will go to this folder” click “Browse”.
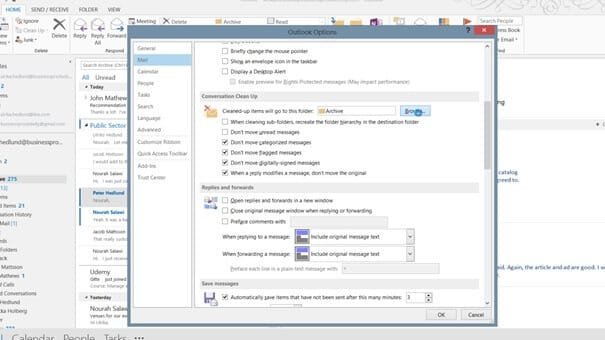
Here I’ve selected my Archive folder, I don’t recommend that you put them in “Deleted Items”, since it is good to be able to search for email from specific people. I’ll click “OK” and “OK” again.
I’ll just write a quick reply to Nourah putting the others on cc, telling Nourah to let me know if she needs my help and when I’m done with my reply I’ll archive the conversation using my “Quick Step”.
Using the Junk email filter to remove spam (06:14)
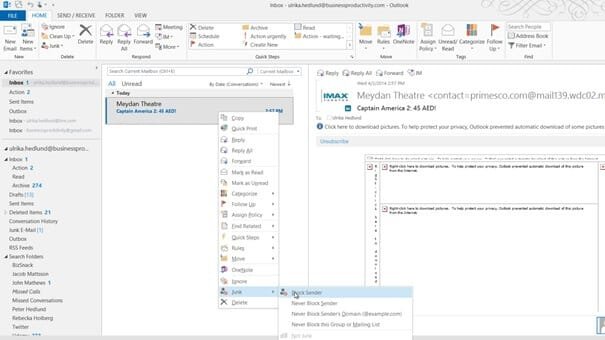
Here I have a spam email, I want to delete this and make sure that I don’t have to waste any more time on email coming from this spammer in the future, so I’ll right-click and select “Junk” and then “Block Sender”.
I’ll mark not to see the message again and click “OK”. If I go to my Junk folder I can see that the email has been moved there. I recommend that you check your Junk email folder from time to time, because sometimes email that are not junk can end up here.
Searching your email (06:37)
Now that I’ve gone through my entire inbox I’ll go to my Action folder where I have email marked for follow up. Here I have an email from Peter asking me which venues we were considering for our Executive Roadshow. I’ve previously received an email from Nourah with this information. I can search for the email from Nourah by clicking in the search box in the inbox, or since I know it’s in my Archive folder I’ll go there to narrow down the search. As soon as I enter the search field the “SEARCH TOOLS” appear.

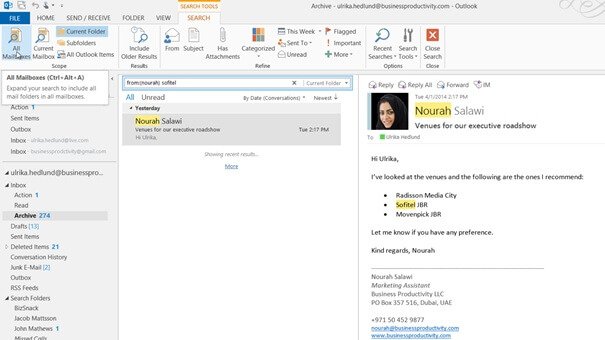
Here I can search for email matching a number of different criteria. I’ll start with clicking “from” and then entering Nourah. All the recent email from Nourah are shown. Outlook limits the search results to recent email to speed up the search. To refine the search further I’ll write “Sofitel” in the search field since I remember this being one of the mentioned hotels. And there is the email I was looking for.
Changing your search settings (07:38)
If you don’t have all of your historical email in one single folder like I have here, you can change the scope of your search to “Subfolders” in order to find what you are looking for. If you have multiple email accounts or archives that you want to search click “All Mailboxes” to extend your search.
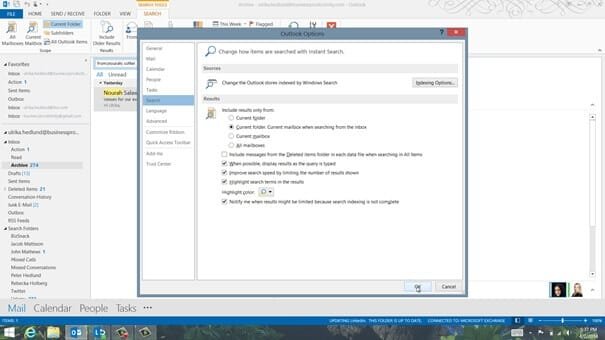
In order for Outlook to always search all your mailboxes you can change the settings. To change the default search settings of Outlook click “Search Tools” and then “Search Options”. Here you can change the default search scopes. The more limited your search scope is, the quicker the search results will appear so I recommend that you keep the default option which is only to search the current folder, unless you are searching from the inbox. If you are in the inbox outlook will search the entire mailbox. In Outlook 2013 the search results are limited to increase the speed of searches. Just uncheck this box if you want to change this.
In the email from Nourah I’ll copy the text, go back to my “Action” folder, click “Reply” and in the Quick Response window I’ll just paste in the text from Nourah with the venues and send the email to Peter. Then, I’ll archive the email using my Archive Quick Step.
Here I have an email from a customer asking me for an agenda similar to the one I sent him two years back but updated with the topics and Office 2013. I’ll go to my “Sent Items” and click in the search field. I’ll click “To” and then enter John’s name. I’ll click the paper clip to find email with attachments.
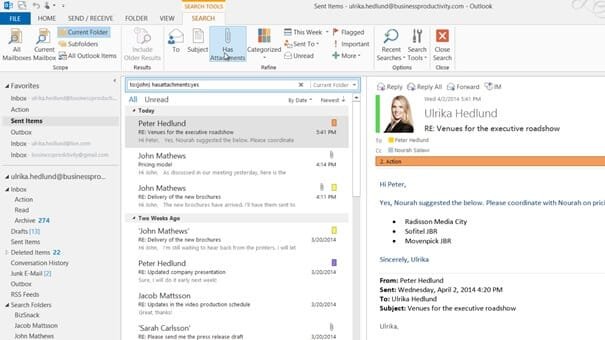
Here are a number of recent email sent to John with attachments, but the email I’m looking for is much older so I’ll click “More” to get older email and here it is, I can open up the email with the old agenda John was referring to.
By knowing how to clean up and find email you won’t waste as much of your valuable time on email.