
Captivate your audience with animations
Introduction (00:04)
Adding motion to your presentation is a great way to capture your audience attention. You can easily do this by using animations. If used effectively animations can add great focus and emphasis to your slides. Now I am going to show you how you can add different types of animations to your text and objects, I’ll show you how you can change the settings of the animations to get the result to you want and finally how you can use the Animation painter to copy animations from one object to the other.
Adding simple animations (00:39)
Here I have a presentation for a company meeting. I want to add some animations to these slides so that I can focus my audience attention on the item I’m currently speaking about.
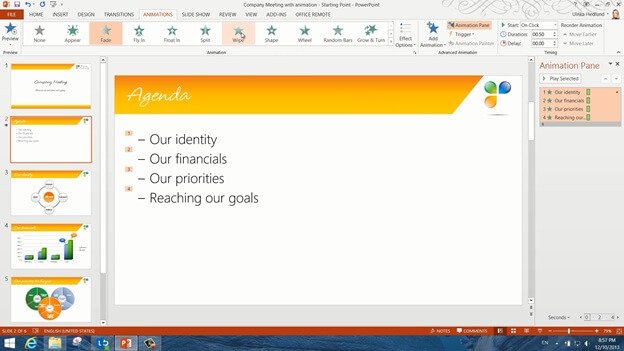
On this first slide, I have the agenda. Instead of showing the full agenda all at once I want each line item to appear when I click as I walk the audience through the agenda.
To apply animation to text, mark the text box and on the “ANIMATIONS” tab click “Add Animation”.
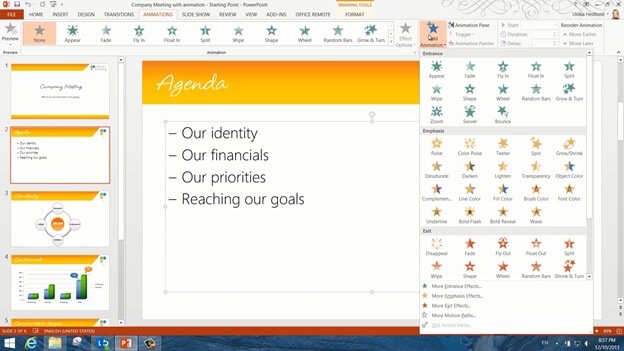
The animations are grouped into four different categories, entrance, emphasis, exit animations, and finally motion paths. Here I want to apply an entrance animation. Let’s apply the “Fade” animation. When you are working with animations I recommend that you open up the “Animation Pane”. On the “ANIMATIONS” tab click, “Animation Pane”, I’ll click the little arrow to expand the group so that I see each row separately. When you add animation to your slide a little star will appear next to the slide in the thumbnail view. You will also see numbers next to the text showing the order they’ll appear in. You can easily change to another animation by just selecting one in the “ANIMATIONS” gallery. Here I’ll change to “Wipe”, but instead of having the text wipe up from the bottom and up, I’ll click “Effect Options” and select “From Left”. To preview your animation you can click the “Play” button in the “Animation Pane” or to see them live click to start the slideshow. Now the agenda items appear one by one, just as I wanted.
On this second slide we have our company identity with our values. I want each circle containing a value to appear as I mention them. To apply animation I’ll mark the circles by holding down “CTRL” on my keyboard. Make sure to mark the objects in the order you want them to appear on your slide. I’ll click “Add Animation” and here I’ll select the “Zoom“ animation. Now all the circles will appear all at once but I want them to appear one by one. So having the animations marked in the “Animation Pane” I’ll go to the Start drop down menu and select: “On Click”. Now you can see that the objects will appear one by one in the order that I want them. Let’s look at this again in Slide Show mode. Perfect!

Adding animations to charts (03:15)
On this next slide I have a chart with financial results. Here I want to add some suspension so that I show the bars one at a time. Finally I want to show the total planned result and the actual result with a little effect to show that we performed much better than planned.

To add animation to a chart mark the chart and click “Add Animation” I’ll apply the “Wipe” animation which is good for charts. The direction is automatically set to “From bottom” which looks best when you have standing bar charts like this one. But now I want to change the animation so that the whole chart does not appear all at once. Under “Sequence” I’ll select “By Element in Category”.

I’ll expand the animations by clicking the little arrow and then I’ll play the animation to see what it looks like. As you can see the chart gridlines and legend are animated which I don’t want, so I’ll just mark the first item in the animation pane and click ”Delete” on my keyboard.
Now for the text bubbles. The first one I’ll just add a simple “Entrance” animation for it to appear. I want it to appear after the Total Planned bar, so I’ll just mark it in the “Animation Pane” and drag it up and position it under the 7th bar animation. I’ll click on the little arrow and select to have the animation “Start After Previous”.

For the second bubble showing our great results I want an entrance animation with more emphasis. I’ll click “Add Animation”, “More Entrance Effects”. Here I’ll choose “Float Up”. I’ll change the timing of this one as well to have it “Start After Previous”. There! Now let’s see how this turned out. I’ll show the bars for advertising, training, consulting and then finally the planned total result of 400 and then our actual result of 510 rising up. Great!
Adding advanced animations to multiple objects (05:19)
On this next slide with the priorities for the coming year I have a lot of objects and a lot of text that I want to animate. First I want to show the group called “Quality Content” with the three elements. Next I want to show “Customer Contact” with a similar animation and then finally the “Reach”. Let’s go to the slide and start adding these animations. To see the objects on the slide, I’ll go to the “Home” tab and click “Select” and then “Selection Pane”. Here I can see all of the objects and the order that they’re in.

I’ll close down the “thumbnail preview” to get some more space on the screen. I want to start by animating this first priority group. Instead of marking the object in the slide, I can go to the selection pane and click on the object “Middle green” here. I’ll go to the “Animations” tab click “Add Animation” and add the “Fade” animation. Next I’ll mark the “Green circle” in the selection pane, click “Add Animation” and select “Zoom.” I’ll change the timing to start “After Previous”. Finally I want the pieces of the circle to appear, so I’ll hold down “CTRL” on my keyboard and then mark them in the order that I want them to appear. I’ll add the “Fade” animation. I want them to start after one another so I’ll change the timing to “Start after previous”.
Instead of manually applying animations all over again I’m going to use the “Animation Painter” to copy the animations to the two other priorities. To copy animations from one object to another you need to click on the actual object in the slide so I’ll close down the “Selection” pane. To use the animation painter first mark the object with the animation you want to copy, then on the Animations Tab click the “Animation Painter”. You will see a little brush next to your mouse pointer. Now point to the object where you want to apply the same animation. Now I’ll just go one by one and apply the same animations. There! Now let’s have a look at this. First priority is “Quality Content”, then “Customer Contact” and finally “Reach”. Perfect!

Adding custom animations paths and exit animations (07:45)
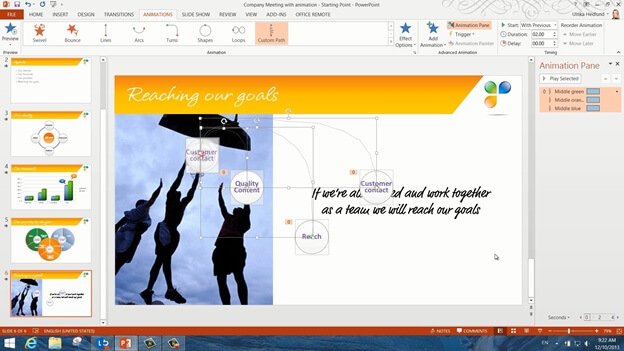
I’ll open up the thumbnail preview again and go to the last slide. On this last slide I want to show that if we are all in line with our priorities we can reach our goals.
I’ll go back to the previous slide and mark the priority circles by holding down “CTRL” and then I’ll copy them by pressing “CTRL C” on the keyboard. I’ll go to the next slide and press “CTRL V” to paste them in. I’ll remove the existing animations by marking them in the “Animation Pane” and clicking “Delete” on my keyboard.
To apply a custom motion path, mark the object, click “Add Animation” scroll down to “Motion Paths” and select “Custom Path”. Your mouse cursor will turn into a cross. Position the cross where you want the animation to start then click the left mouse button multiple times along the motion path you want to create for your object. To end the motion path, double-click. I’ll add the same custom motion path to the other circles. I’ll mark all the custom paths and then change the timing to start “With previous”. Now I also want the circles to become smaller and smaller and finally disappear into the net. So I’ll mark all the balls, click “Add Animation” and select “Grow/Shrink”. I’ll click “Effect Options” and choose “Tiny”. I want this to happen at the same time as they are moving into the basketball net so I’ll change the start option to “With previous”. Finally I want them to disappear so I’ll click “Add Animation” again and from the “Exit” group I’ll select “Disappear”. I’ll change the timing so that this animation start after previous.
Okay, let’s preview this and see if we got it right. Great, we are done! In just a few minutes we have added animations to our presentation to captivate our audience.