Automate writing personalized emails
Learn how to use advanced mail merge in Word 2010 to personalize emails
Introduction (00:04)
Welcome to Business Productivity I’m Ulrika Hedlund. In the video “Automate personalizing multiple letters” I showed you how you can use mail merge in Word 2010 to personalize letters. However, since most of our communication today is done via email, learning how to personalize your email messages might be even more useful. Say for instance that you want to send out thank you emails to participants after attending an event, or you want to send out emails to your employees asking them to contribute to a charity event. Whatever your reason is for sending the emails, the impact will be much higher if the recipient feels that this email was addressed uniquely to him or her.
In this video I’ll show you how you can use mail merge in Word 2010 to add individual names to your email messages, I’ll show you some more advanced capabilities of mail merge which enable you to customize the content of the email message based on data in an Excel file. Finally I’ll show you some tricks in Outlook that enable you to review the email messages before they are sent out to the recipients. Let me show you!
Personalized thank you email messages (01:24)
On April 3rd we had a Business Productivity workshop for some of our customers and now I’d like to send out a thank you email to the participants for attending the workshop.
After the workshop we asked the participants to fill out a feedback form. In this Excel spreadsheet I can see who has filled in the feedback form and who has still not given us their input. I’d like to thank those participants who have filled in the feedback form in the thank you email and I’d like to send a reminder to those who still haven’t filled it out. I’d also like to address any specific feedback that they’ve given us in the feedback form.
Composing personalized email messages in Word 2010 (02:01)
I’ll close down this Excel spreadsheet and then I’ll open up Word. Even though I’ve drafted the thank you email in Outlook and we’re going to use Outlook to send the emails I’m going to compose this Mail Merge email in Word. Here I’ll click “Mailings” and then select “Start Mail Merge” I’ll click “Email Messages”.
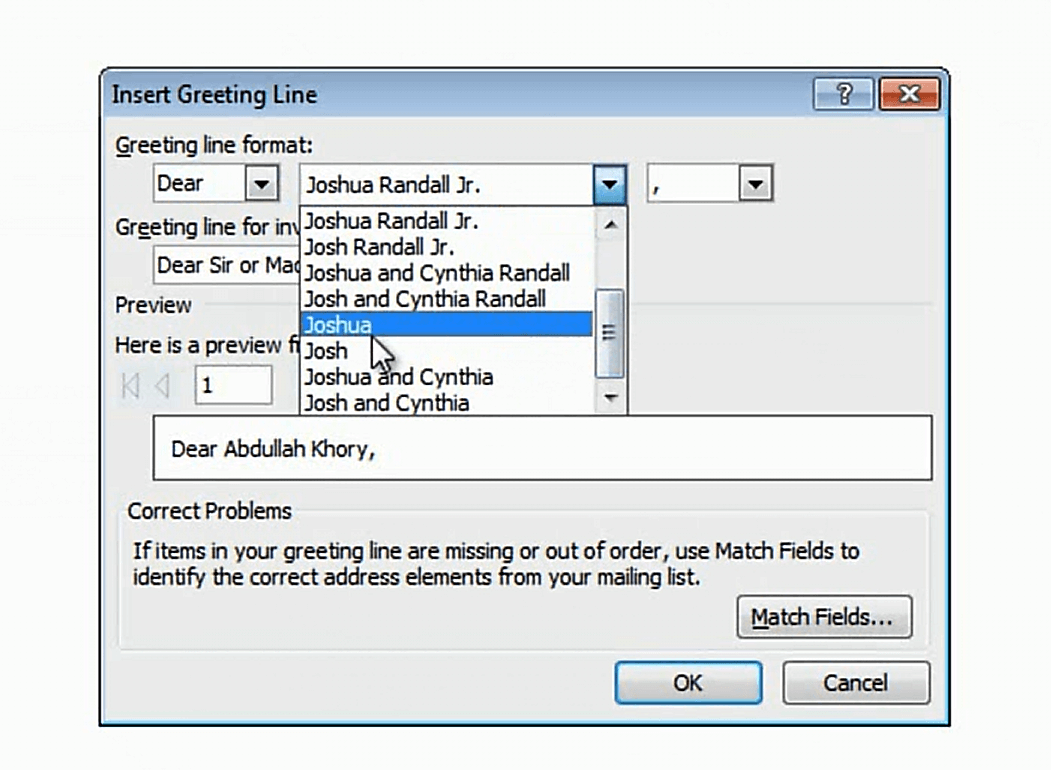
Next I’ll select my recipient list. Here I want to use an existing list and I’ll select the spreadsheet where I have the attendees email and feedback. I’ll select “Sheet 1” and my first row contains headers so I’ll leave this checkbox marked and click “OK”. I’ll click “Edit Recipient List” just to preview that I have the right recipients and this looks good so I’ll just click “OK”. Next I want to insert a greeting line. I’ll click “Greeting Line” and I’ll just leave the default which is “Dear” but here I’ll select only to have the first name so I’ll select “Joshua”.
I can preview to see what it would look like with my own recipients and then just click “OK”. Now I’ll click [press] “Enter” and now I want to copy some of the text that I’ve already written in my email message. I’ll take the first part of the text that’s the same for all recipients, I’ll right click and select “Copy” and then go back to Word. I’ll right-click and select “Paste”.
Customize text in the email message (03:24)
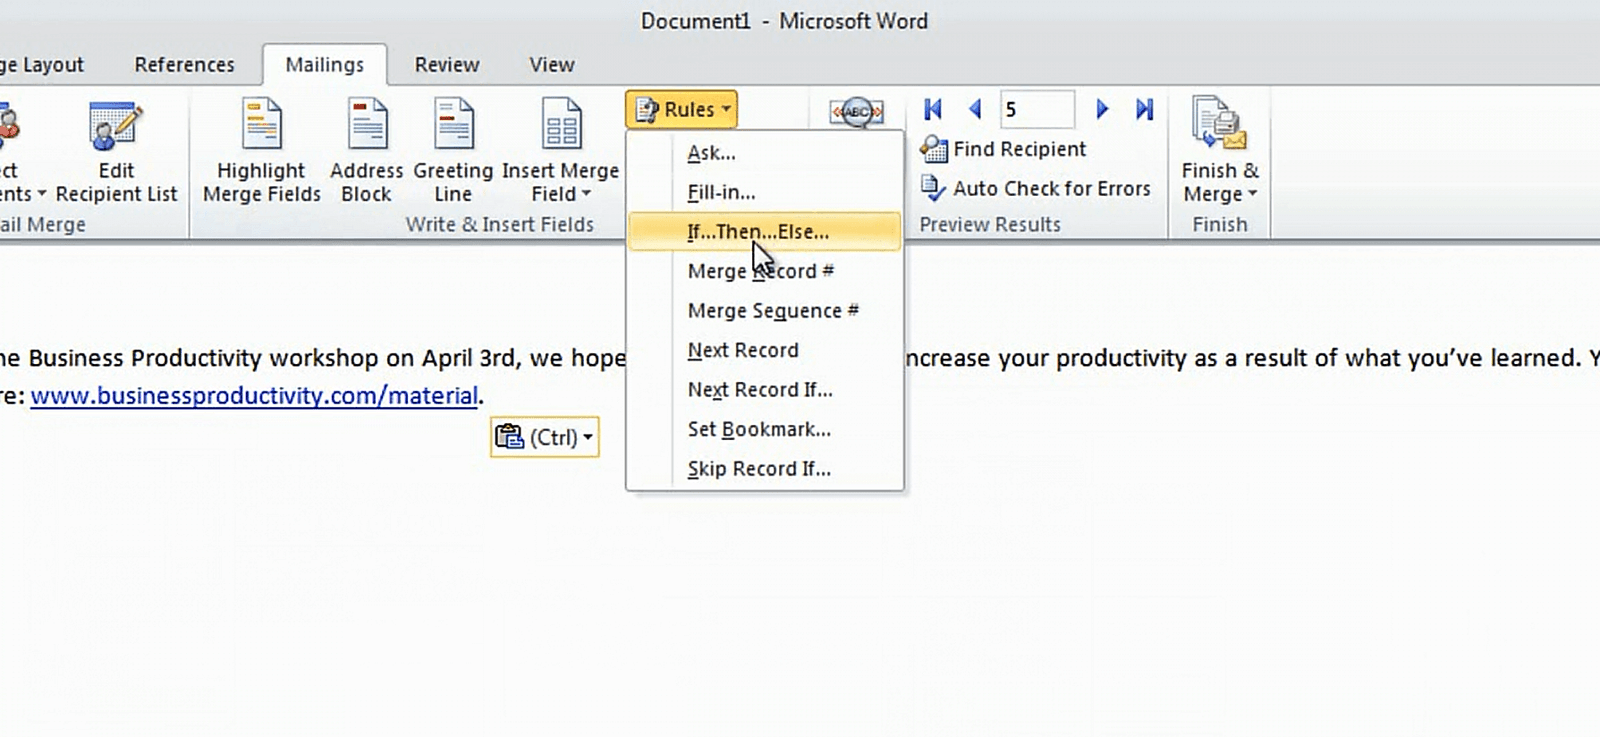
The next part of the text I want to customize depending on if they have filled in the feedback form or not. To do that I’ll click “Rules” and then “If…Then…Else…”.
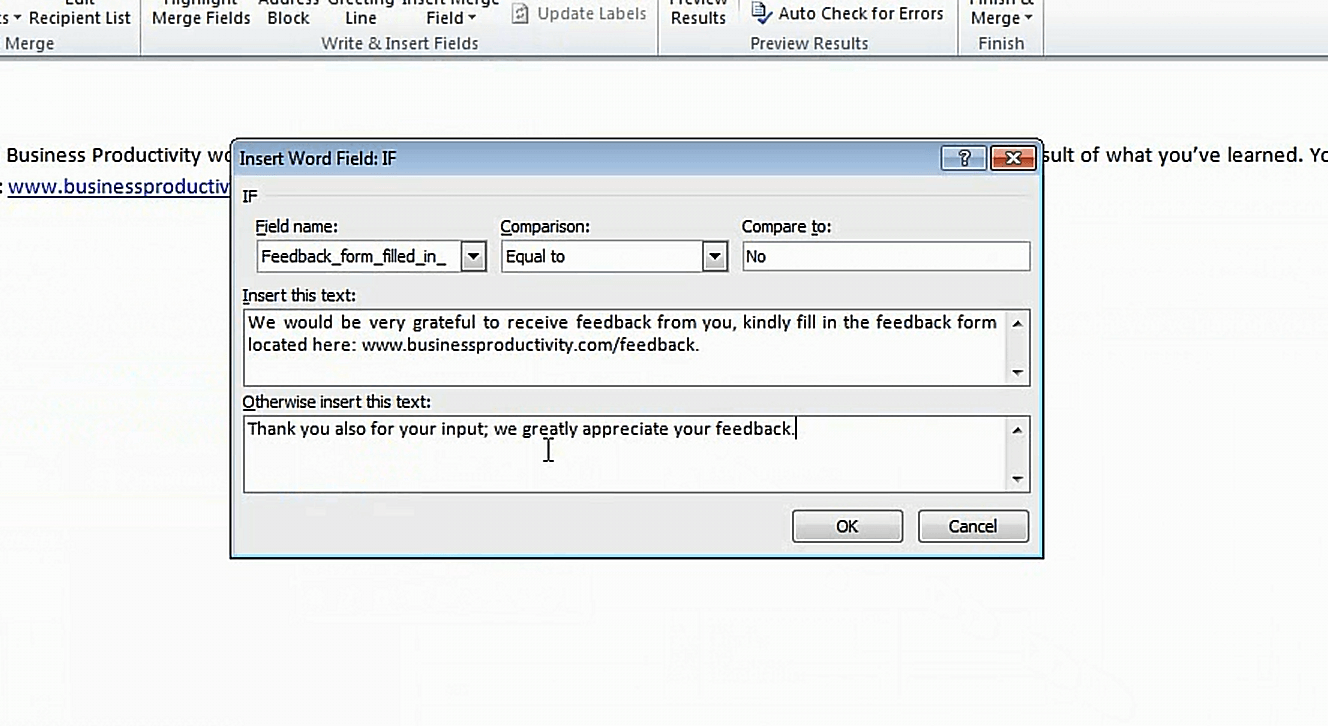
Now I’ll say if the field name “Feedback_form_filled_in” is equal to “No” I want to ask them to please fill in the feedback form. So again I’ll open up my email message and I’ll copy the text where I’m asking them to fill in the feedback form and I’ll just paste it into this text box by clicking CTRL + V. Otherwise I want to thank them for their feedback. I’ll open up my email message and I’ll copy the text by right-clicking and selecting “Copy” and again I’ll click [press] CTRL + V and then click “Ok”.
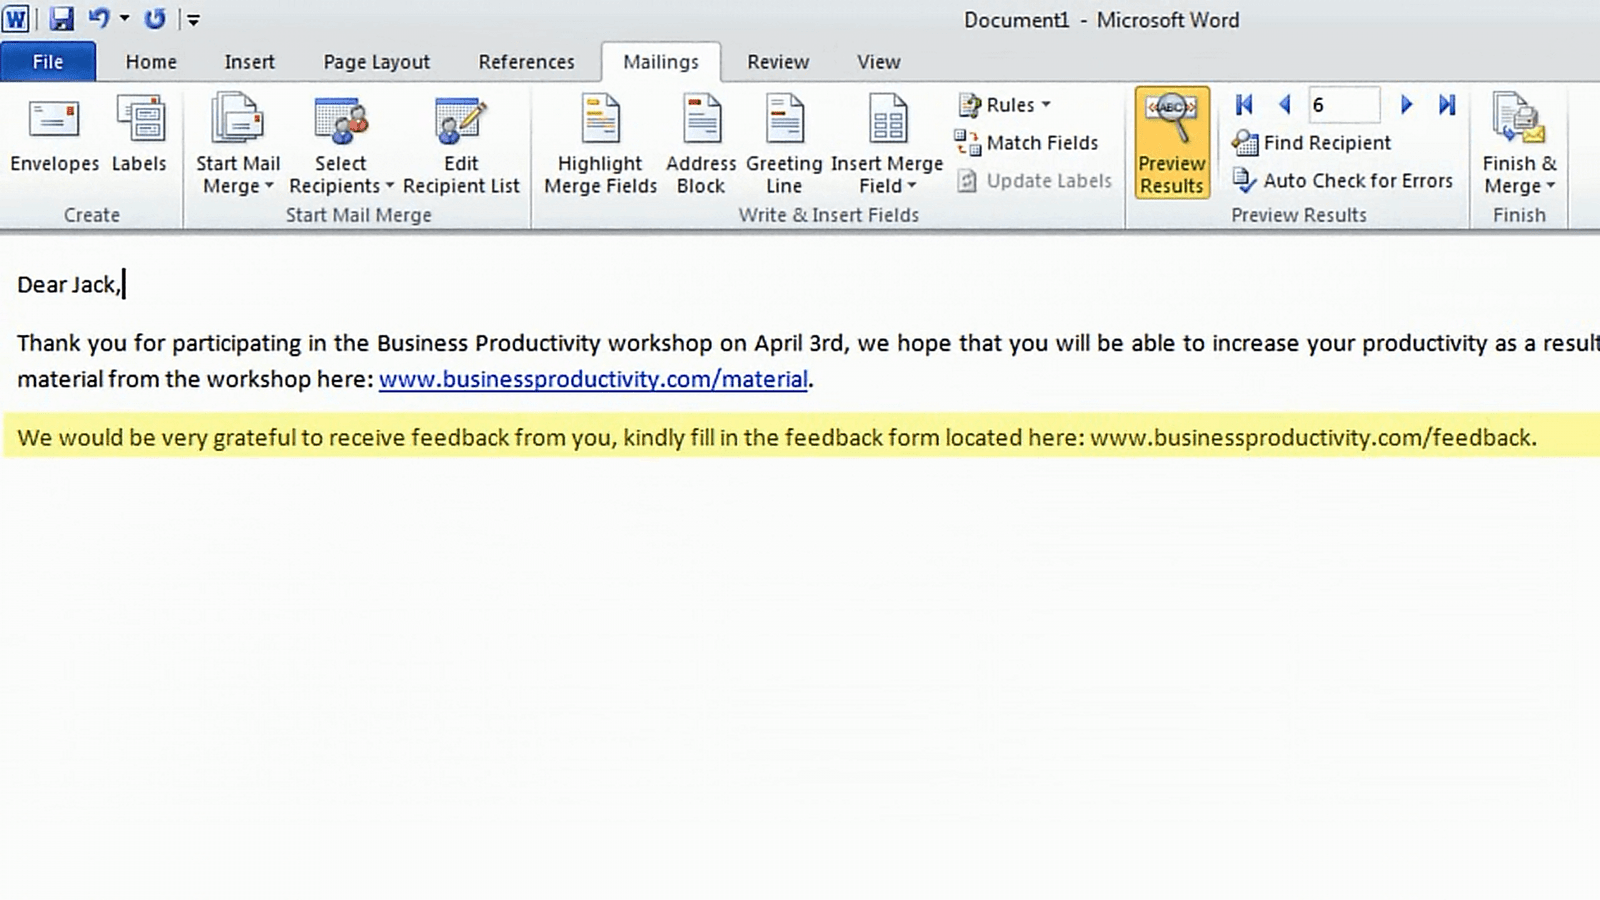
Here I can see that for recipient number five Word has input the thank you text. If I click “Preview Results” I can see that this is for Sven. Now I’ll open up my Excel spreadsheet just to make sure that this is correct. I’ll open it up in Read-Only mode and here I’ll see that Sven indeed has filled in the feedback form. However, the next recipient Jack has not. So let us just step to the next recipient to make sure that the text changes. I’ll click “Next recipient” and here I can see that the text changes and we’re asking him to fill out the feedback form.
Prompt for unique text in each email message (05:03)
The final step is to address any individual feedback that has been given to us. I’ll go to the end of my letter and then I’ll click “Rules” again. Here I’ll select the option “Fill in”.
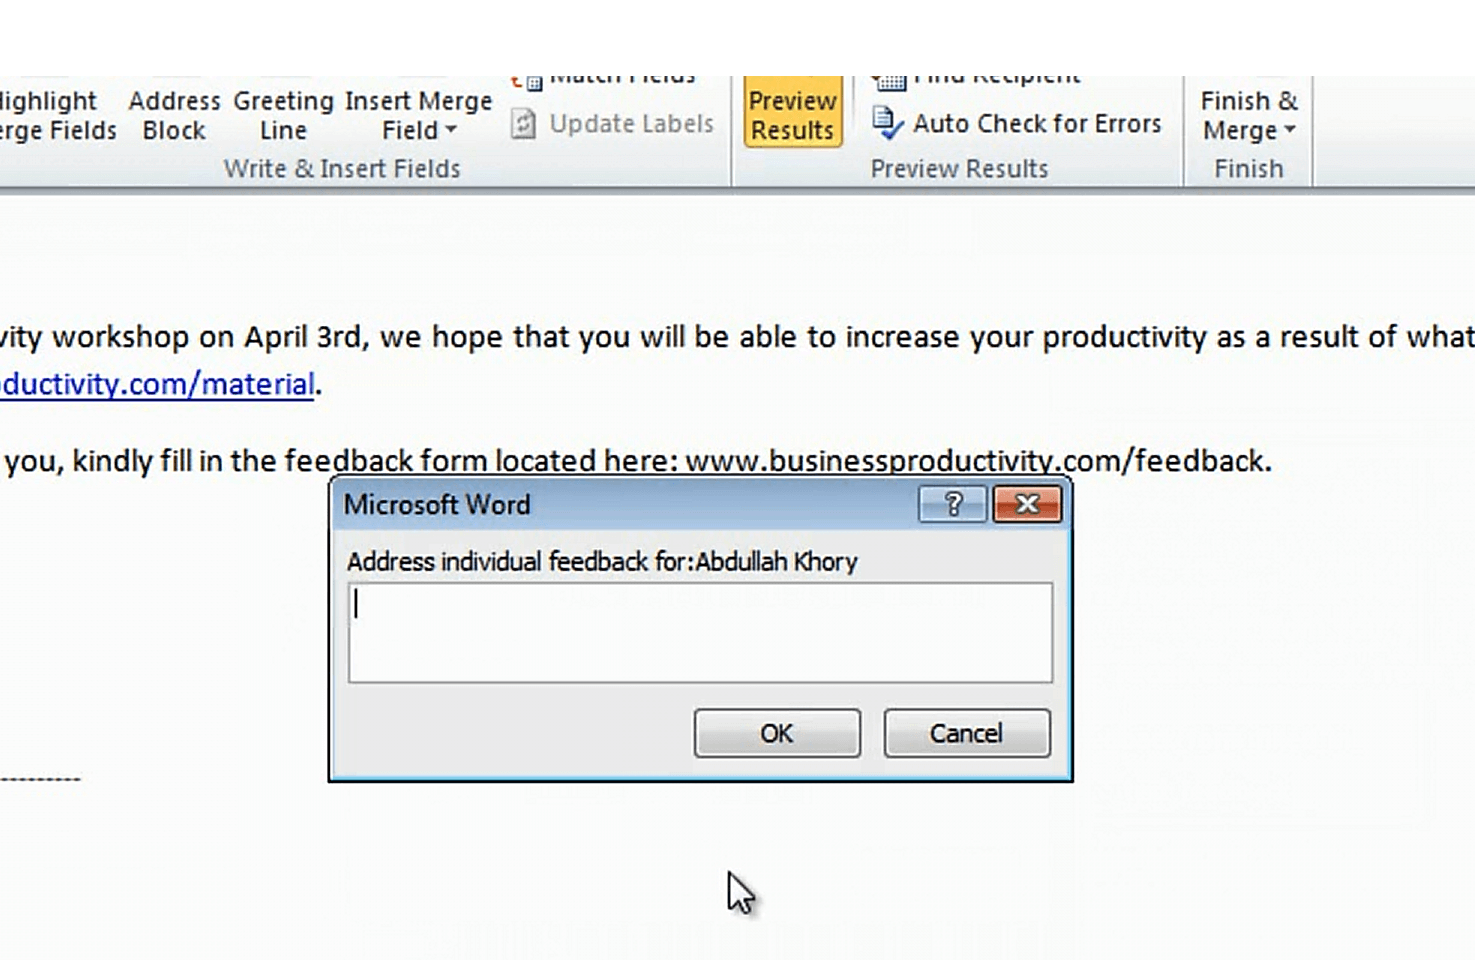
Here I can fill in customized text for each email. So in the prompt I’ll just put “Address individual feedback”. I don’t want to have any default fill in text since each feedback will be unique. I’ll leave the checkbox “Ask once” unfilled because I want to be asked for each individual email and then I’ll click “OK”.
The prompt opens up and I’m asked to address individual feedback. The problem is that I don’t know which recipient this is referring to. So what I want to do now is to add the name of the recipient to this prompt.
To see the underlying code that Word uses to fill in this information click [press] “Alt + F9” on your keyboard.
Here I want to add the recipient’s first name and last name to the text box where we’re prompted to address individual feedback so that we’ll know which person the email will be sent to. So I’ll click right after the text “Address individual feedback” I’ll add a space and I’ll write “for” , colon, and then I’ll click “Insert Merge Field” I’ll start with the “First Name”, hit space, click “Insert Merge Field” again and select the “Last Name” and then when I’m done I’ll click [press] Alt + F9 again to hide this code.
Now I’ll finalize this email by just copying my signature. I’ll mark and copy the text, here I’ll select to paste the text keeping the source formatting.
Set Outlook to “Offline Mode” (06:54)
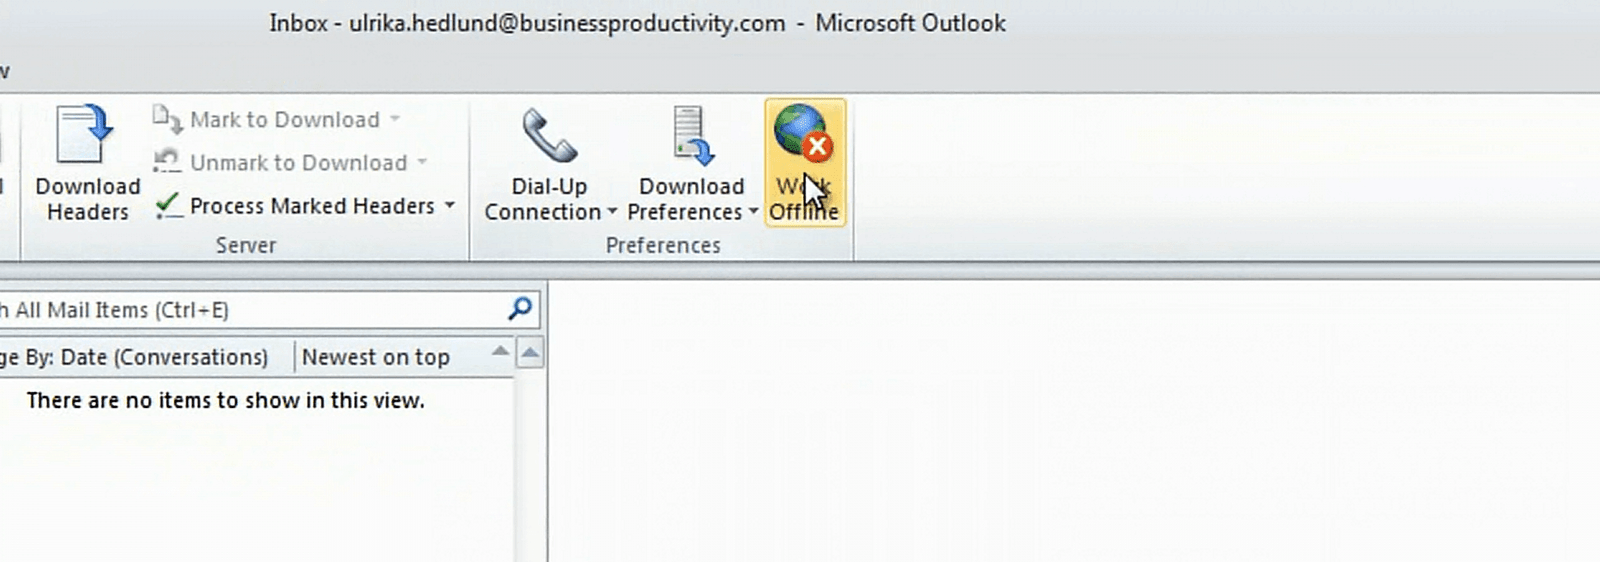
Now we are ready to finish with our mail merge. But before we do that I’m going to put Outlook to “Offline Mode” just to make sure that Outlook doesn’t send the email messages before I have time to review them. Click “Send/Receive” and then click “Work Offline”.
I’ll go back to my Word document click “Finish & Merge” and select “Send Email Messages”. Here I get to select a Subject line so I’ll write “Thank you for attending the workshop”. I’ll keep the mail format as HTML and I want to send all the records and I’ll click “OK”.
Here I’m prompted to address the feedback for the first recipient.
I’ll open up my Excel spreadsheet and I can see that he thought that it was too hot in the room. So here I’ll just write “Next time we’ll make sure to regulate the temperature in the room better!” And then click “OK”. Nicole just said that she learnt a lot, thank you. So here we’ll write “We’re glad you learnt a lot, thank you for your comment!” And then click “OK”. Ahmed didn’t leave any feedback so I’ll just remove this and click “OK”. Same thing for Chen and Sven asked us for the slides, so here I’ll just say “ You can find the slides on the link above”. And the rest didn’t leave any feedback so I’ll just remove the text and then just click “OK” for the remaining recipients.
Review your emails before they are sent (08:33)
Now we are done! I want to review these emails before they’re sent so I’ll go to Outlook and then I’ll go to by Outbox and here you can see all of the emails.
I’ll open up the first one that was sent just to make sure that I’m addressing the unique feedback and here I can see that I have the text “Next time we’ll make sure to regulate the temperature in the room better”. I’ll click “Send” and then when I’ve reviewed the email messages I’ll just click “Work Offline” to put Outlook online and send the personalized email messages.
Closing (09:09)
As you can see mail merge can be quite sophisticated and very powerful! Don’t be discouraged if you felt that this was a bit too advanced. You can just use the basic functionality of personalizing the email message with the recipient’s name. This step in itself will save you a lot of time. I’m Ulrika Hedlund for Business Productivity – Thanks for watching!


