How to use Crop to Shape in PowerPoint 2013?
Please note that this is a shortened, fast-speed video with the objective to give you a glimpse of ways in which you can improve your business productivity. The full video: “Get creative with shapes in PowerPoint 2013” shows you how to perform the steps in a slower, more user-friendly fashion.
How to use Crop to Shape in PowerPoint 2013?
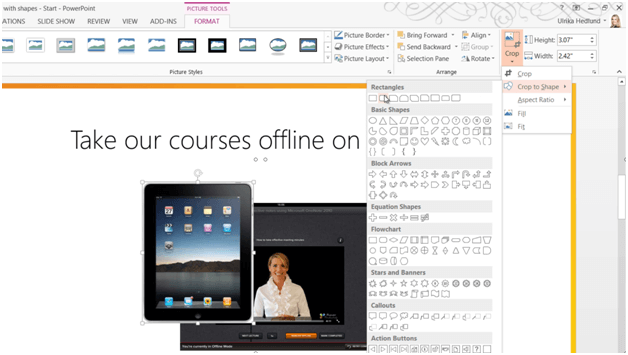
Crop to shape can effectively be used if you need to crop an object that does not have 90-degree angles. Here I have an image of an iPad. As you can see the iPad has rounded corners. So instead of using the normal crop tool, I am going to use “Crop to Shape” and use a rounded rectangle shape. To use ”Crop to Shape”, mark the object and on the format tab click “Crop” and then “Crop to Shape”.
Here I’ll select a rectangle with rounded corners. I’ll move the little yellow marker to change the sharpness of the rounded corners. There, now the iPad has been cropped into a proper shape.
Check out our How-to PowerPoint website for free PowerPoint 2013 video tutorials here. You can also have a look at out our other How-to sites for free Office 2013 tutorials here (more How-to sites coming soon!).


