Captivate your audience with motion
Learn how to use animations effectively in PowerPoint 2010
Introduction
Welcome to Business Productivity. I’m Ulrika Hedlund. Adding motion to your PowerPoint slides is a great way of captivating your audience’s attention, and you can easily do this by adding animations in PowerPoint. Unfortunately animations have a really bad reputation and most of us think about texts flying up and down and pictures bouncing off the slides. But animations don’t have to be tacky. If you use them effectively it can really help to focus your message.
In this video I’ll show you some quite basic animations and also some very advanced. So don’t be discouraged if it’s too complex. By just adding some simple animations to your PowerPoint presentations you can really help to captivate your audience. So let’s see how it works!
Here I have a company meeting presentation, in its current form there are no animations, everything is still, there is no movement. It might be difficult for me to focus my audience’s attention to a specific topic. So, let’s see how I can take this presentation and add some animation to it to capture my audience’s attention.
On this first slide, I have an illustration of our company values. Now, when I share these with the audience I want them to focus on one value at a time. So to do that, I’m going to add some animation so that they appear one at a time.
Adding animation to an object
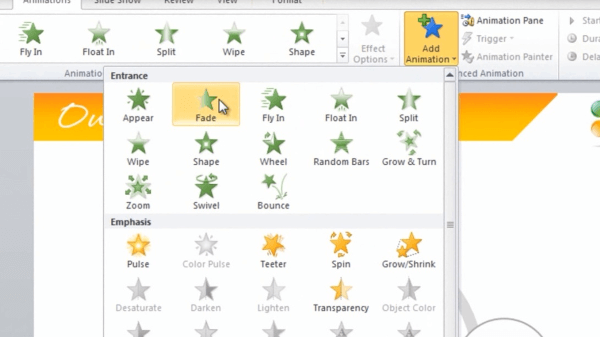
To add animation to an object you simply mark the object and go to the “Animations” tab and I can choose to “Add an Animation”. In this case I want the object to appear, so I’ll choose an animation under the “Entrance” group. I’ll choose the “Fade” animation.
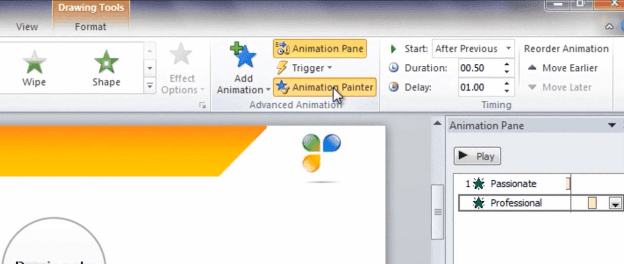
To get a better overview of the animations I usually open up the “Animations Pane”. This is a great way for you to get a visual presentation of the animations you added to your slide. I want the following objects to appear automatically, without me having to click the mouse clicker. So to do that, I’ll just mark the object again, choose the “Fade” entrance animation, but instead of starting “On Click” I’ll just say that I want it to “Start After Previous”, and I’ll choose to delay it with one second so that I will have time to read out the value.
Copy an animation using the “Animation Painter” (02:25)
I want the “Ambitious” and “Helpful” circle to have the same animation, but instead of having to do that all over again I can use something called the “Animation Painter”. So I’ll mark the object that I want to copy and click the “Animation Painter”.
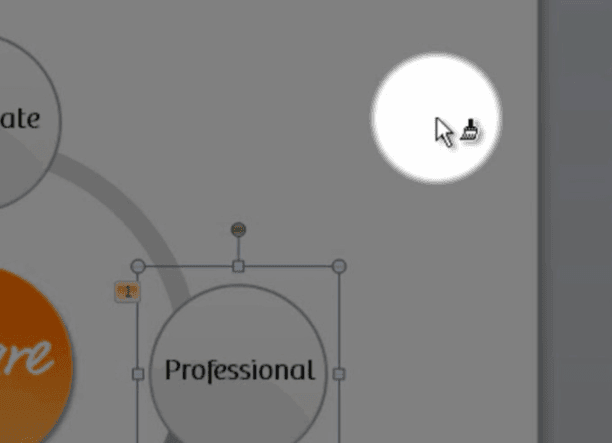
If I click it twice, quickly, you will see that I get a little brush next to my mouse pointer.
Now I can mark other objects that I want to have the same animation. To end the Animation Painter I just mark it again. Now I’d like to try this in presentation mode. You can preview the animation with the “Preview” button, but in order to get the right feeling I usually like to do the live slideshow so I’ll do that. [Reading out slide] We are Passionate, Professional, Ambitious and Helpful. Great! So let’s move on to the next slide.
Using Motion Path Animations (03:23)
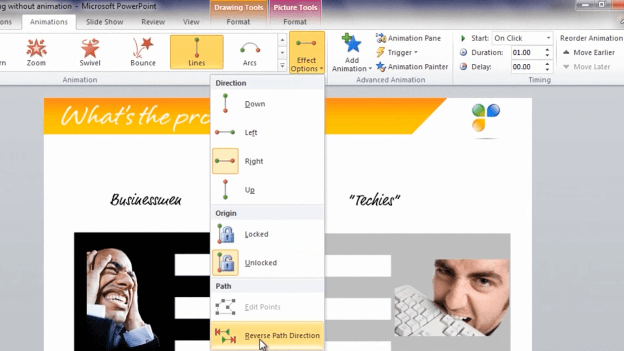
Here I want to show the collision in communication between businessmen and techies. And in order to do that I want to show these two pieces colliding. I’ll mark the object and go into the “Animations”. I’ll choose a “Motion Path”, but I don’t want to choose any of the ones in the gallery here so I’ll just click “More motion paths”.
I’ll choose a line that goes to the right and click “ok”. Here you will see an arrow showing me the motion of this object, the green arrow indicates the beginning of the motion and the red one the end. In this case I only want the object to move a little bit to the right so I need to change this motion path. Now I’m going to zoom in so that I get a better view of the arrow and then I’m going to hold down the “Shift” key. That way the arrow stays straight.
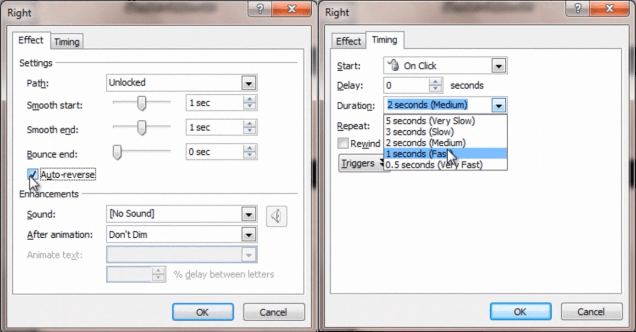
I’ll zoom back out and then I’ll double click the motion path to change the properties. I want this to go in “Auto-reverse” meaning that I want it to bounce back and forth and I also want the timing to be “Fast”.
There! Now I want to copy the animation again. So I’ll mark it, [click] “Animation Painter” [and then mark the object] but I want to change the motion path, so I’ll just click here to “Reverse the path direction”, and I also want this animation to start simultaneously [change “Start” to “With Previous”]. Ok, let’s look at this! Great!
I’ll add a similar animation to the next slide. But this time I don’t want them to bounce back. I’ll mark it, add a motion path to the right, change the length, change the speed, copy the animation, reverse the path direction, shorten it a little bit, start “With Previous”, and then Preview in slideshow mode.
Adding animation to graphs (05:26)
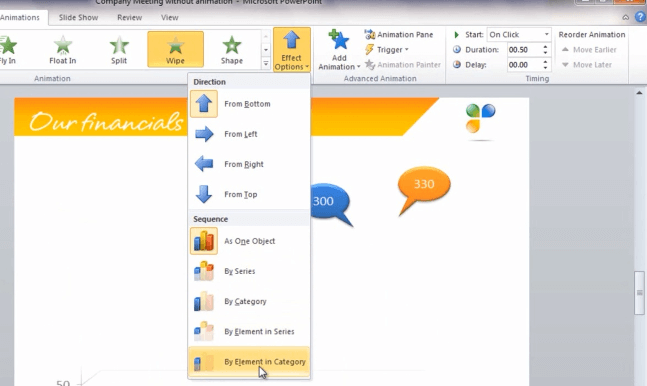
Now on this next slide where I’m showing the financial results, I want the audience to have a little bit of suspension before I show the actual numbers. So we’re going to add animation in order to do that. I’ll mark the graph, choose the “Wipe” animation, under “Effect Options” I can choose how I want the graph to be animated and in this case I want each element in the categories to be animated.
I’ll pull up the animations pane to look at the details. Now this first animation is for the background, now I don’t want this to be animated so I’ll just delete that one. Finally I’ll just add an animation to these numbers as well. [Mark the object, add “Zoom” animation, Start “After Previous” select Animation Painter and mark the other object]. There!
Now just to make sure we got this right with all of this animation I’ll just preview this again. So we have the grid with our animation. And then we start with the numbers, one by one, in each category. And then finally the total. Perfect!
Part 2
Using the selection pane to clearly see all objects (00:00)
On this next slide with the priorities for the coming year I have a lot of objects and a lot of text that I want to animate. So, in order to help me see the objects clearly I want to bring up the selection pane. To do that, you go to the “Editing group” under the “Home” tab and click “Select” and “Selection pane”.
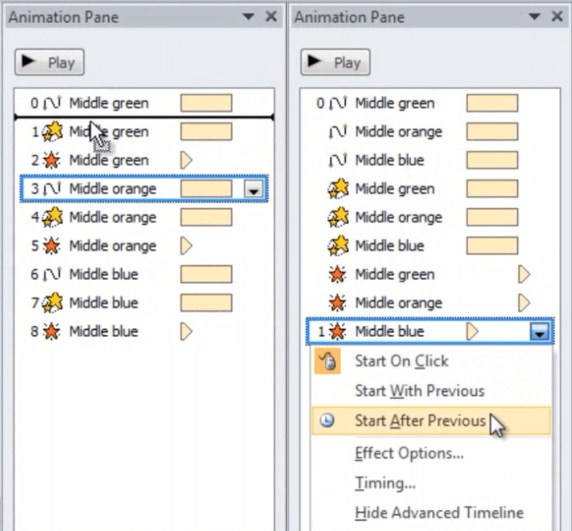
I’ll close down the “Thumbnail preview” in order to get some more space on the screen. I want to start by animating this first priority group. Instead of marking the object in the slide, I can go to my selection pane and I can click on the object here. I go to “Animations” and add the animation that I want. First I want the text, and then I want the circle. And I want the circle to zoom in. So I’ll go to the animation choose “Zoom” and I want this to start “After previous”, and I’ll just choose the default settings here.
Finally I want the text to appear and I’ll just use the “Fade” animation for this. And again, I want it to start “After previous”. And then I’ll just do the same for the other text boxes as well. Okay, so let’s preview this before we copy the animation to the other objects. “Quality content”. Great! Now I can take that and copy it to the rest.
So I’ll start by copying the animation that I have applied to the green circle. And I’ll just copy it to the different parts of the blue circle. Then I’ll copy the animation from the blue circle to the orange circle. By doing this, I make sure I get the animation in the right order. And now, let’s just play the animation. Well done! Okay, let’s close down the “Selection pane” and let’s open up our “Preview pane”.
Adding more creative motions (02:24)
Now for the final animation I want us to be a bit creative. I want to show that if we’re all aligned with our priorities we can reach our goals, just like a basketball team playing together. So if we think of these priorities as basket balls, I want to add an animation where we throw them into the net.
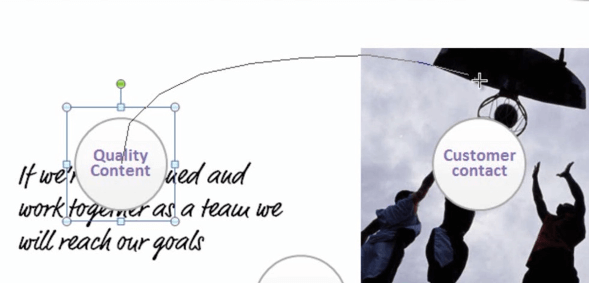
So first I’ll copy these [priority circles] and I’ll add them into the next slide. I want to add another animation so I’ll just remove this one. I’ll mark the first circle, choose to “Add an animation” and I’ll choose a “Custom path”. When you choose the custom path your mouse cursor will turn into a cross.
Put the cross where you want the animation to start and click the left mouse button. Then you click the left mouse button for each area on the path that you want to create. And finally, for the ending point; you double-click.
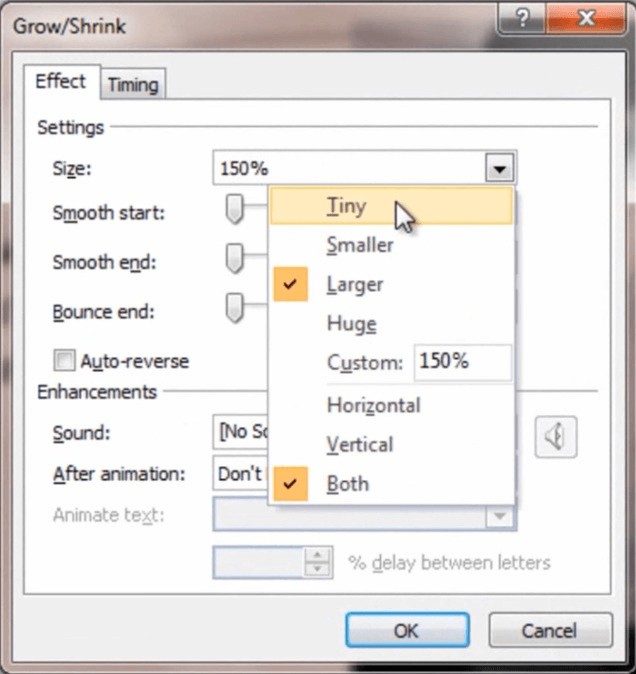
Now I also want the circel to become smaller and smaller and finally disappear into the net. So to do that we’ll add one more animation which is the “Grow/shrink”. But instead of growing, we’ll go to the “Effect options” and we’ll choose for it to become “Tiny”. And finally we’ll add an animation from the “Exit” group; which is “Disappear”.
Now just add a similar animation to the other circles as well. I’ll start with a “Custom motion path” and draw the line for the circle. Then I’ll add the “Grow/shrink” animation and change it to “Tiny”, and finally for it to disappear. And I’ll do the same for the last circle. Shrink to “Tiny” and “Disappear”.
Finally I just have to edit the timings and then we’re done. So I want all of the balls to start their motion without me having to click the mouse clicker, so I’ll just choose “With previous” and I’ll move all the “Custom motion paths” into a group and say “Start with previous”. Then I want them to start shrinking also with previous. So I’ll move them all up, and for all of them say “Start with previous”. And then finally I want them to disappear after the movement [click “after previous”]. Okay, let’s preview this and see if we got it right. Great, now we’re almost done!
A personal ending (05:32)
Now, let’s just finish off with the final slide which is a “thank you”. And I want this to be personal, so I’ll add an animation which is “Wipe”, for it to be hand written. And I’ll choose the effect to be “From left to right”. Now, I’ll change so that it starts “With previous” and I’ll increase the duration a little bit so it really feels like it’s hand written.
Okay, let’s preview this. Great, we’re done with the animation!
Adding transitions (06:07)
Now finally we’ll just add some transitions to the slides. To add transitions, you go to the “Transitions” tab. What I want to do is I want to add the “Fade” transition. And I want to apply this to all slides, just to give a nice and smooth transition between the slides.
I want to add a more dramatic effect to the slide with the puzzle. So here we’ll change the effect and add a more exciting transition. And I’ll choose the “Uncover” transition. Okay, we are done! Now let’s go through this final presentation.
A final walk-through of the presentation with animations (06:52)
On the first slide we look at our identity and we focus on our values. One at a time. On the next slide we focus on the collision in communication between businessmen and “techies” and how we bridge the gap. Looking at our financials we go through the categories one by one, and finally showing the total value. We look at the priorities for the year, first “quality content”, “customer contact” and “reach”. And finally I show that if we’re aligned on our priorities and work together we will reach our goals. Thank you!
Now I’ve shown you a number of different ways of how you can add animations to your PowerPoint slides. Even so, I’ve just scratched the surface of what can be done. So don’t hesitate to be creative using animations. And good luck in captivating your audience’s attention. This is Ulrika Hedlund for Business Productivity – Thanks for watching!


