Avoid clogging up your recipient’s inbox
Learn how to use attachments effectively in Outlook 2010
Introduction (00:04)
Welcome to Business Productivity, I’m Ulrika Hedlund. Even though Internet connections today are a lot faster and email applications can handle larger and larger email attachments you should still think twice before attaching large files to your email messages. Your recipient might be traveling without a good internet connection, reading the email on a mobile device, or he or she might have reached the maximum mail box size limit. Instead of clogging up your recipient’s inbox, you should learn how to use technology smarter and how to communicate more effectively.
In this video I’m going to show you how you can compress the size of your email attachments; I’ll also show you how you can upload your files to a web site and instead share the link in your email message. Let’s have a look!
Compress pictures that you want to attach (00:54)
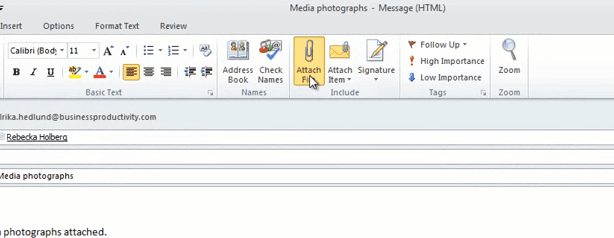
Here I have an email where I want to attach some photographs. To do that, I’ll click the “Attach File”
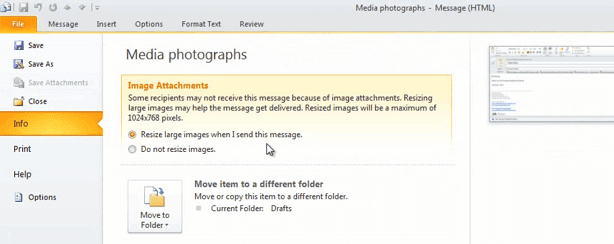
And go to my “Pictures” library, and select the pictures I want to attach. As you can see, each photograph is quite large, so the size of this email will be more than 11 Mb, which is too much to send in a normal email. Outlook can automatically compress pictures that you attach as files. To do that, go to the “File” tab, and then under the “Info” section you can choose to resize image attachments [“Resize large images when I send this message”].
It’s important to note that the photographs you send will actually loose in quality when you choose this option. So you shouldn’t use this if you need to send high-resolution pictures to someone. Another way to compress photographs that you want to send in an email attachment is by going directly to the picture folder. I can mark the photographs I want to send and then right-click and choose “Send to”.
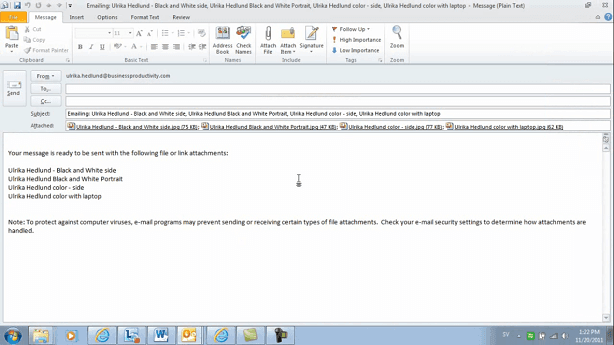
If I choose “Mail recipient” I will get an option to resize the images. When I select the size, I can see how large the email will be. In this case I’ll choose “Large” and then click “Attach”. And here’s the email that Outlook generated for me:
Compress pictures in a document (02:09)
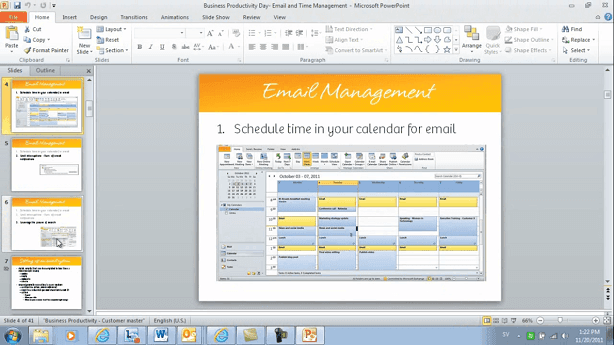
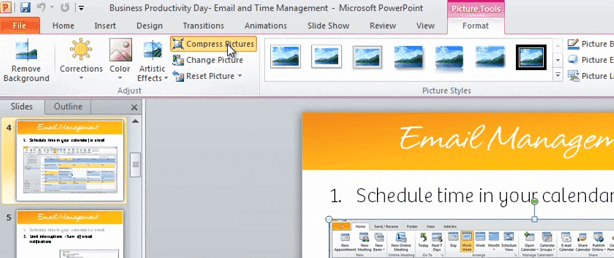
Sometimes you need to compress pictures that are part of a document. In a PowerPoint presentation I want to send to a customer I have a lot of screenshots. This presentation is over 15 Mb, which again, is too large to send in an attachment in an email. As you can see I have a number of screenshots in this presentation:
Since the customer doesn’t need to have this in a high resolution I can compress the images in this presentation. To do that, I’ll mark an image and then I’ll go to the “Picture Tools”. I’ll choose “Compress Pictures”
And I’ll choose the “E-mail” document size. I’ll uncheck the box which says “Apply only to this picture”.
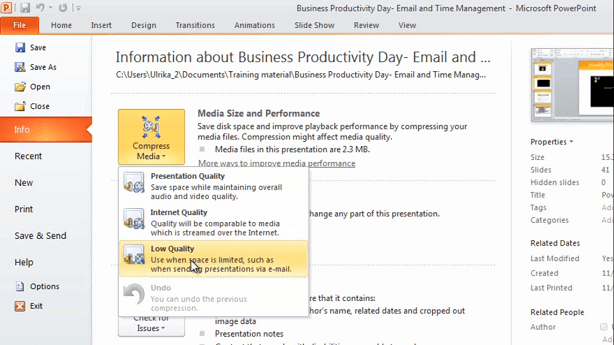
This way, PowerPoint will compress all of the pictures in this PowerPoint presentation. And then I’ll click “OK”. At the end of this PowerPoint presentation I also have a video. Videos are included in the PowerPoint file, so that they can be played in the presentation. However, they are usually quite large, so you can choose to compress these as well. To do that, go to the “File” tab and choose “Compress Media”. Here you can choose which quality you want to have.
In this case I’ll just choose “Low Quality” since I want to send this presentation in an email. Okay! Now I can save this presentation, and then I can send it as an attachment. As you can see, this has now been reduced from 15 Mb to 5 Mb, which is okay for an email.
Compress files (03:41)
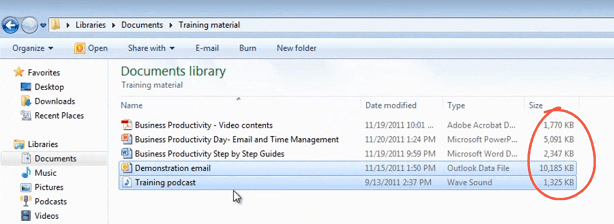
Another way to compress files for email attachments is by using the built-in Windows compressing tools. Here I have a number of documents I want to share with a customer and as you can see some of these are quite large, just the two of these are over 11 Mb:
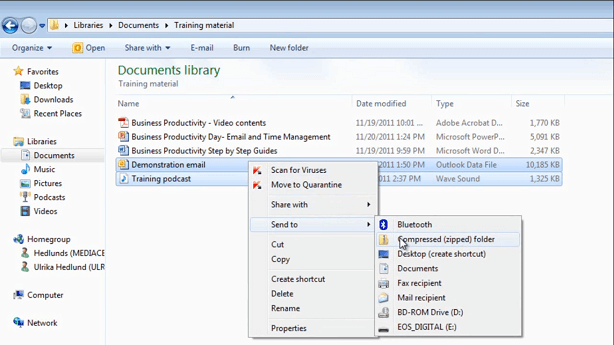
To use the built-in compressing tool I can right-click and then choose “Send to”, “Compress (zipped) folder”.
These will then be compressed and as you can see, they will now be reduced from 11 to 8. If I want to add more documents to this compressed file I can just drag and drop them into the compressed file. Now unfortunately, documents that we commonly want to attach, such as pdf documents or word documents, are already using a compressed file format. So it doesn’t make a lot of sense to compress these files. Instead, I recommend that you upload your files to a website and email the link.
Upload files to a web site (using Microsoft SharePoint) (04:34)
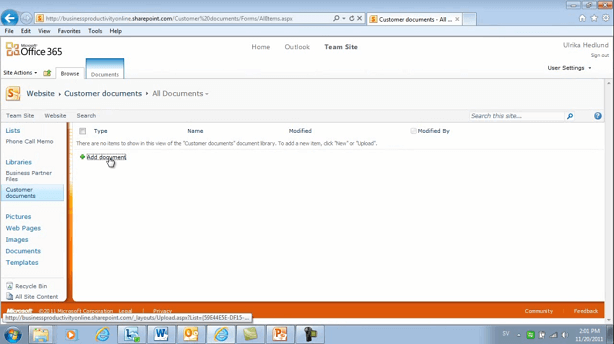
I deleted the compressed file we just created and for simplicity I’m compressing these two files individually, then I’ll go our Customer Document Library and add documents.
I’ll choose to add multiple documents and then “Browse for Files”. Here I’ll select the files I want to upload and then click “Open” and then “OK”. Now these files will be uploaded to our SharePoint library and it can be shared with our customer from here.
This might take a while depending on your bandwidth. Here I’m actually fast forwarding so that you don’t have to wait for the files to upload. Organizations provide different options for document collaboration. Microsoft SharePoint which is part of Office 365 that I’m using, is a common collaboration platform used by many organizations. There, now all the files are uploaded! Now I can just copy this link [in the web browser], open up a new email, and paste in the link. I can also select an individual file, click the little arrow next to the file, “Send To” and “E-mail a Link”.
Outlook will then create an email for me with the link. Now unfortunately I can only do this for individual files, I can’t do it for multiple documents.
Upload files to a web site (using SkyDrive) (05:51)
Another option, if your organization does not have a collaboration platform, is to use Windows Live Skydrive. Skydrive is an online document storage and sharing service with 25 Gb of storage at no cost. To access SkyDrive you need log in with a Windows Live ID.
Go to “SkyDrive” in the top menu and then click “Documents”, click on little folder icon to create a new document library and give it a name.
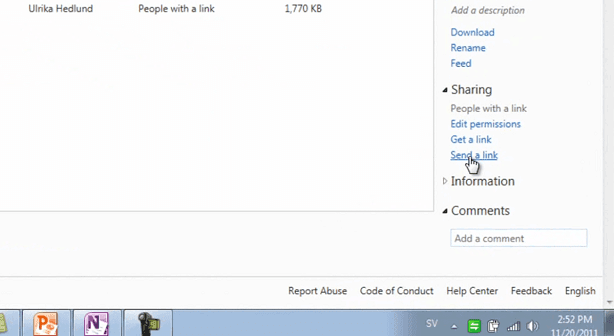
I’ll just name this “Customer documents”. And then click “Next”. Click on the “Browse” button to upload a file. Select the files you want, and then click “Upload” when you’ve selected the files want to upload. I’ll just upload one document for now. To share this folder with your customer Click “Send a link” and type in the email address of the customer you want to share it with and then click “Send”.
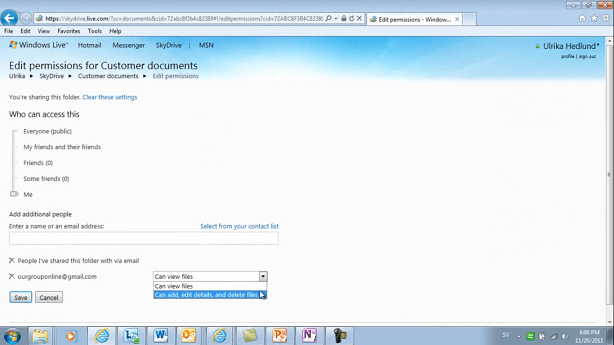
You can always change the permissions for a library, go to “Edit permissions”,
and here you can see who the library is shared with. You can also change the permissions, for the ones you’ve shared the document library with.
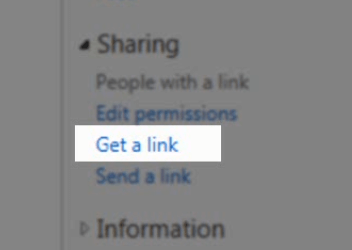
If you don’t want the email to be sent from your Windows Live account you can always copy the link by clicking “Get a link” and then paste it into an email from your normal business email account.
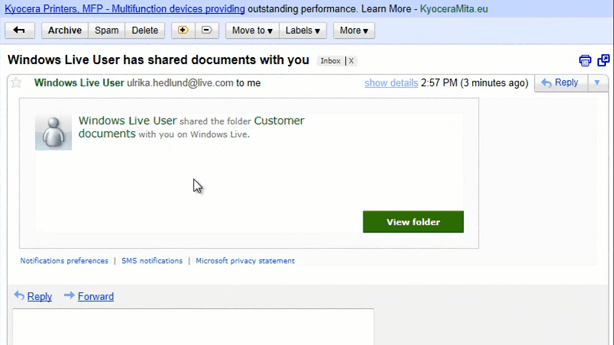
Now, let’s see what this looks like from the customer’s perspective. We’ll step into the shoes of the receiver. Here is the email that we sent from Windows Live, and as you can see it contains a link to the shared document library.
When we click the link we can access the documents in the SkyDrive folder. Much more convenient than a huge email attachment that clogs the inbox.
Closing (07:47)
Now that you know how to share files more wisely I hope you’ll stop sending emails with huge attachments. If you start with setting a good example I’m sure that others will soon follow. I’m Ulrika Hedlund for Business Productivity – thanks for watching!


