Organize and schedule your activities
Learn how to use the calendar in Outlook 2010
Introduction (00:05)
Welcome to Business Productivity, I’m Ulrika Hedlund. When I was a teenager my family used to make fun of me because I wrote down everything I needed to do in my FiloFax. Today I don’t have a Filofax anymore, but I still write everything down in my Outlook calendar- if it is not there it doesn’t exist! I synchronize my calendar with my mobile phone so that I can keep track of my daily activities and quickly add new appointments.
In this video I’ll show you how you can use Outlook 2010 to plan your daily activities. And also I’ll show how you can quickly navigate your calendar and configure it to see exactly what you want to see including holidays, working days and different time zones. Let’s get started!
Different ways of viewing my calendar (00:51)
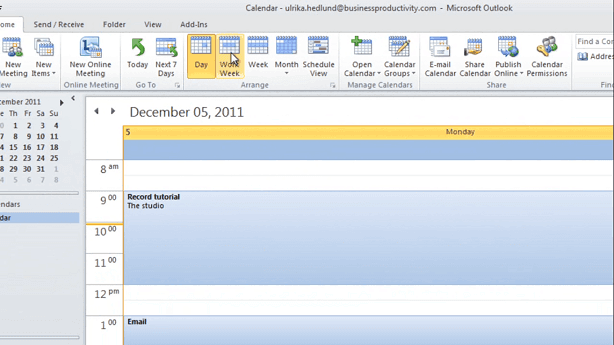
You access the calendar in Outlook 2010 by clicking the calendar in the navigation pane. The default view is to show one day at a time, but I prefer to change this to either work week or the full week, showing the full 7 days.
Outlook remembers your preferred choice, so next time I open up my calendar it will show me the work week. I can quickly navigate to another week by just clicking a date in the calendar in the navigation pane. I can always go back to today’s date by clicking “Today”.
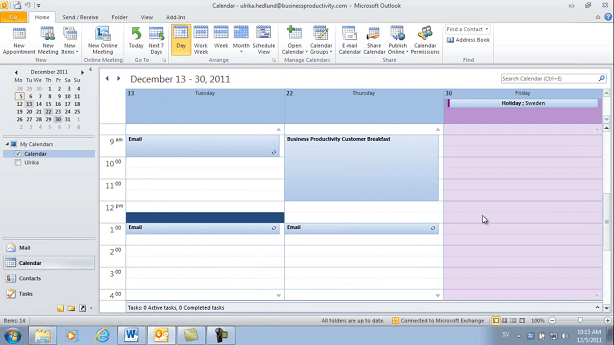
Sometimes you need to get a good overview of random dates. Say for instance that a customer is asking me about my availability the 13th, 22nd and 30th of December. To do that I’ll click the “Day” view, and then I’ll click on the 13th. Then I’ll hold down the CTRL-key while I click the 22nd and the 30th. This way I get these dates side by side and I can get a good overview of my availability.
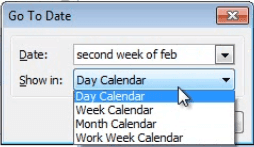
I can also use a keyword shortcut to navigate to a point in time. To do that, press CTRL+G and then either enter a date or just write in normal language. So I’ll just write: “second week of feb”. And I want to show this as a week.
And there we go, second week of February 2012. Using this command is very useful, especially if you are looking at dates that are far from today’s date.
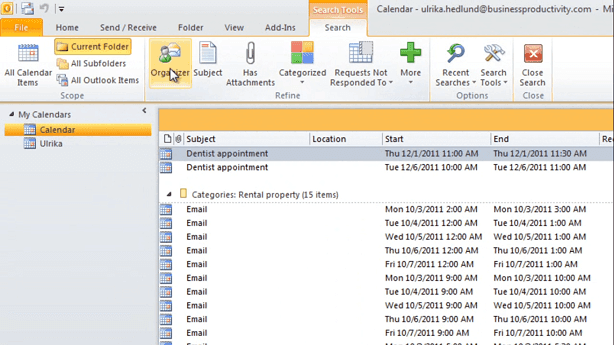
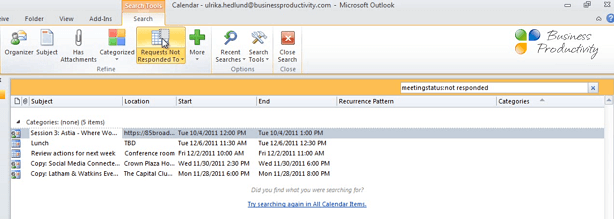
If I want to find a specific appointment I can easily search for it. To do that just click the search field and type in what you want to search for. So I’ll just search for dentist appointments. And here I get all of the dentist appointments that I have in my calendar. I can delete this search term and then I can use the search tools for more advanced searches. So for instance, I can click on the “Organizer” and just type in a sender name to find all of the meeting requests sent by that person.
I can also search for meeting requests that I haven’t responded to. This is very convenient if you’ve been out traveling and you want to get quickly up to speed on meeting requests in your calendar.
To return to your normal calendar view, just click “Close Search”.
Configure Outlook to suit you (03:01)
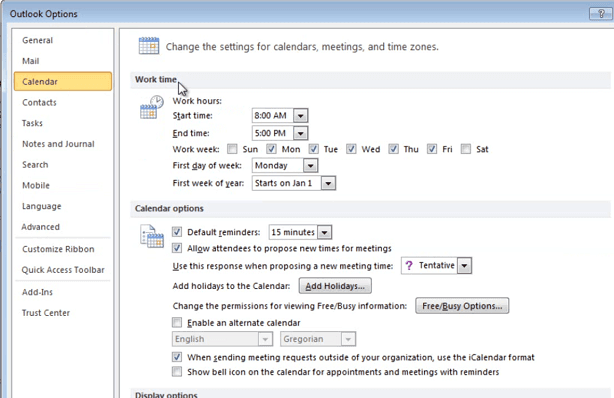
Before you start using your calendar I recommend that you configure Outlook to show exactly what you want. To do that go to the “File” tab, click “Options” and then go to “Calendar”. Here you can start with setting your work time.
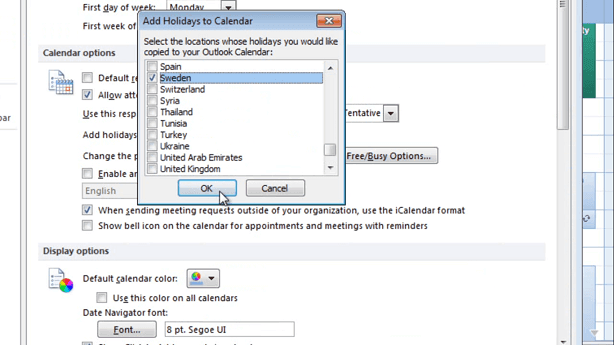
This is the time that the scheduling assistant uses to suggest appropriate times for business meetings. Since I usually have business meetings past 5:00 PM I’ll just change this to 6:00 PM. By default, Outlook adds reminders to all appointments. Personally I like to uncheck this and only add it manually when I send meeting invites. I can also choose to add holidays from different countries, so here I can choose the Unites States. I’m also going to use Sweden, because I like to keep track of the holidays back home.
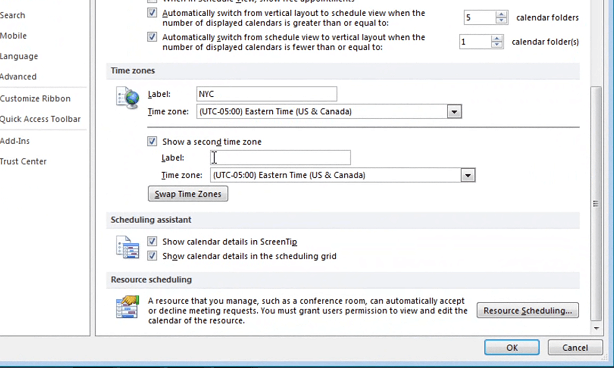
I’ll just click “OK”. And the final thing I want to change here is that I want to add different time zones. This is really useful if you’re working with people from different parts of the world. So first I’ll just put a label on my current one and then I’ll choose to “Show a second time zone”.
I’ll label this “DUB”, for Dubai, and I’ll select the time zone for Dubai. And then I’ll click “OK”. And as you can see I now have the two time zones, side by side, in my calendar. This really helps when I need to schedule meetings across times zones.
Scheduling an appointment (04:20)
To create a new appointment in your calendar, just mark the time in the calendar, right-click, and select “New Appointment”. Alternatively you can double-click in the calendar to open up the new appointment, or you can just write directly in the calendar.
Different ways to label your time (04:36)
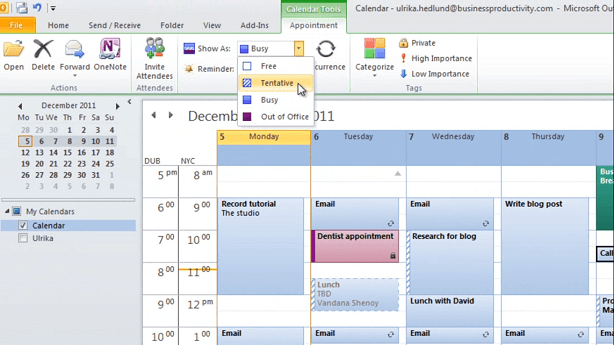
You can label the time of your appointment with either “Free”, “Tentative”, Busy” or “Out of Office”.
This information is used by others that have access to your calendar to see when you are available for a business meeting. But even if you’re not sharing your calendar with others, this is useful information for your own overview.
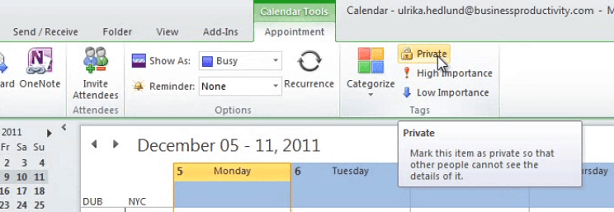
“Busy” is the default option and I use this for any appointment where I don’t want to be interrupted. The “Tentative” I use for meetings that haven’t been confirmed yet. I also use it when I schedule to do admin work, because I want to show others that if they have an urgent meeting that they need me to be part of, I will be available. The “Free” time I use for things that don’t require my time, so here for instance there’s a fire alarm practice, I just want to have it in my calendar but it doesn’t mean that I’m busy. Finally the “Out of Office” I use when I’m out of the office, so for holidays or for other appointments when I’m out of the office. I can also mark an appointment as private.
If it’s marked as private you will see this little lock down in the corner. This means that no one else that has access to my calendar will see the details.
Using categories to label time spent (05:42)
You can also use categories to organize your appointments. So for instance this one here is green, for a customer meeting. And I have the dentist appointment here, which is marked as personal. This is really useful when you want to do some analysis on how you’re spending your time.
Unfortunately you don’t have very advanced reporting tools built-in to Outlook, but you can export your appointments into Excel and do more analysis there. There also are third-party plug-ins that you can use.
Create a meeting invitation (06:11)
If you want to invite someone to a meeting, just right-click and choose “New Meeting Request”. Now you’ll get an option to invite attendees to this meeting. Be sure to specify the subject, location and always send a proper agenda in a meeting invitation. I’ll cover this more in another video.
Recurring appointments (06:28)
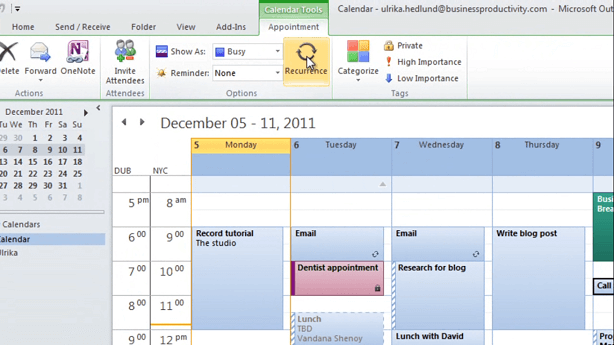
The final thing I want to show you is recurring appointments. Say that I need to call Sarah every Friday to get an update on the week. I’ll mark the appointment, and then I’ll click the “Recurrence” tab.
I can choose the recurrence pattern, and in this case I want to it weekly, each Friday. I can choose the range of the recurrence, so for instance to end it after 10 occurrences or end by a specific date. In this case I’ll just leave the default “No end date”.
And now, as you can see, I have the recurrence symbol on this appointment. Now if I go to next week you can see that I have the appointment to call Sarah. This is a very effective way of scheduling appointments.
Closing (07:08)
If you’re already a user of the Outlook calendar I hope I was still able to give you some useful advice. And if you’re not, I strongly encourage you to start. It will really help you to manage your time and become more organized. And when you get used to it you won’t be able to live without it. I’m Ulrika Hedlund for Business Productivity. Thanks for watching!


